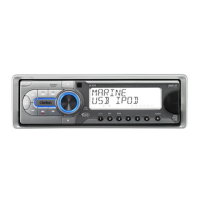
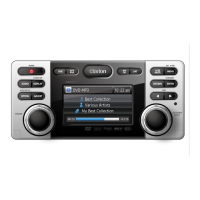
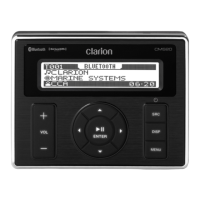
System Setup
SCRN SVR: ON/OFF
Rotate the
[VOLUME]
knob to choose SCAN
SVR (screen saver)
ON
or
OFF.
SCROLL: ON/OFF
For track information that is longer than the
display panel:
When
SCOLL is
ON,
the LCD will scroll the
ID3
TAG information across the display, e.g.:
TRACK->FOLDER->FILE->ALBUM->
TITLE-
>ARTIST->
TRACK->
...
When
SCROLL
is
OFF,
the LCD will display
one of the
ID3
TAG information, the default
is
TRACK, but user can adjust
it
to other
ID3
TAG information by press
[DISP]
button.
S-CTRL
(iPod mode) :
ON/OFF
Rotate the
[VOLUME]
knob to choose
S-CTRL
(Simple control)
ON
or
OFF.
*
Refer to Page 14.
Pandora:
ON/OFF
Select
OFF
if
the Pandora application has not
been installed on your iPod touch or iPhone.
DIMMER: ON/OFF
Rotate
the
[VOLUME]
knob
to
choose
DIMMER ON
or
OFF.
• ON:
LCD
dimmer
is active when small
light of vehicle
is
turned
ON.
• OFF:
LCD
always
maximum
brightness
regardless of the vehicle small light.
Audio Setup
Press the [
P
]
button to enter sound effect
setting mode. First press shows current EQ.
Rotate the
[VOLUME]
knob to changes BEAT
EQ
in
this order:
OFF->
B-BOOST
->
IMPACT->
EXCITE->
CUSTOM
Rotate
the
[VOLUME]
knob
to
changes
CUSTOM,
and press the
[VOLUME]
knob,
the press [
~
]
or
[
...,.. ] button to select
it including:
BAS-G
-> BAS-F ->
BAS-Q
->
MID-G
->
MID-F
->
MID-Q
-> TRE-G
->
TRE-F,
rotate the
[VOLUME]
knob to select a value.
BAS-G
I
MID-G
I
TRE-G: (-7)- (+7)
BAS-F:
50
I
100
I
200
BAS-Q: 0.7
I
1.0
I
1.4
I
2.0
MID-F: 500
11
K
I
2K
MID-Q: 0.7
I
1.0
I
1.4
I
2.0
10
M303
REAR/S-W
Rotate
the
[VOLUME]
knob
to
choose
REAR or
S-WOOFER (SUB-WOOFER).
SW PHASE
Rotate
the
[VOLUME]
knob
to
choose
SUBWOOFER
phase
REVERSE
or
NORMAL.
BEEP:
ON/OFF
Rotate
the
[VOLUME]
knob
to
choose
button beep sound
ON
or
OFF.
12/24H
Rotate the
[VOLUME]
knob to choose time
format: 12 or 24 hours.
RESET
Long press [
ENTER ]
button. Settings will
be
set to the default value.
TUNE AREA
Rotate the
[VOLUME]
knob to choose
U,
K
or
E.
•
U:
U.S. standard (initial setting)
•
K:
Other
countries
•
E:
Europe standard
TRE-F:
5k
I 10k
I
15k
TRE-Q: 0.7
I
1.0
I
1.4
I
2.0
Press the [
.P
]
button, then press [
~
] or
[
...,..
]
button
to
select
USER
preset
including:
BALANCE -> FADER -> M-B EX -> HPF
(high pass filter) -> LPF (low pass filter) ->
SUBW VOL
(Subwoofer
Volume),
rotate the
[VOLUME]
knob to select a value.
BALANCE: LEFT 1-7
->CENTER
->
RIGHT
1-7
FADER:
FRONT
1-7
->CENTER->
REAR
1-7
M-BEX:
ON
I
OFF
HPF:
THROUGH
I
60
I 90
I
120
LPF:
THROUGH
I
60
I 90
I
120
SUBW VOL:
(-6)-
(+6)
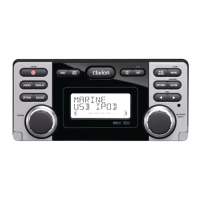
Radio Operations
Select
tuner as playing source
Press
[SAC
I<!>]
button once or more to enter
RADIO
mode.
Changing the reception area
This unit
is
initially set to
USA
frequency
intervals of 1 0
kHz for
AM
and
200
kHz for
FM.
When using
it
outside the
USA,
the
frequency reception range can
be
switched to
the intervals below.
u.
s.
Other
Europe
standard
countries
standard
Frequency
10kHz
9kHz
9kHz
spacing
AM
Frequency
530
to
1,710
531
to
531
to
1,602
range kHz 1,629kHz
kHz
Frequency
200kHz
50kHz 50kHz
FM
spacing
Frequency 87.9 to
87.5
to
108
87.5 to
108
range
107.9MHz
MHz
MHZ
Setting
the reception area
*
All station preset memories are lost when
the reception area
is
changed.
1.
Press and hold the
[DISP]
button.
2.
Press the
[...,..]
or [..,...
] button to select
"TUN AREA"
3.
Rotate the
[VOLUME]
knob to select:
•
U:
U.S.
standard (initial setting)
•
K:
Other countries
•
E:
Europe standard
4.
Press and hold the
[VOLUME]
knob to
store the selecting.
•
The unit will turn off after setting.
Selecting the radio band
Press the
[BAND
/tc
]
button
on
the panel or
on
the remote control to select one radio band
among FM1, FM2, FM3,
AM.
Manual tuning
During manual tuning, the frequency will
be
changed
in
steps.
Press the
[...,..
] or
[..,...
] button on the panel
to tune
in
a lower
I higher station.
Press the
[...,..]
or
[..,...]
button
on
the remote
control to select preset stations.
Auto tuning
Press and hold the [
...,..
] or [ ..,...
] button to
seek a lower
I
higher station.
To stop searching, repeat the operation above
or press other buttons having
radio
functions.
Note:
When a station
is
received, searching stops
and the station
is
played.
Preset scan
Preset scan receives
the
stations stored
in preset memory
in
order. This function is
useful when searching for a desired station
in memory.
1.
Press the
[PS/AS]
button.
2.
When a desired station
is
tuned
in,
press
the
[PS/AS]
button
again
to
continue
receiving that station.
Note:
Be careful not to press and hold the
[PS/AS]
button for 1 second or longer, otherwise the
auto store function will begin and the unit
starts storing stations.
Auto store
Only
stations with sufficient signal strength
will
be
detected and stored
in
the memory.
Press and hold the
[PS/AS]
button
(1
sec.) to
start automatic station search.
To stop auto store, press other buttons having
radio functions.
Notes:
1.
After auto store, the previous stored stations
will
be
overwritten.
2.
The unit has 4 bands, such as
FM1,
FM2,
FM3 and
AM.
FM3 and
AM
can store by
AS
function. Each band can store 6 stations,
M303 can store 24 stations
in
total.
Manual store
When one expected radio station has been
detected, press and hold number button 1-6
to store it in the memory.
Recall the stored stations
Press one numeric button among 1 to 6 on
the panel to select the corresponding stored
station.
Local seeking
When
LOCAL
seeking
is
ON,
only those radio
stations
with
strong
radio
signal
could
be
received.
To select
LOCAL function, press and hold the
[
DISP
]
button on the front panel, then press
[..,...]
button repeatedly until
LO
or
OX
displays
on
the screen,
and
rotate the
[VOLUME]
knob
to
select Local or Distant mode.
Note:
The number of radio stations that can be
received will decrease after the local seeking
mode
is
ON.
 Loading...