59
2. The ascending order of the available preset tones
is:
Flat Rock Classic Pop Jazz Hip
Hop Custom 1 Custom 2 Flat...
Note:
• Custom 1 and Custom 2 allow manual adjustment of the
audio via a graphic equalizer.
• Loudness Function
The loudness function amplifies the audio on the
unit.
1. Press the [Loudness] button to toggle the loud-
ness function on or off. The button display will
change accordingly.
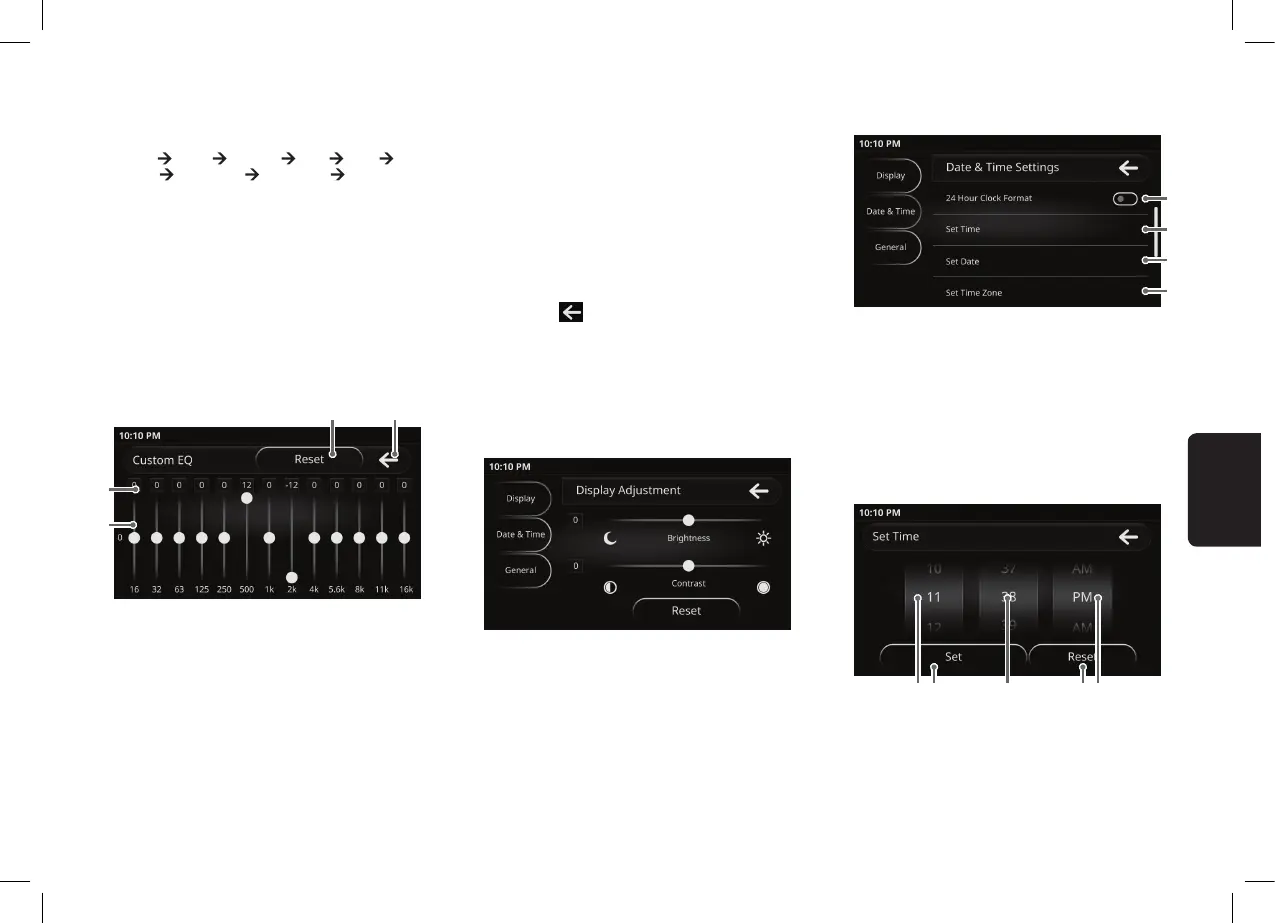
Custom Equalizer
2
1
3 4
1) Gain Pointer Display
2) Gain display in dB
3) Reset Button
4) Back Button
1. Press the [Custom EQ] button at the Equalizer
menu. The display will change accordingly.
Notes:
• Graphic equalizer is only available if the Custom 1 / Cus-
tom 2 preset tone is selected.
• This operation is not available while driving.
• A series of 13 frequency bands are available for custom-
ization. The default gain for each band is 0. Each band has
an adjustable range of -12 to 12.
2. Press and move the pointer at desired frequency
upwards or downwards to adjust the audio gain.
3. Selected gain display for desired frequency will
be changed accordingly.
4. Press the [Reset] button to reset each of the val-
ues to their defaults.
5. Press the button to return to previous screen.
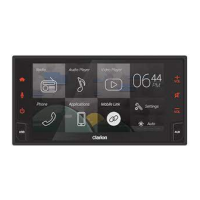
System Settings
Press the [System] button to make adjustment for
System settings.
Display Adjustment
1. Press the [Display] button in the tab menu to
select the Display tab. The display will change ac-
cordingly.
2. Press and move the pointer for Brightness to-
wards right/left to change the brightness.
3. Press and move the pointer for Contrast towards
right/left to change the contrast .
4. Press the [Reset] button to reset the Brightness
and Contrast to default settings.
Clock Adjustment
1) 24-Hour Format on/off button.
2) Set Time Button.
3) Set Date
4) Set Time Zone
1. Press the [Date & Time] button in the tab menu.
The display will change accordingly.
2. Press “24 Hour Clock Format” to toggle between
clock format 12-Hour or 24-Hour display.
1
2
3
4
21 3 54
1) Hours adjustment.
2) Set
3) Minutes adjustment.
4) Reset
5) AM/PM
 Loading...