26
Notions on refrigerant piping connection
6.1.3 Countersink the ends of the pipes
Correct flaring is essential to perfectly seal the gasket.
1 After removing burrs from the cut pipe, seal the ends
with PVC tape to prevent foreign materials from entering.
2 Wrap the pipe in an insulating material.
3 Place a countersunk nut at each end of the pipe. Make
sure that the nuts are facing in the correct direction,
because after countersinking it will no longer be
possible to apply them or change their direction (see
“Fig. 16”).
4 When you are ready to complete the flaring,
remove the PVC tape from the ends of the pipe.
Flared nut
Copper pipe
Fig. 16
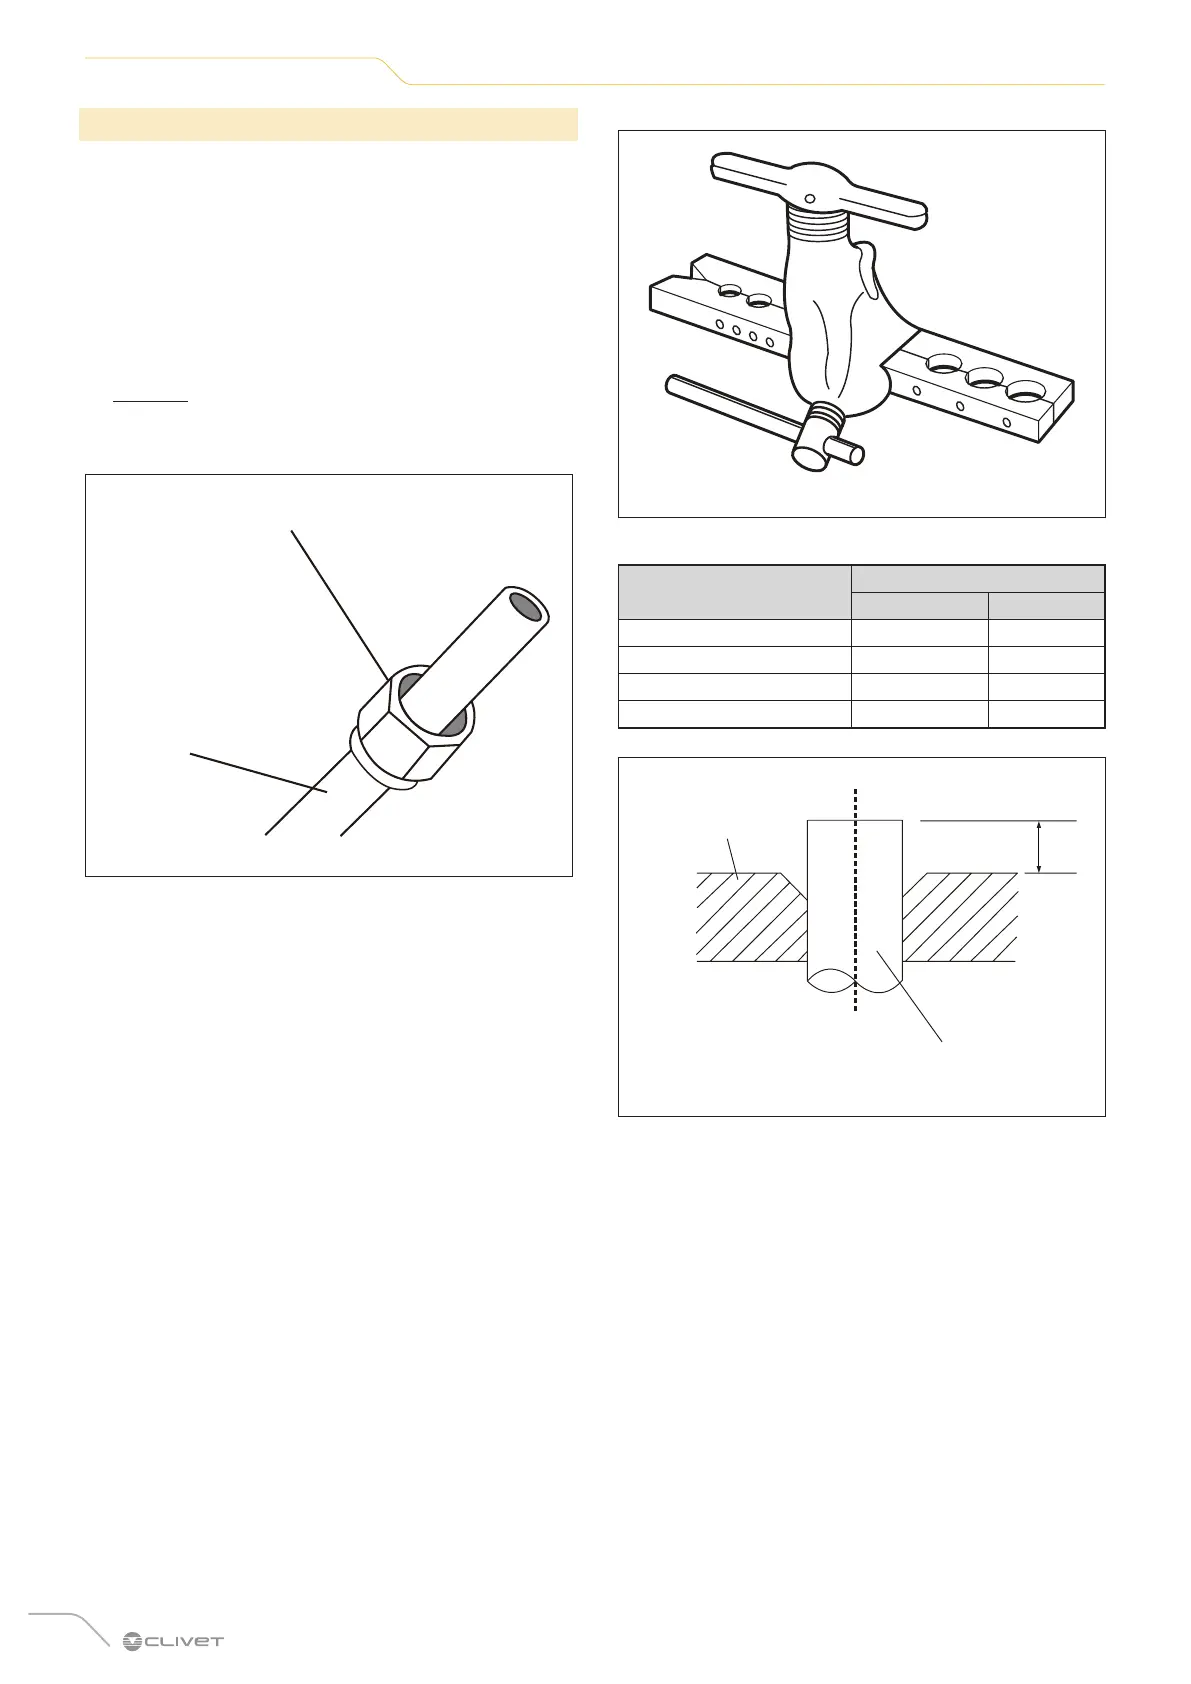
5 Tighten the end of the pipe into the template of
the flaring tool. The end of the pipe must extend
beyond the edge of the template, according to the
measurements indicated in the table below.
6 Apply the countersink screw to the template.
7 Turn the screw clockwise until the desired countersink
is achieved.
Fig. 17
PIPE PROTRUSION BEYOND THE TEMPLATE
Pipe outer diameter (mm)
A (mm)
Min Max
Ø 6.35 (Ø 1/4”) 0.7 1.3
Ø 9.52 (Ø 3/8”) 1.0 1.6
Ø 12.7 (Ø 1/2”) 1.0 1.8
Ø 15.9 (Ø 5/8”) 2.0 2.2
Template
Pipe
A
Fig. 18
8 Remove the countersunk screw and template,
then check that the end of the pipe is countersunk
evenly and not cracked.
 Loading...