8 | Piping installation
Installer reference guide
90
EPRA08~12EAV3+W1 + ETVH12SU18+23EA6V
Daikin Altherma 3 H MT F
4P644482-1 – 2021.03
Typical workflow
Connecting the water piping typically consists of the following stages:
1 Connecting the water piping to the outdoor unit.
2 Connecting the water piping to the indoor unit.
3 Connecting the recirculation piping.
4 Connecting the drain hose to the drain.
5 Filling the water circuit.
6 Filling the domestic hot water tank.
7 Insulating the water piping.
8.2.2 Precautions when connecting the water piping
INFORMATION
Also read the precautions and requirements in the following chapters:
▪ "2General safety precautions"[410]
▪ "8.1Preparing water piping"[482]
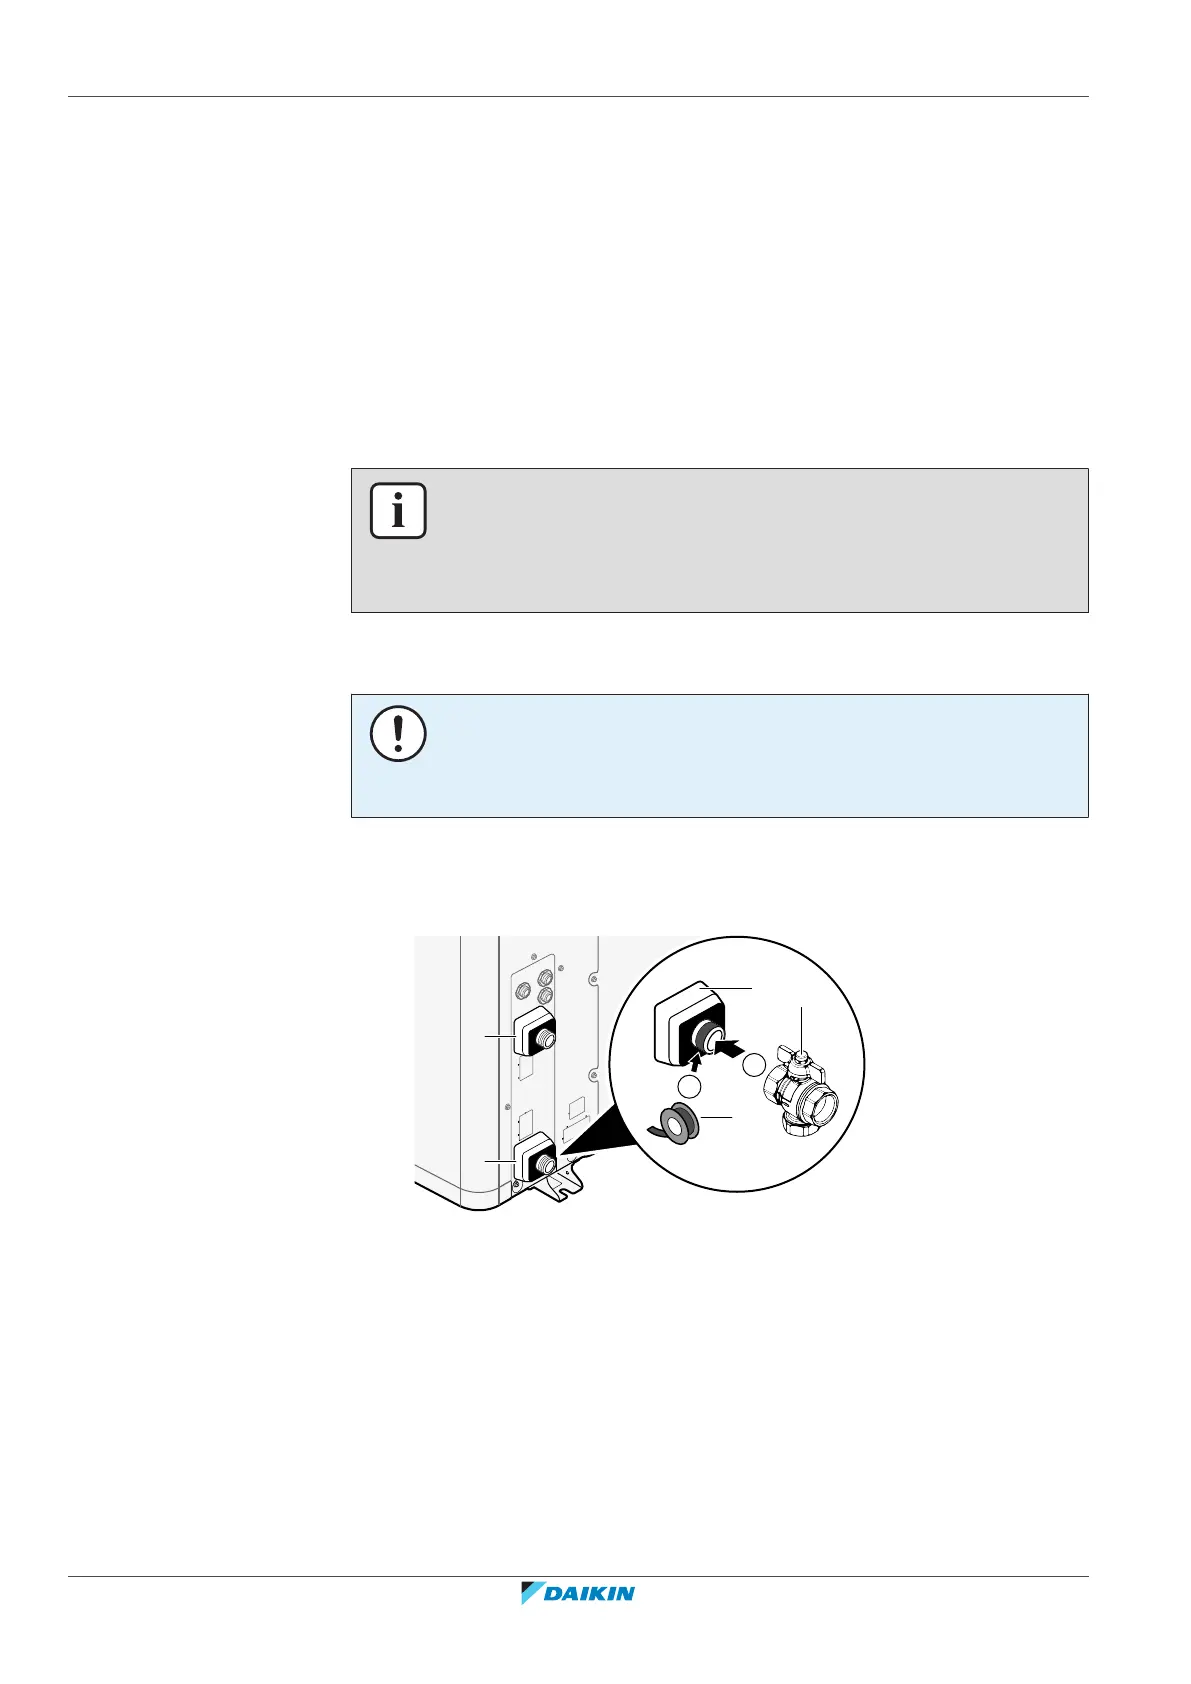
8.2.3 To connect the water piping
NOTICE
Do NOT use excessive force when connecting the field piping and make sure the
piping is aligned properly. Deformation of the piping can cause malfunctioning of the
unit.
Outdoor unit
1 Connect the shut-off valve (with integrated filter) to the outdoor unit water
inlet, using thread sealant.
a Water OUT (screw connection, male, 1")
b Water IN (screw connection, male, 1")
c Shut-off valve with integrated filter (delivered as accessory)(2× screw connection,
female, 1")
d Thread sealant
2 Connect the field piping to the shut-off valve.
3 Connect the field piping to the outdoor unit water outlet.

 Loading...