Outdoor Unit (80 / 90 Class) Si12-411A
234 Removal Procedure
1.6 Removal of Electronic Expansion Valve and Thermistor
Procedure Warning Be sure to wait 10 minutes or more after turning off all power supplies
before disassembling work.
Step
Procedure Points
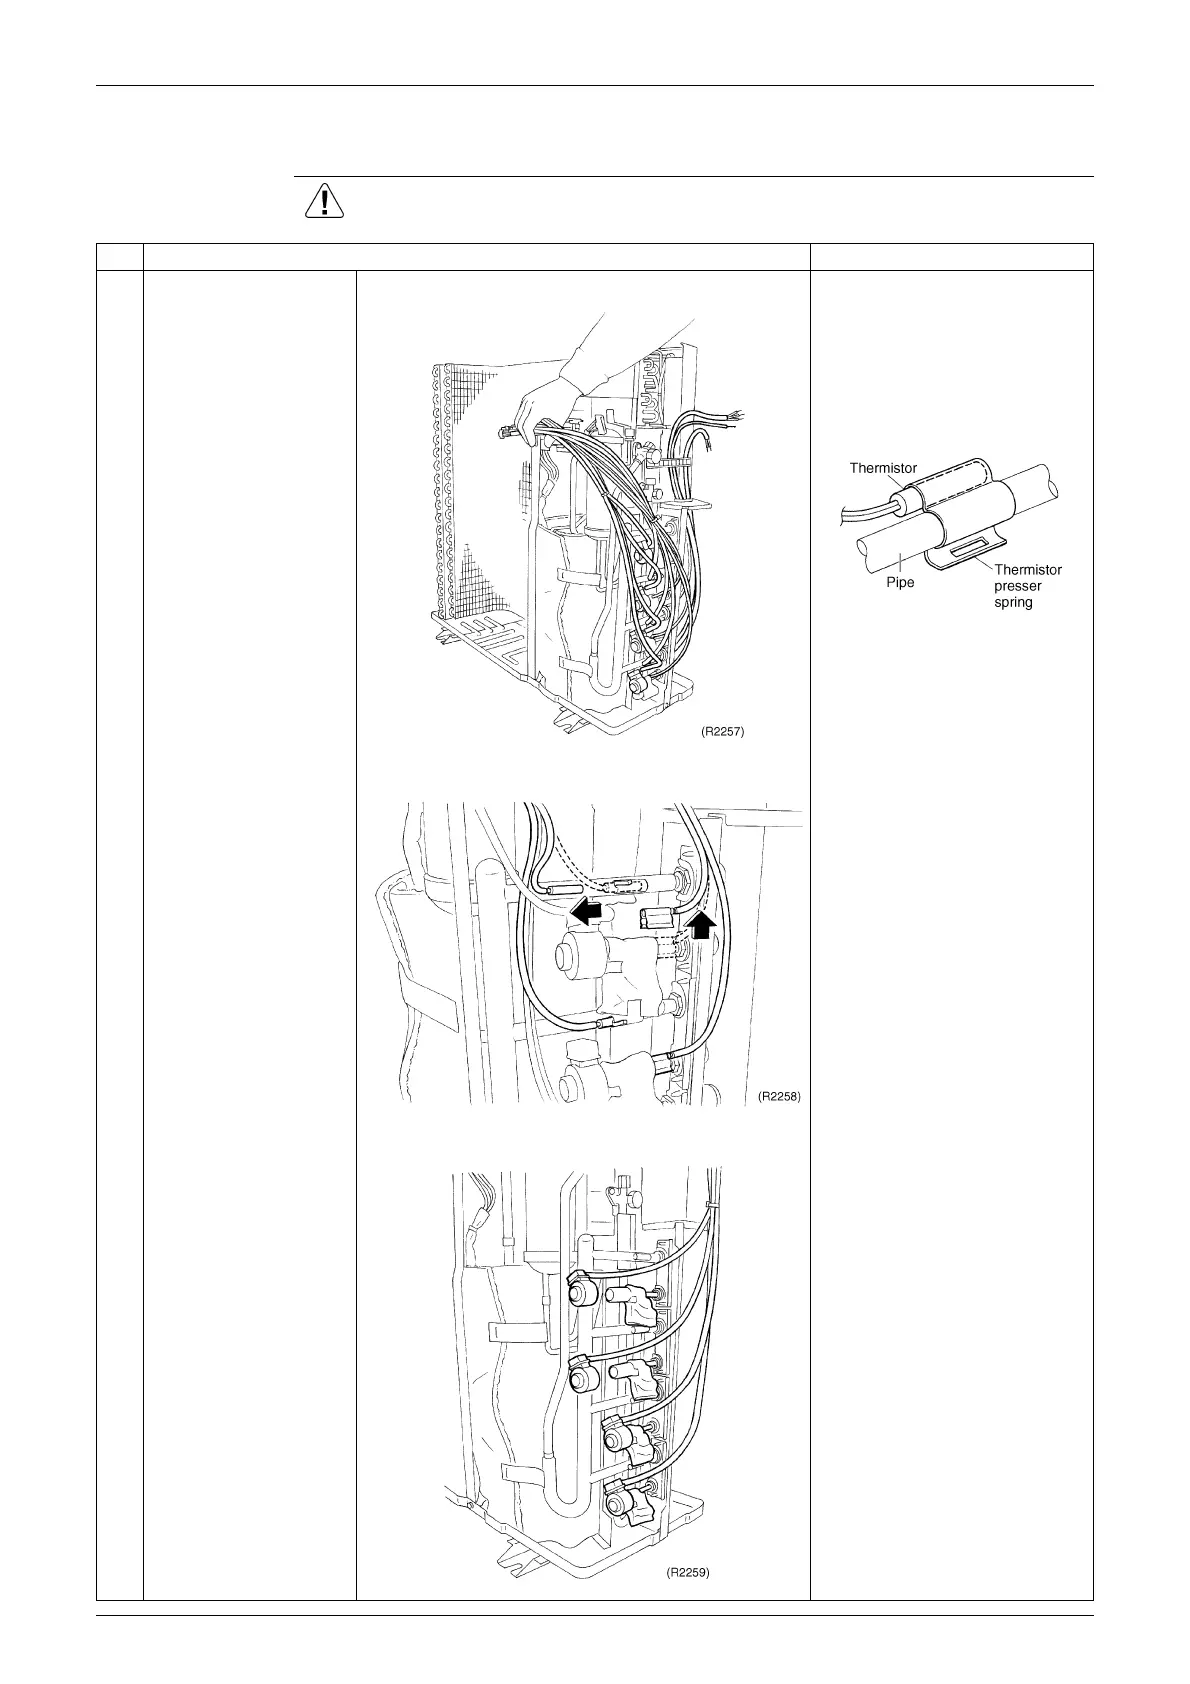
1
Remove each wire
harness.
Place the thermistor so that
its end comes up to the end
of the presser spring.
Be careful not to lose the
presser spring for the
discharge pipe thermistor.
2
Take off the putty, and
remove each
thermistor.
S90:
Outdoor air thermistor (Blue)
Heat exchanger thermistor
(Gray)
Discharge pipe thermistor
(Black)
S92: Gas pipe thermistor
Room A (Black)
Room B (Gray)
Room C (Brown)
Room D (Red)
S93: Liquid pipe thermistor
Room A (Black)
Room B (Gray)
Room C (Yellow)
Room D (Blue)
3
Remove the electronic
expansion valve coil.
 Loading...