Component parts Be sure to check that the following parts are included before installation.
Name
Shape
Air direction
adjustment grille
Qty. 1 pc
.
Cautions for usage
Be sure to perform the following as installation precautions to ensure correct and safe use of the air direction
adjustment grille.
1.Be sure to stop the operation before installation.
2.Avoid short-circuits during installation.
3.When using the unit in areas with snow, install the grille to create a left-right or downward airflow.
Do not install the grille to create an upward airflow to prevent snow accumulating in the air outlet of the outdoor unit as this may
damage the unit.
4.Be careful of foreign substances such as dead leaves, which may accumulate on the air outlet after installing the grille to create
an upward airflow.
5.Do not use screws other than those provided. Tighten the screws securely without any looseness.
Selection of installation site
Use the air direction adjustment grille for installation at a location that fits the following conditions.
1.When installing the outdoor unit near the neighbouring house.
2.When changing the airflow direction to prevent exhaust blowing directly onto passersby or garden plants.
M4
x
30 Screw
4 pcs. 4 pcs.
Installation
manual
One sheet (this sheet)
Seal
1 pc
.
Spacer
1.Install the air direction adjustment grille ( ) on the
front panel using 4 screws ( ).
The prepared holes on the front panel are a concave
shape and not through-holes. Create a through-hole
by tightening the screw ( ) in the prepared hole.
Do not use a borer for the prepared holes to avoid
damaging the parts inside. (4 positions)
2.Seals ( ) and spacers ( ) are not necessary.
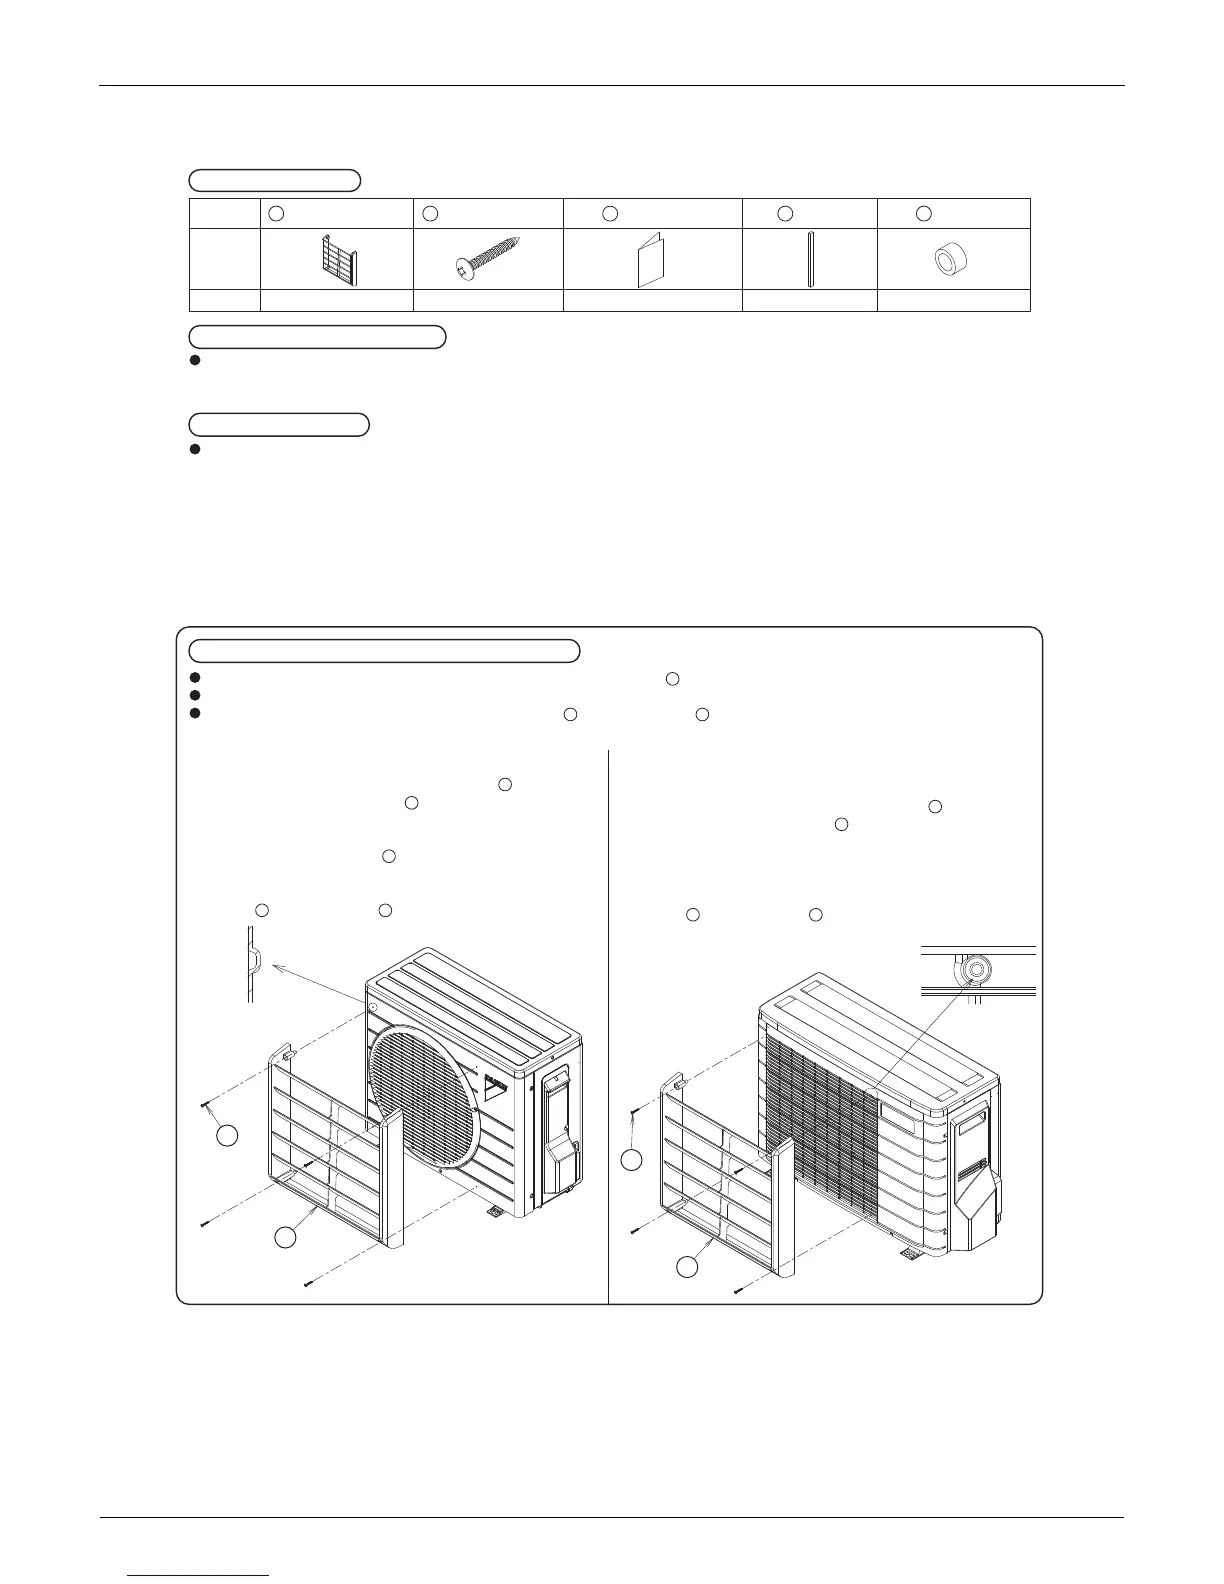
Installation of air direction adjustment grille
<Round outlet grille> <Square outlet grille whose
thickness is 5/8” (15mm) or less>
1
2
2
4
5
Pitch of the installation screws for the air directrion adjustment grille ( ) is 17-1/8” (434mm) in vertical and
horizontal directions.
Installation can be performed in 4 diections:top, bottom, left and right.
Temporarily secure the air direction adjustment grille ( ) using 4 screws ( ), check the installation angle, and then tighten
the screws.
1.Install the air direction adjustment grille ( ) on the
front panel using 4 screws ( ). The prepared holes
of the front panel are located between the lattice of
the outlet grille and approx. 10mm inside from the
outlet grille surface. (4 positions) Do not use an
electric screwdriver if the front panel is made of resin.
2.Seals ( ) and spacers ( ) are not necessary.
Cross section of
prepared hole
Example of
prepared hole
1 2 3 4 5
2
2
1
1
1
1
2
1
2
4
5
 Loading...