6 | Installation
Installer reference guide
47
3(A)MXM+3(A)MXF+4MXM+5MXM
R32 Split series
4P600463-1B – 2020.05
WARNING
Do NOT connect the power supply to the indoor unit. This could result in electrical
shock or fire.
WARNING
▪ Do NOT use locally purchased electrical parts inside the product.
▪ Do NOT branch the power supply for the drain pump, etc. from the terminal
block. This could result in electrical shock or fire.
WARNING
Keep the interconnection wiring away from copper pipes without thermal insulation
as such pipes will be very hot.
DANGER: RISK OF ELECTROCUTION
All electrical parts (including thermistors) are powered by the power supply. Do not
touch them with bare hands.
DANGER: RISK OF ELECTROCUTION
Disconnect the power supply for more than 10minutes, and measure the voltage at
the terminals of main circuit capacitors or electrical components before servicing.
The voltage MUST be less than 50VDC before you can touch electrical components.
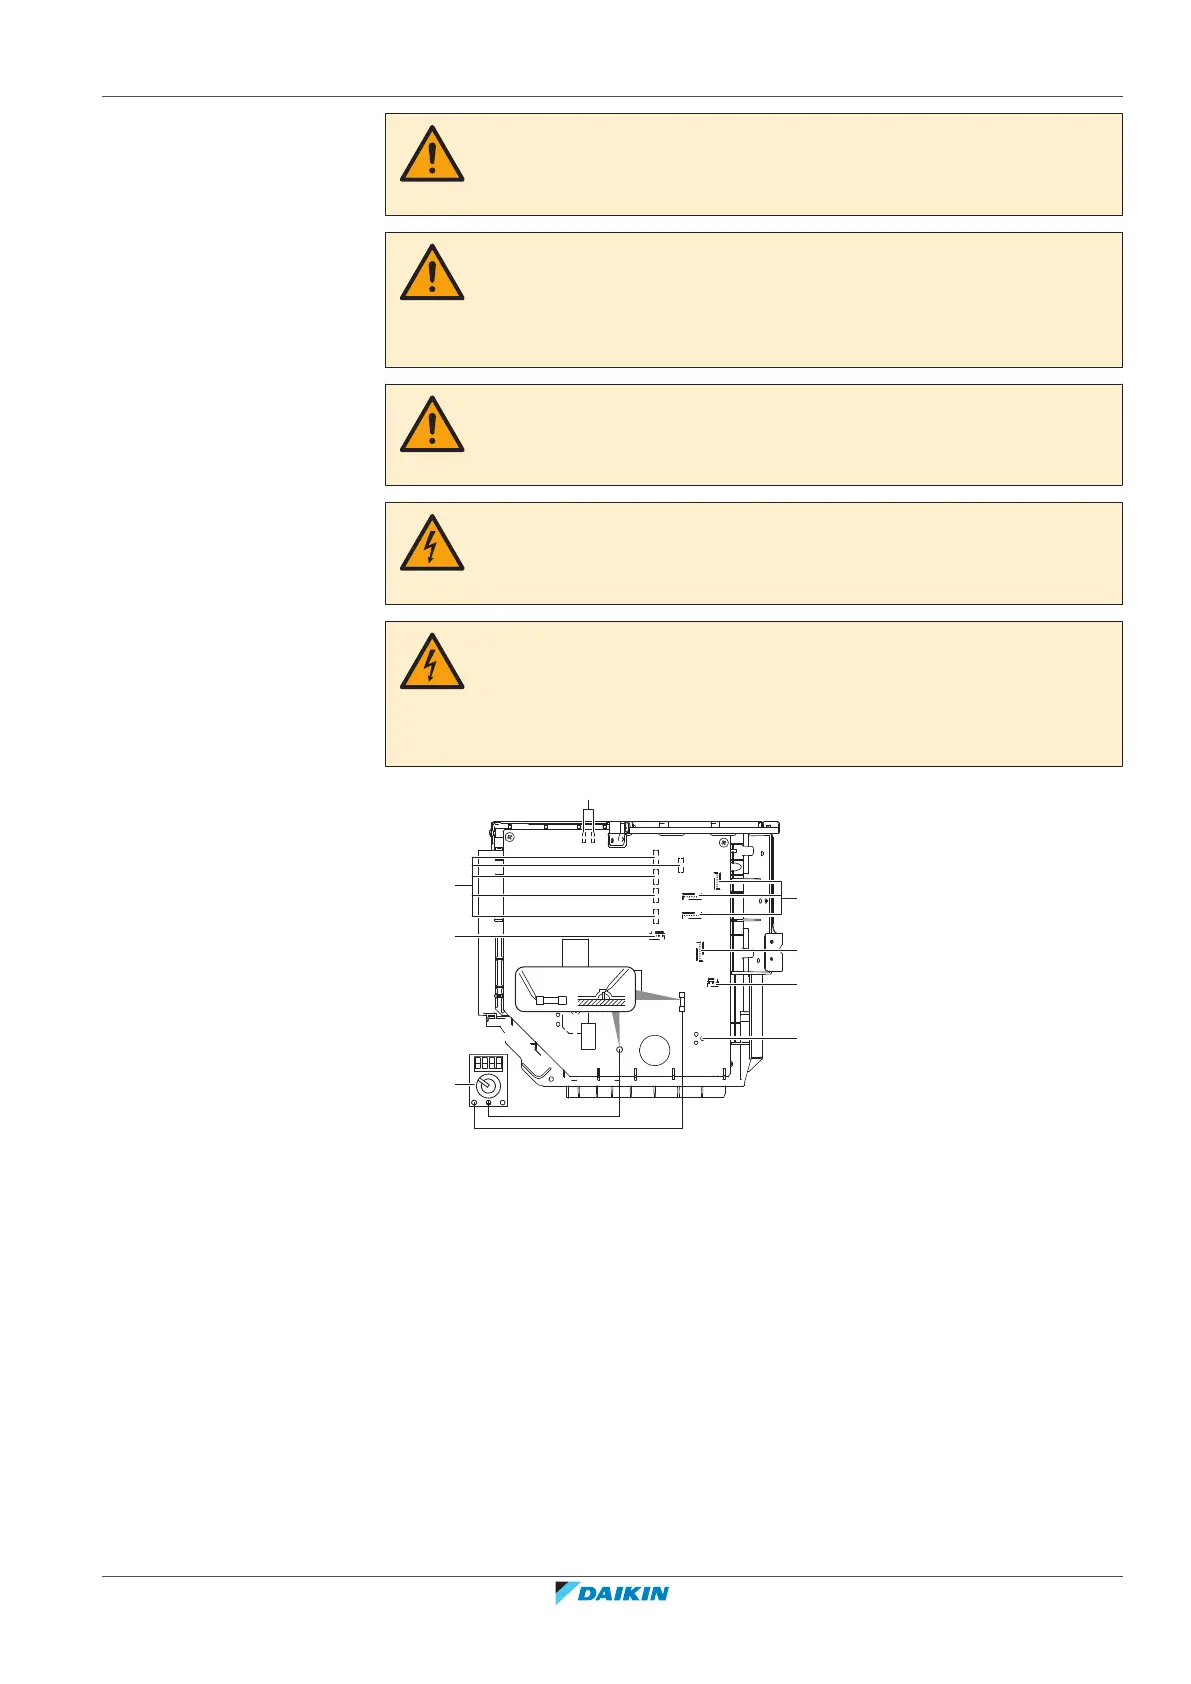
For the location of the terminals, see the wiring diagram.
AC
DC
DC
S20 S21 S22 S23
S92
S93
S40
S80
S70
U W
V
DC-
FU2
S90
S24
AL2 AL1
e
f
g
h
a
b
c
d
DC(-)
FU2
a AL1, AL2 - solenoid valve lead wire connector*
b S20~24 - electronic expansion valve coil lead wire connector (room A, B, C, D, E)*
c S40 – thermal overload relay lead wire and high pressure switch connector*
d Multimeter (DC voltage range)
e S90~93 – thermistor lead wire connector
f S70 - fan motor lead wire connector
g S80 - 4-way valve lead wire connector
h Compressor lead wire connector
*May differ depending on the model.
6.7.3 Guidelines when connecting the electrical wiring
Keep the following in mind:
▪ If stranded conductor wires are used, install a round crimp-style terminal on the
end of the wire. Place the round crimp-style terminal on the wire up to the
covered part and fasten the terminal with the appropriate tool.
 Loading...