Accessory Installation
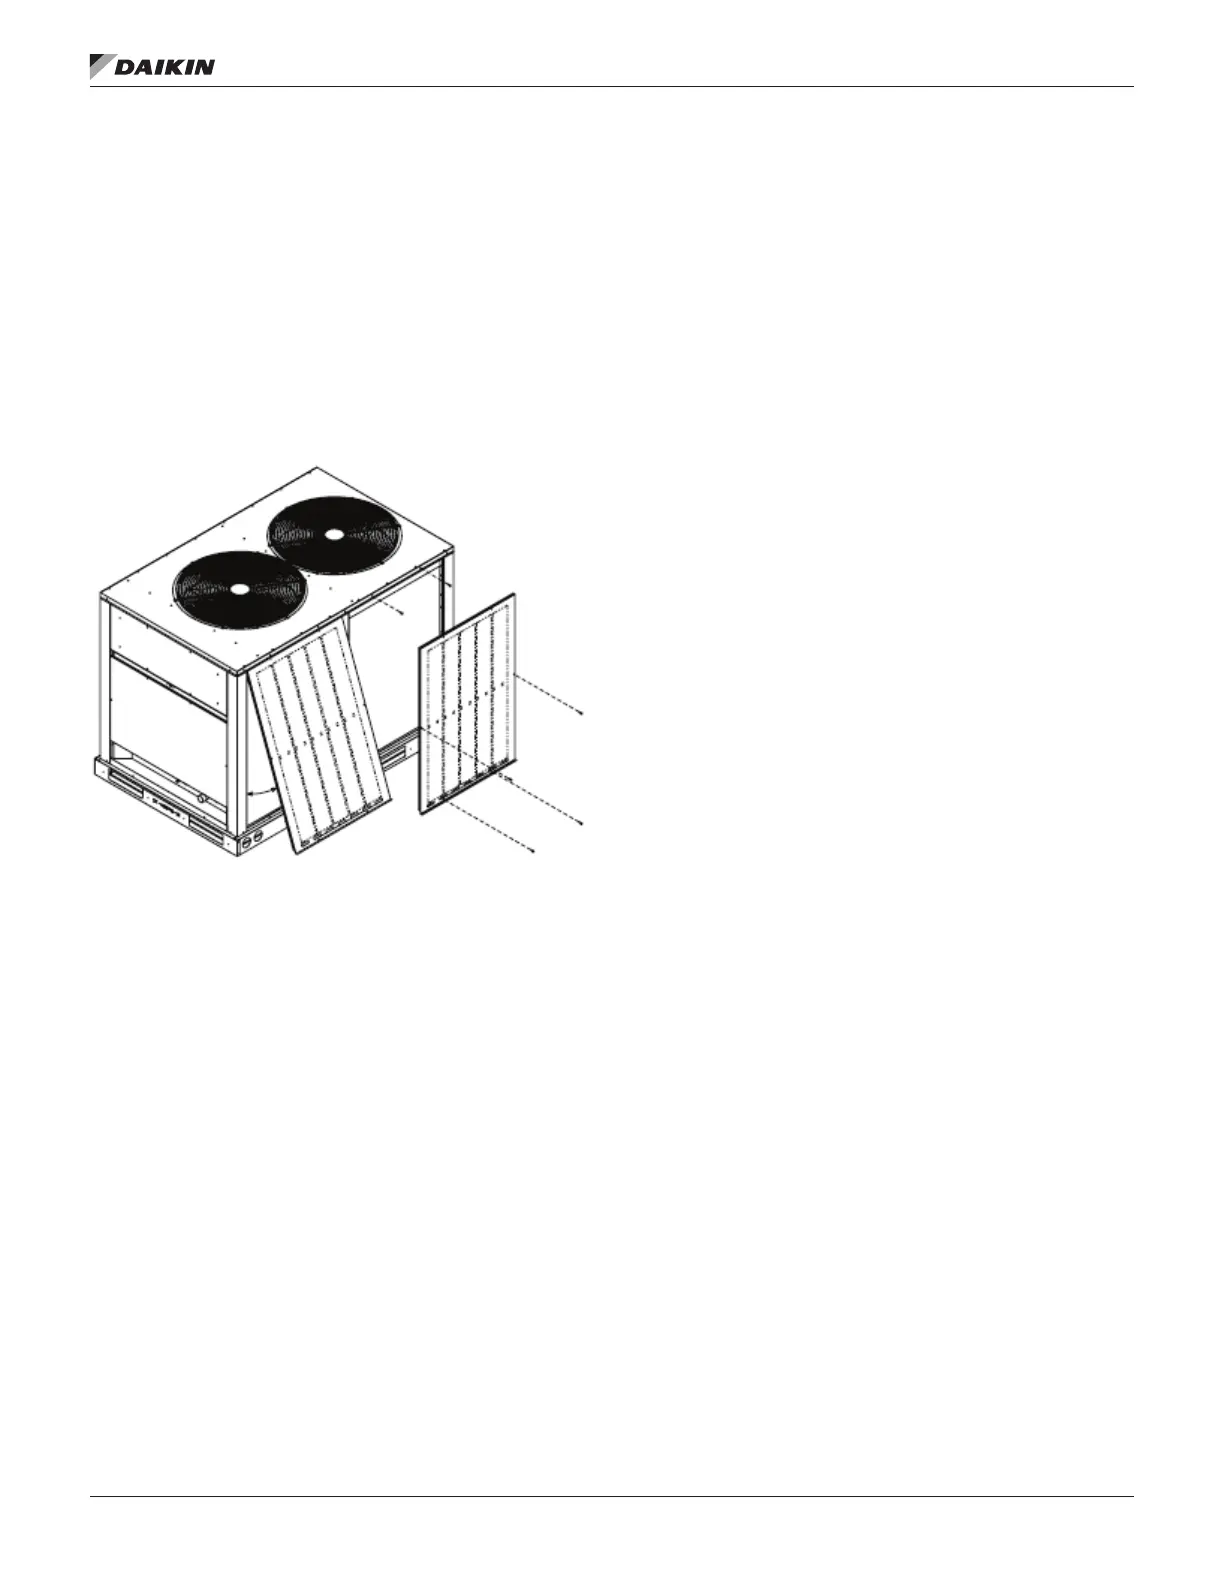
Louvered Panels
1. Remove two screws from top panel where louver will
install.
2. Slide top of louver panel under lip of the top panel and
slide into place.
3. Attach with four screws provided.
Figure 16: Louver Removal
Optional Service Valve
1. Remove clamp securing suction line ext. tube (if
applicable).
2. Remove connector panel “A”.
3. Remove suction line ext. tube by sweating at reducer/
suction line “B” (reducer required on some models and
remains on suction line). Remove excess braze material
from surface.
4. Slide service valve “C” onto reducer/suction line “B” (DO
NOT braze at this time).
5. Install connector panel “A”.
6. Install bracket “D”.
7. Braze valve.
www.DaikinApplied.com 19 IM 962-4 • AIR-COOLED SPLIT SYSTEM CONDENSERS
 Loading...