15
9.5 Multi system piping installation
Front connection
Remove the front plate knock out holes to connect (see figure
below).
Bottom connection
Remove the knock out holes on the bottom frame and route the
piping under the bottom frame (see figure below).
9.5.1 Precautions when connecting piping between outdoor
units (multiple outdoor unit system)
To connect the piping between outdoor units, an optional multi
connection piping kit BHFP22P100/151 is always required.
When installing the piping, follow the instructions in the
installation manual that comes with the kit.
Only proceed with piping work after considering the limitations
on installing listed here and in the chapter "10.2. Connecting the
refrigerant piping" always referring to the installation manual
delivered with the kit.
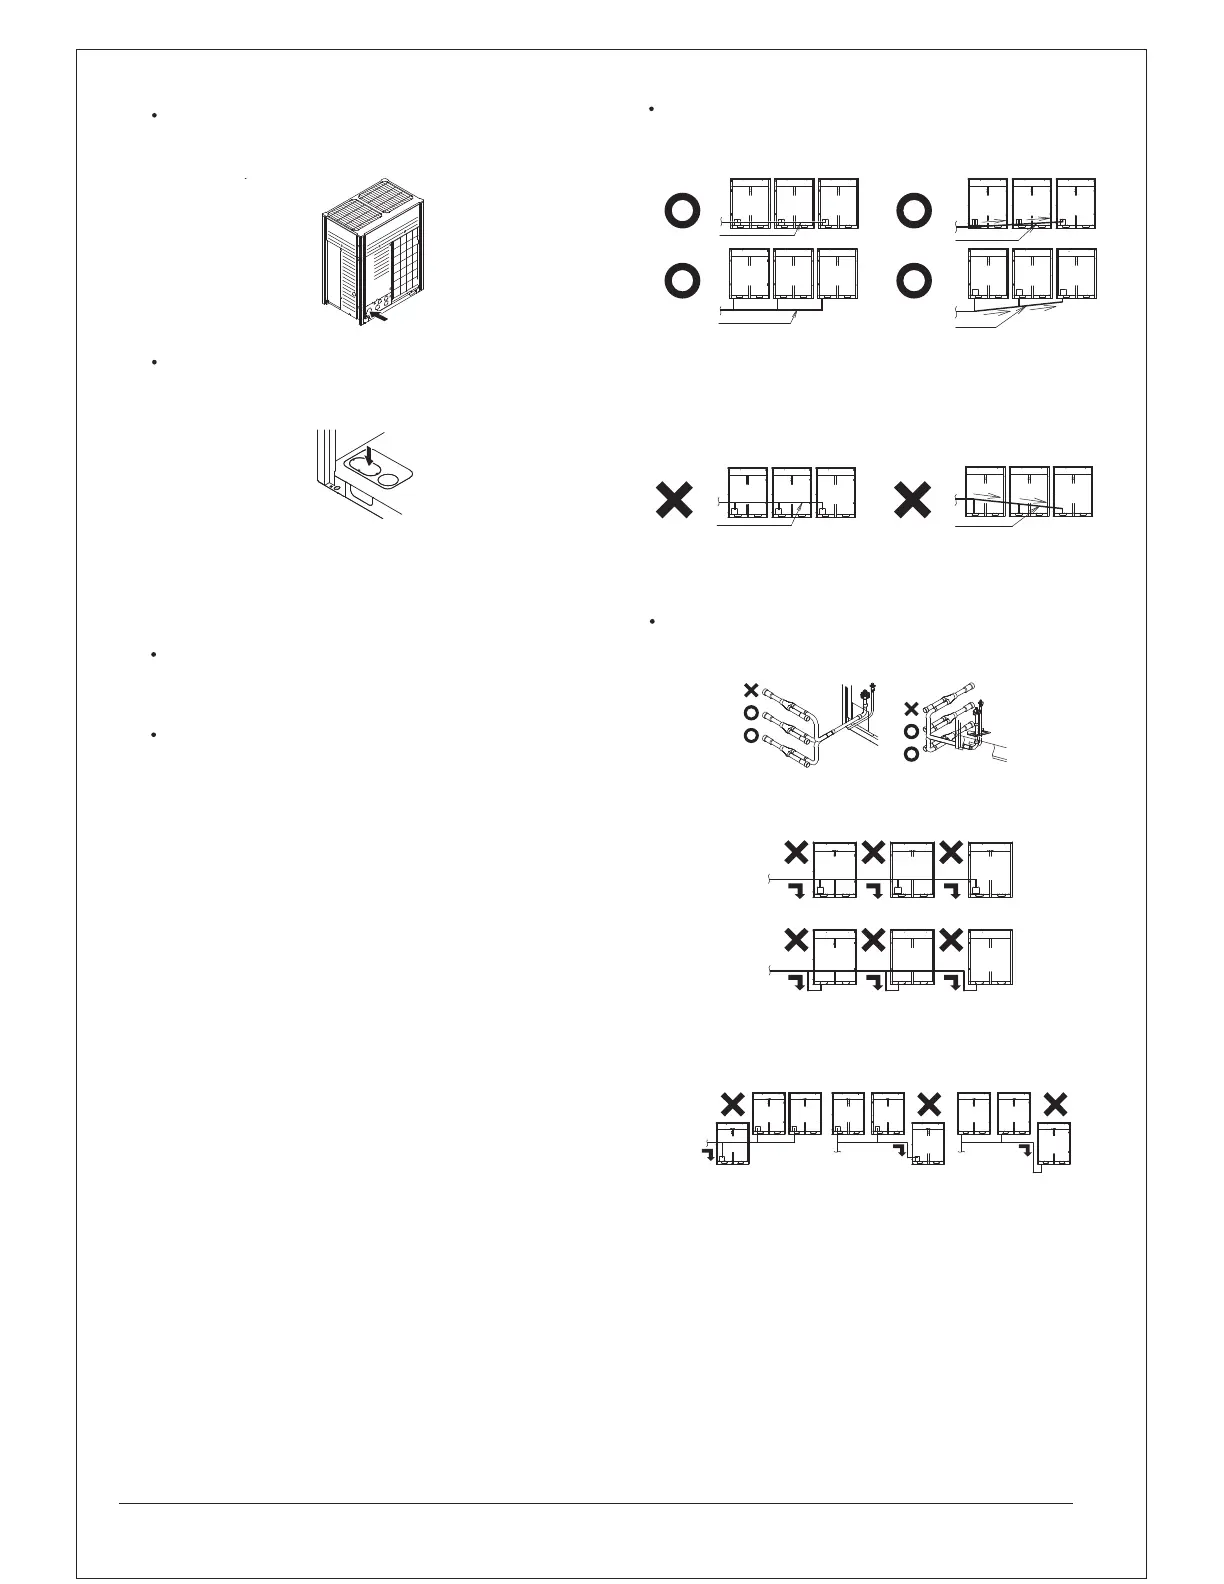
9.5.2 Possible installation patterns and configurations
The piping between the outdoor units must be routed level or
slightly upward to avoid the risk of oil retention into the piping.
1 To indoor unit
2 Piping between outdoor units
Prohibited patterns: change to pattern 1 or 2.
1 To indoor unit
2 Piping between outdoor units
2 nrettaP1 nrettaP
2
1
11
2
1
2
2
1
1
2
2
1
To avoid the risk of oil retention to the outmost outdoor unit,
always connect the stop valve and the piping between outdoor
units as shown in the 4 correct possibilities of the figure below.
Prohibited patterns: change to pattern 1 or 2.
1 To indoor unit
2 Oil collects to the outmost outdoor unit
Change to configuration as in figures below
1 To indoor unit
2 Oil collects to the outmost outdoor unit when the system
stops
1
2 2 2
1
2 2 2
1
2
1
2
1
2

 Loading...