Datacard® SR200 & SR300 Printer
Hardware and Driver Installation Manual 19
•
If a network-connected printer will be installed on several PCs, each PC must use
the unit number and printer name assigned in the printer.
• If the printer was previously used as a network printer and you want to use a USB
connection, the Default Interface must be set back to USB.
1. Install printer supplies. See Using the Printer in the User Guide to install supplies.
2. Install the Status Monitor from the Support CD. See
“Installing the Status Monitor” on page 33. Close the
installation windows.
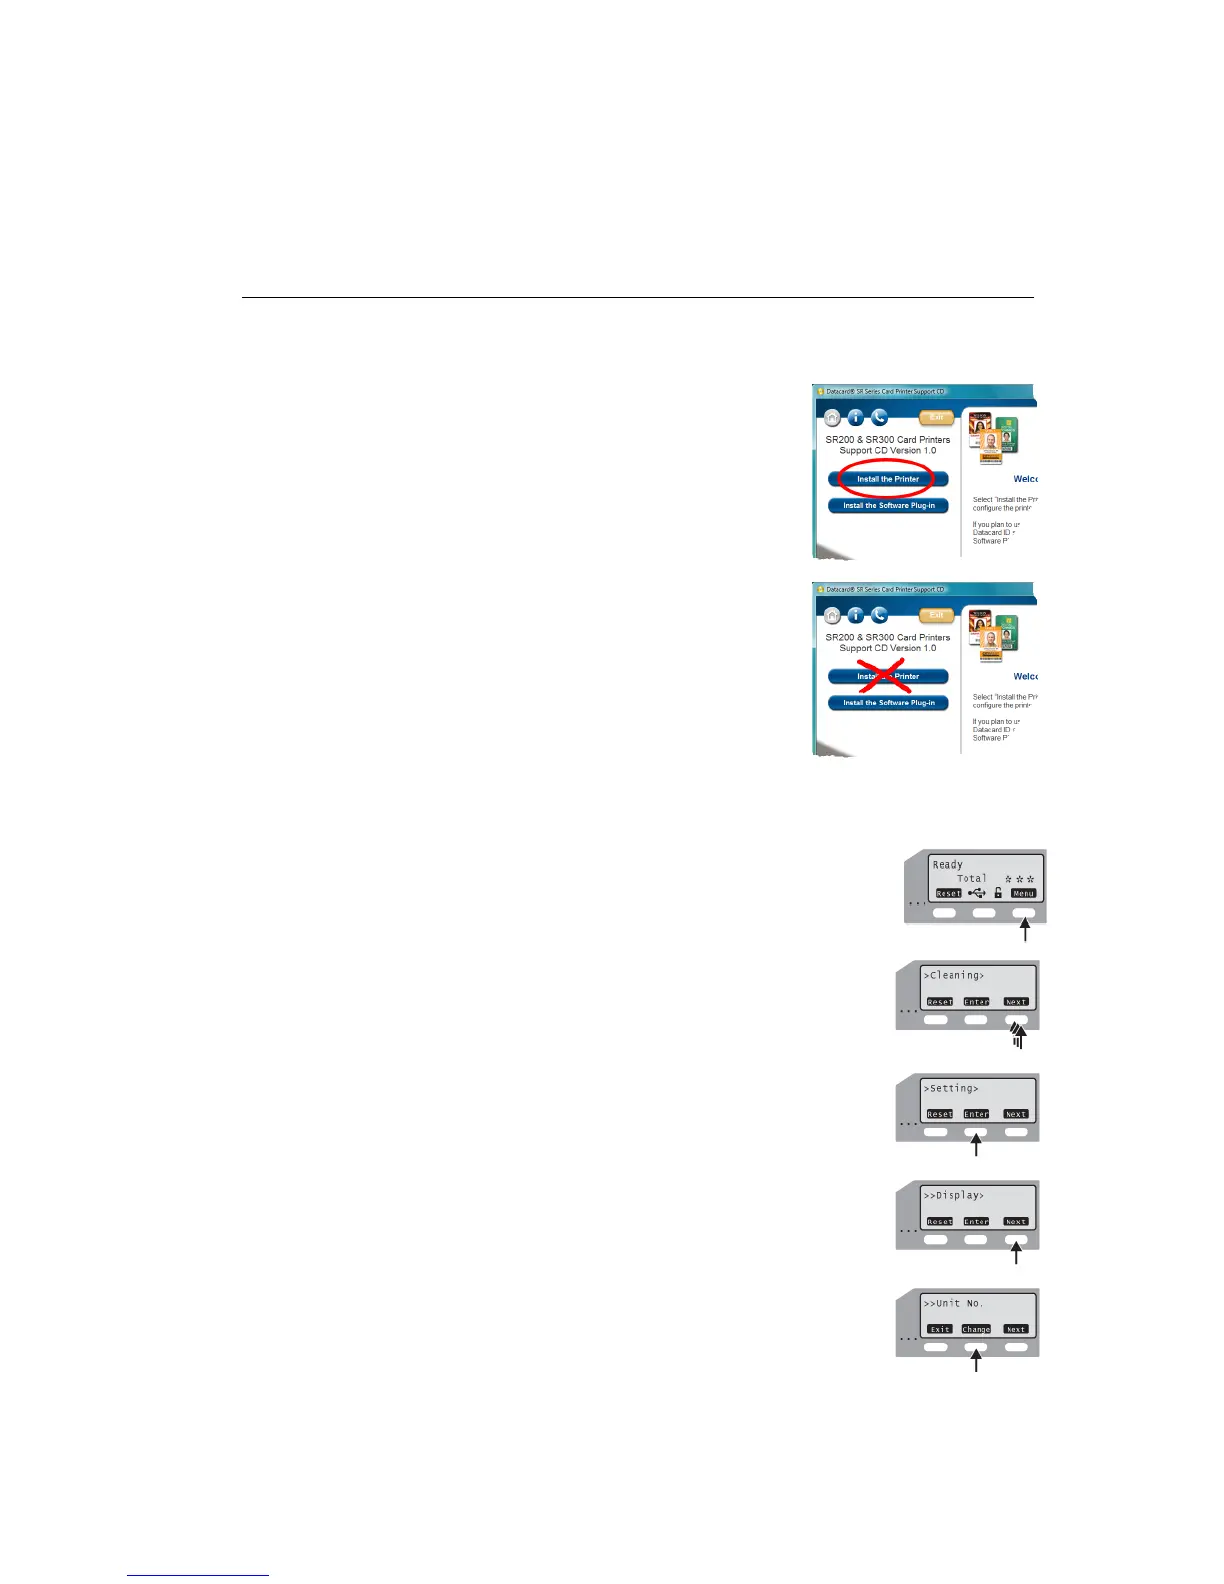
3. With the Support CD in the PC drive, connect the
printer and PC using a USB cable. Do not use the
“Install the Printer” button.
4. Power on the printer. The PC will detect the USB
hub, and display a Found New Hardware wizard.
Follow the prompts to install the hub software. The
PC posts an identifier, such as SR-CPU1. Record
this identifier to use in step 7.
5. Change the unit number at the printer front panel.
A. Press Menu to enter the menus.
B. Press Next several times until “Setting” is displayed.
C. Press Enter to choose the Setting menu.
D. The first submenu is “Display.” Press Next.
E. “Unit No.” is displayed. Press Change.
 Loading...