Steps
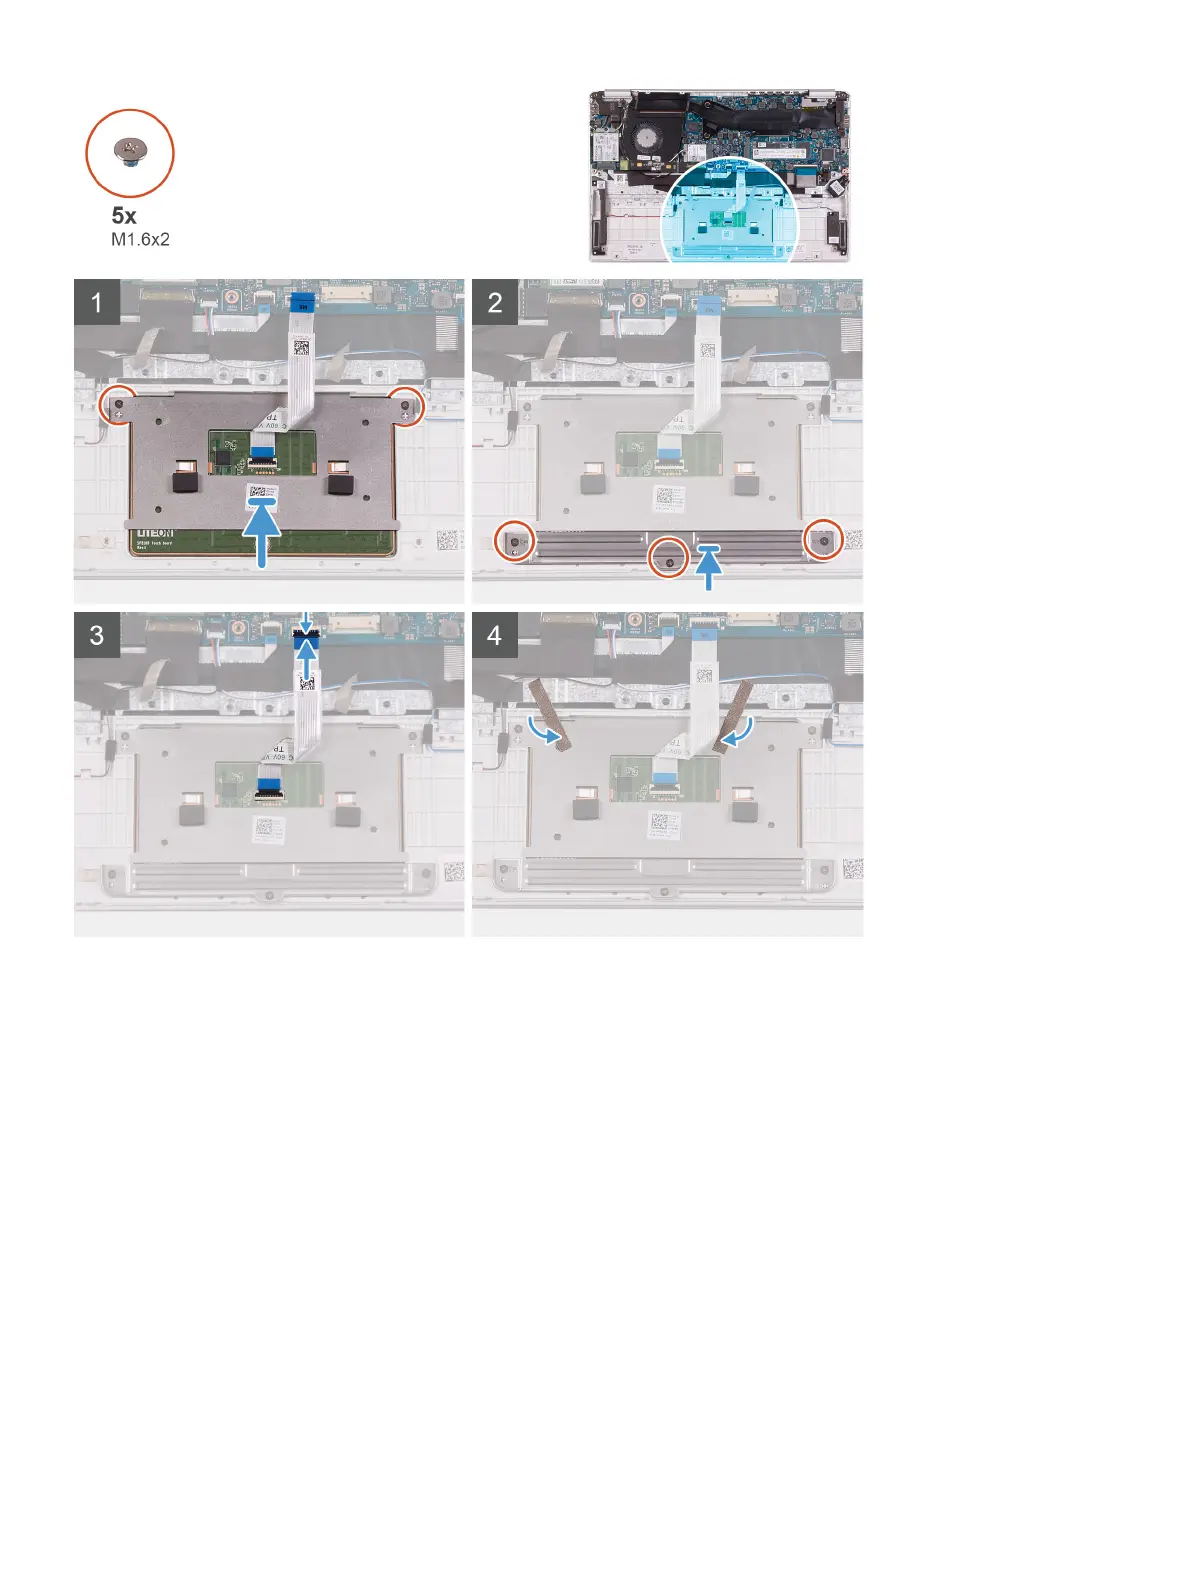
1 Align and place the touchpad into the slot on the palm-rest and keyboard assembly.
2 Replace the two (M1.6x2) screws that secure the touchpad to the palm-rest and keyboard assembly.
3 Align and place the touchpad bracket into the slot on the palm-rest and keyboard assembly.
4 Replace the three (M1.6x2) screws that secure the touchpad bracket to the palm-rest and keyboard assembly.
5 Slide the touchpad cable into its connector on the system board and close the latch to secure the cable.
6 Adhere the tape that secures the touchpad to the palm-rest and keyboard assembly.
Next step
1 Install the battery.
2 Install the base cover.
3 Follow the procedure in After working inside your computer.
Power-adapter port
32
Removing and installing components
 Loading...