Steps
1.
NOTE:
When replacing the system board, the Type-C bracket on the left side, under the system board must be
relocated to the replacement system board.
Adhere the coin-cell battery to the palmrest and then place the system board on its slot on the palmrest.
2. Replace the three (M2x5) screws to secure the system board to the palmrest.
3. Replace the display cable bracket on the display cable.
4. Replace the (M2x5) screw to secure the display cable bracket to the system board.
5. Connect the FPC beam connectors on the system board.
NOTE:
When installing an FPC beam connector, ensure that the end marked "MB" is connected to the system board
and that the alignment pins on the connector are inserted into the openings on the boards.
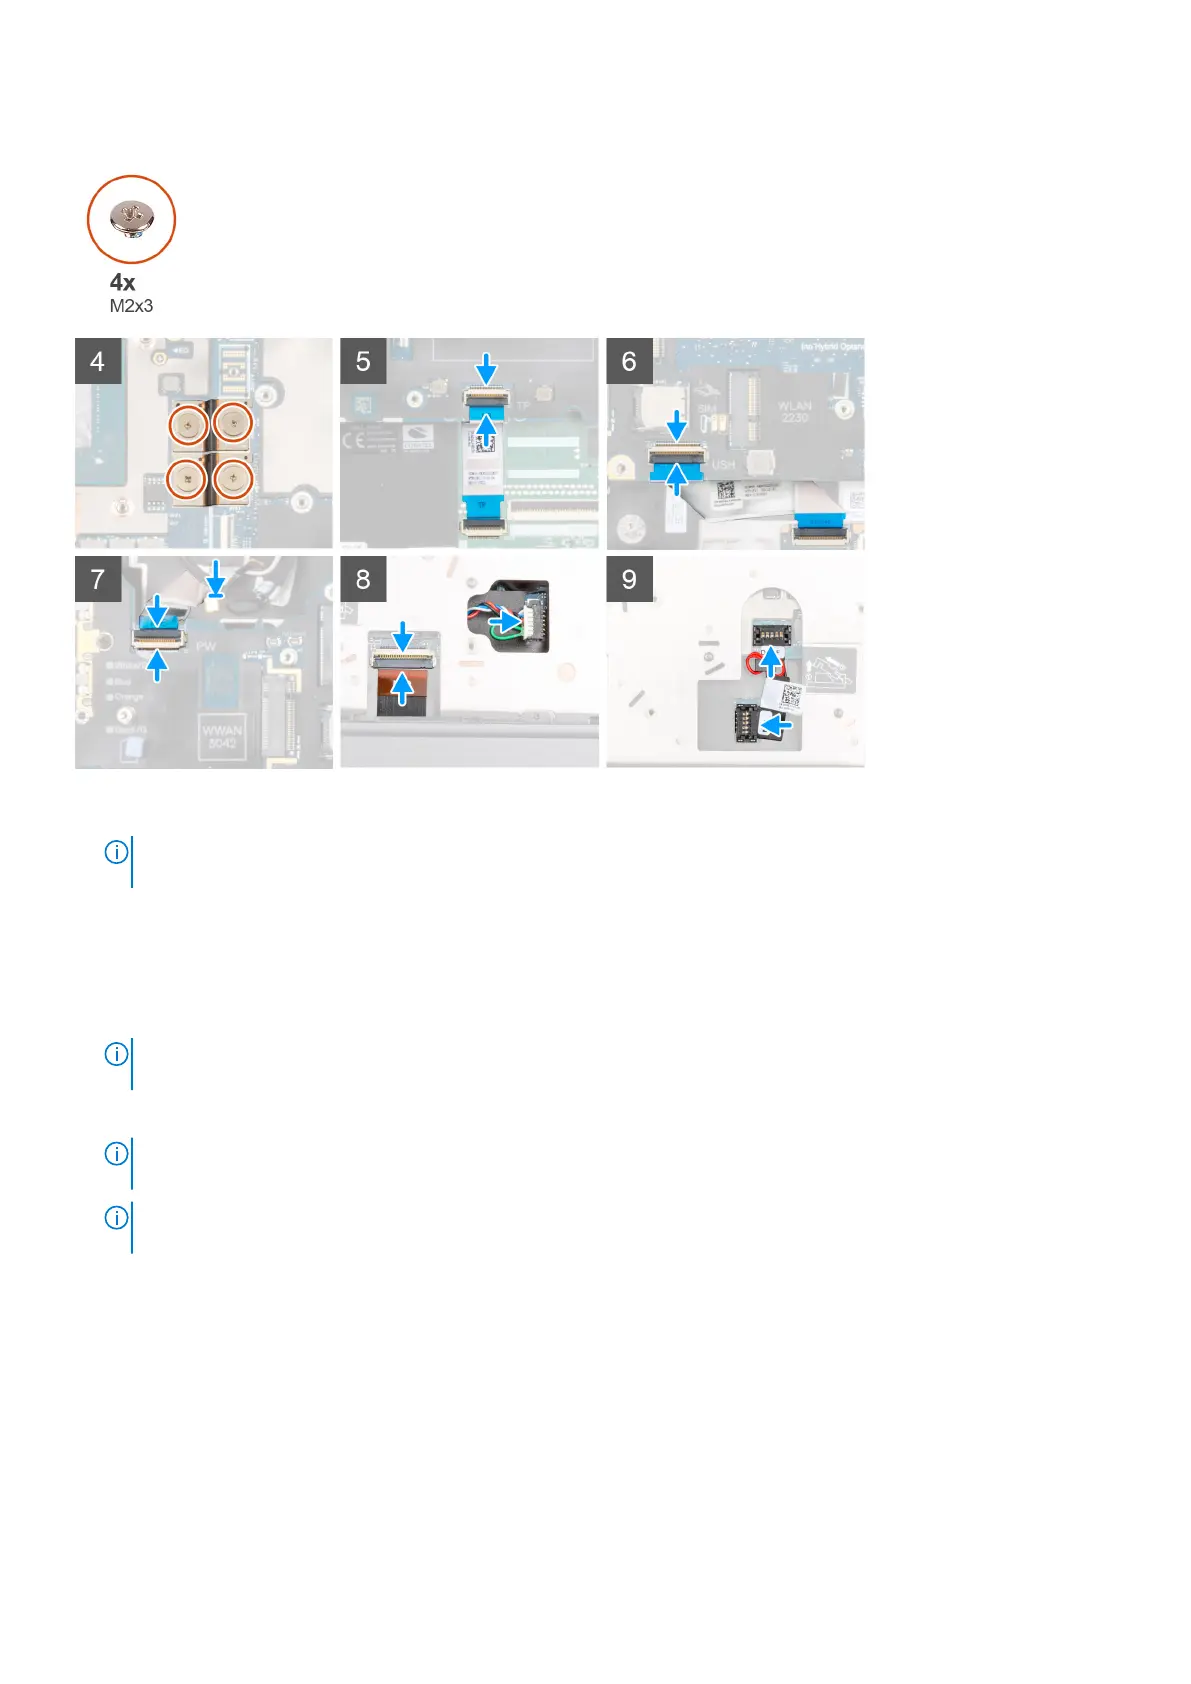
6. Replace the four (M2x3) screws to secure the two FPC beam connectors to the system board and the GPU card.
NOTE:
For UMA models, replace the two (M2x3) screws to secure the single FPC beam connector to the system board
and the GPU card.
NOTE: When installing an FPC beam connector, ensure that the end marked "MB" is connected to the system board
and that the alignment pins on the connector are inserted into the openings on the boards.
7. Connect the speaker cable and SD card reader FPC to the connectors on the system board.
8. Connect the display cable, touch screen cable (for models shipped with a touch screen) or IR camera cable (for models
shipped with an IR camera), power adapter cable, touchpad FPC, USH daughter board FFC (for models shipped with a USH
daughter board), and power button board FFC to the connectors on the system board.
9. Connect the GPU power cable to the connector on the system board on the top side of the computer.
10. Lock the GPU power cable connector on the system board.
Next steps
1. Install the inner frame.
2. Install the heat-sink assembly.
76
Removing and installing components
 Loading...