Installing System Components 65
2
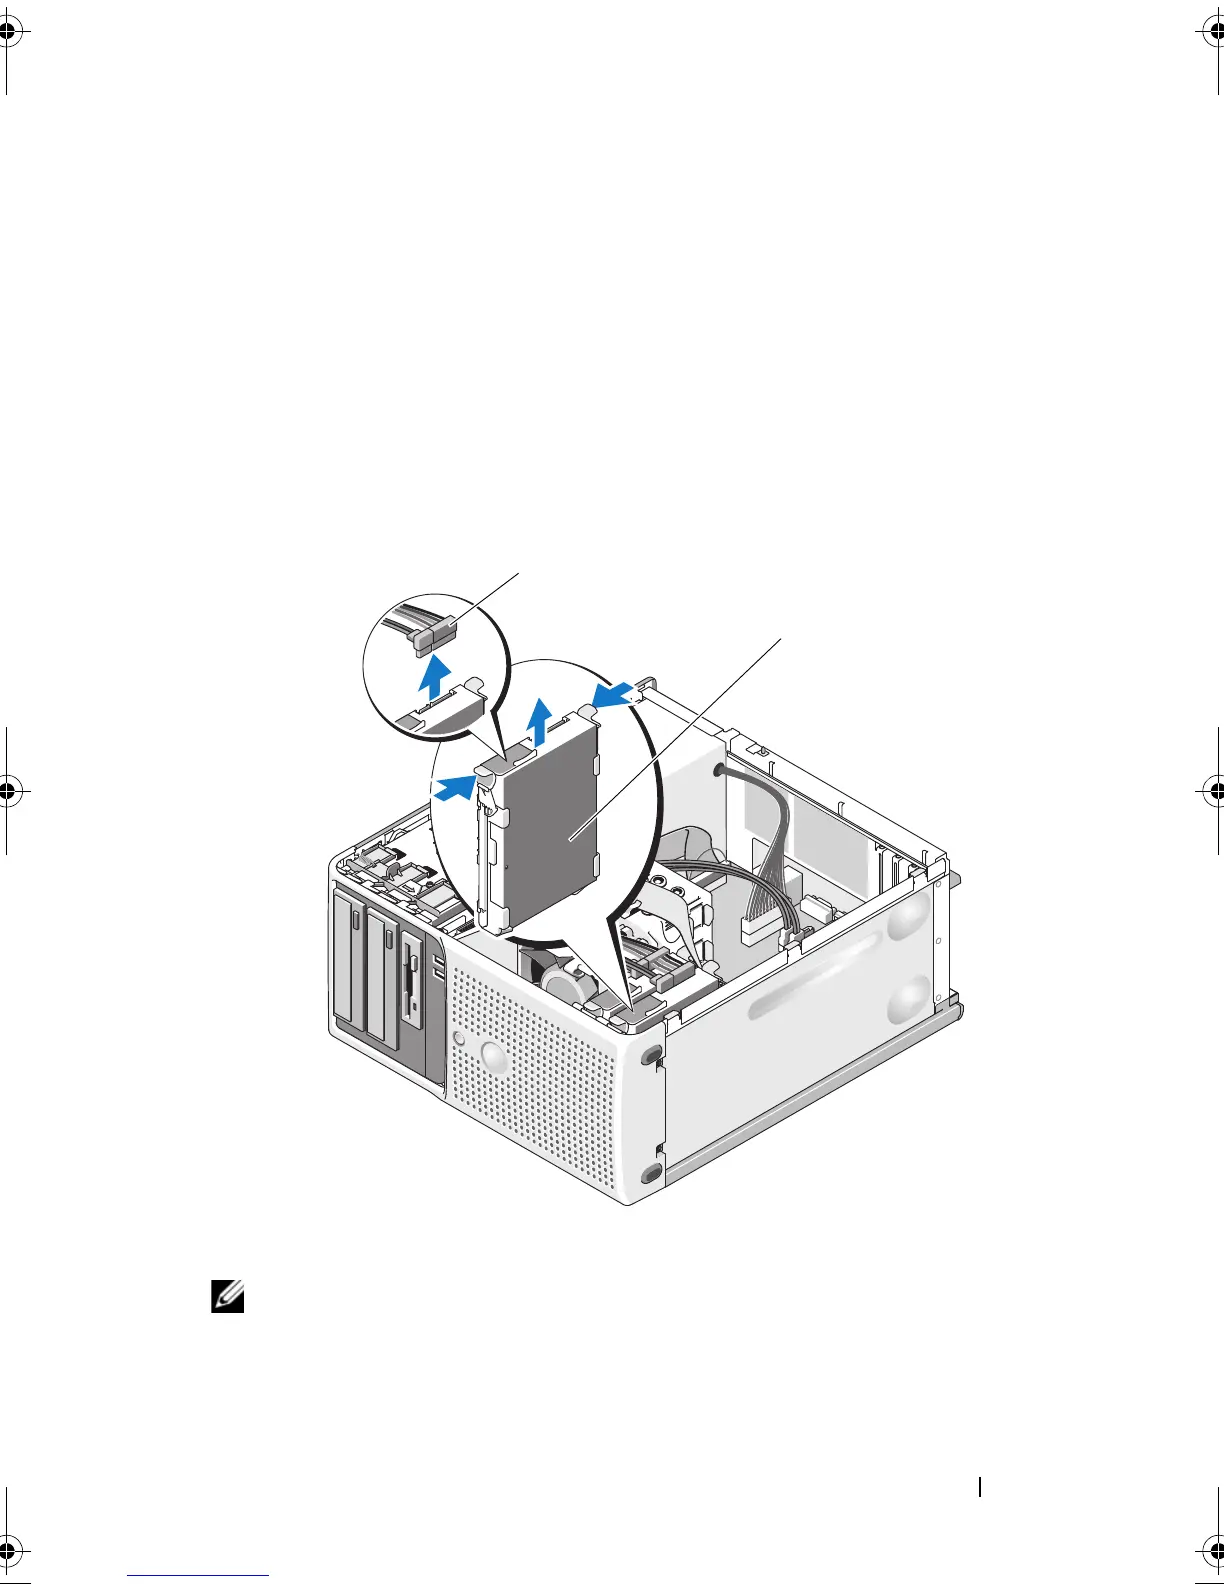
Open the system. See "Opening the System" on page 47.
3
Disconnect the hard drive power cable from the hard drive that you are
removing.
4
Disconnect the blue data cable from the hard drive that you are removing
by pulling up on the blue tab.
5
Press the blue tabs on each side of the hard-drive bracket toward each
other and slide the drive and its bracket up and out of the bay. See
Figure 3-14.
Figure 3-14. Removing and Installing a Hard Drive in the Drive Carrier
NOTE: If you do not intend to replace the drive, it is highly recommended that you
remove the drive from the guide bracket (see Figure 3-15) and insert the empty
guide bracket back into the drive bay. This eliminates the likelihood that the empty
bracket will be misplaced or improperly stored while not in use.
1 hard drive power cable 2 hard drive in primary hard drive bay
book.book Page 65 Wednesday, June 24, 2009 8:21 AM
 Loading...