WLAN card
Removing the WLAN Card
Steps
1. Follow the procedures in Before Working Inside Your Computer.
2. Remove the:
a. base cover
b. battery
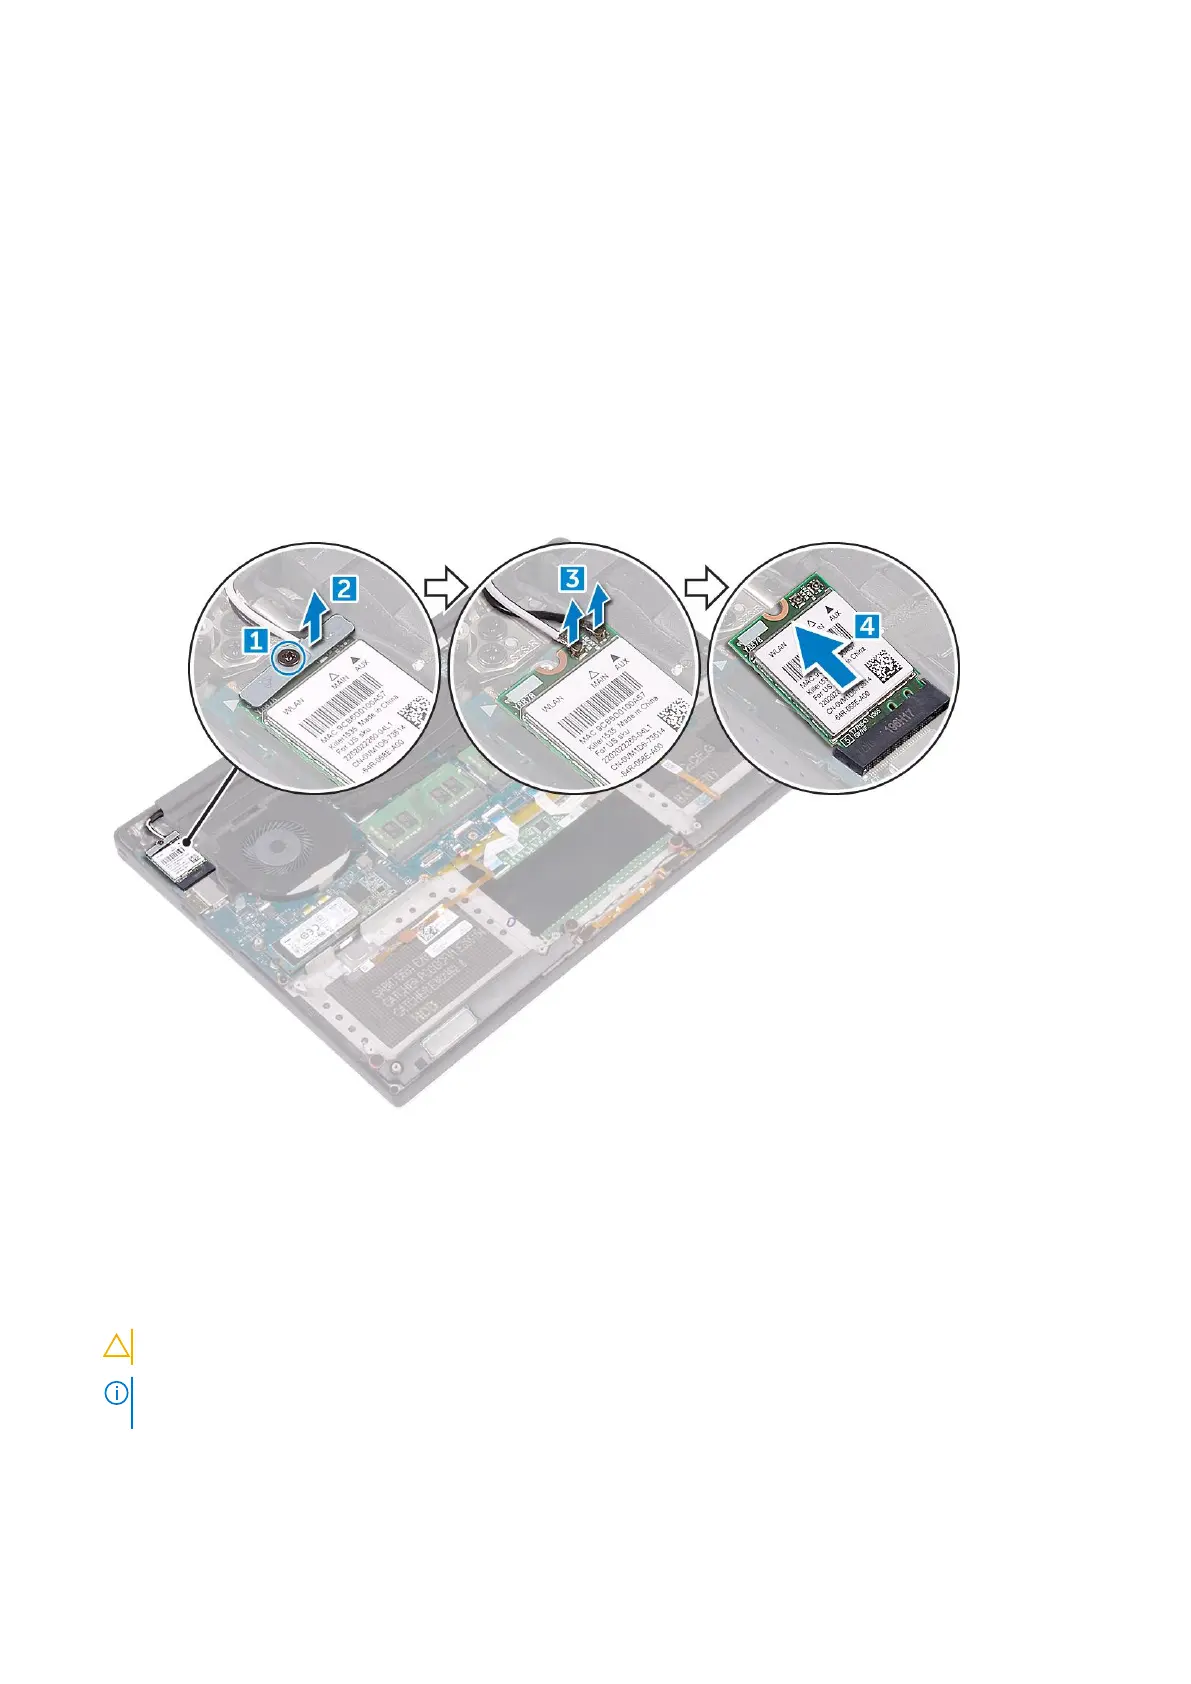
3. Perform the following steps to remove the WLAN card:
a. Remove the captive screw to release the bracket that secures the WLAN card to the computer [1] and lift the bracket
away from the computer [2].
b. Disconnect the antenna cables from the WLAN card [3].
c. Slide and remove the WLAN card from its connector on the board [4].
Installing the WLAN Card
Steps
1. Align the notch on the WLAN card with the tab on the WLAN-card connector on the system board.
2. Align the bracket which secures the WLAN card to the palmrest assembly.
3. Connect the antenna cables to the WLAN card.
CAUTION: To avoid damage to the WLAN card, do not place any cables under it.
NOTE: The color of the antenna cables is visible near the tip of the cables. The antenna-cable color scheme for the
WLAN card supported by your computer is as follows:
Disassembly and reassembly 25
 Loading...