To rem ov e t he st and:
1. Place t he m onit or on a flat surface.
2. Press and hold t he st and release but t on.
3. Lift t he st and up and away from t he m onit or.
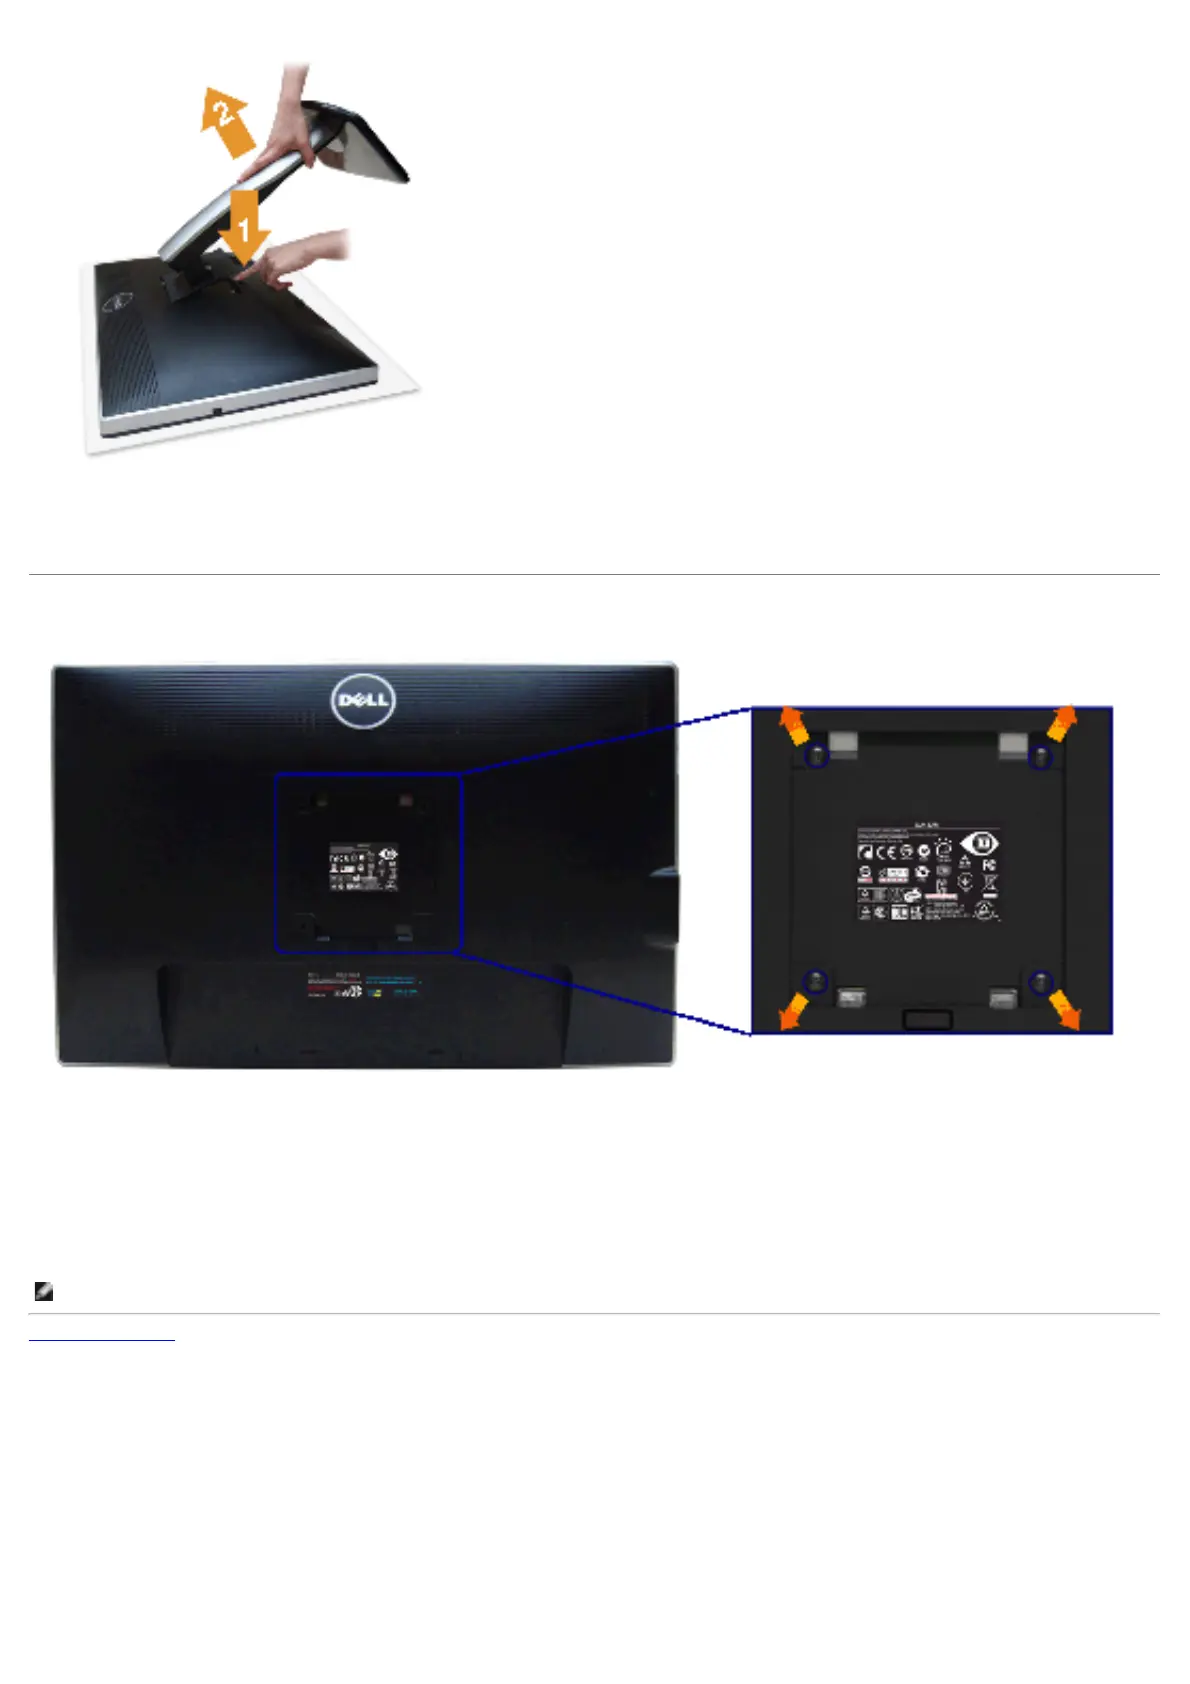
W a ll Mount ing ( Opt ional)
( Screw dim ension: M4 x 10 m m ) .
Refer t o t he instr uctions t hat com e w it h t he VESA- com patible wall m ount ing k it.
1. Place t he m onit or panel on a soft clot h or cushion on a st able, flat t able.
2. Rem ove t he st and.
3. Use a Philips crosshead screwdr iv er t o rem ove the four screws secur ing t he plast ic cov er.
4. Att ach t he m ount ing br acket fr om the wall m ount ing kit t o t he m onit or.
5. Mount t he m onit or on t he wall by following t he inst ruct ions t hat cam e w ith t he wall m ount ing k it.
N OTE: For use only wit h UL Listed Wall Mount Br acket w ith m inim um weight / load bearing capacity of 4.52 kg.
Back to Cont ent s Page
 Loading...