17 - English
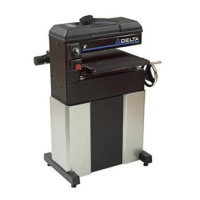
3. Move the tension lever (E) Fig. 39, to the right to the "LOOSEN" position (F). Remove the sanding belt (F) from both
sanding drums.
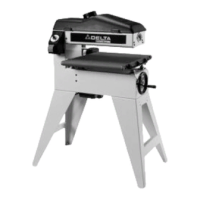
4. Place a new 6" x 48" sanding belt (F) Fig. 40 over both sanding drums (G). Ensure that the belt will travel in the
direction of the arrows printed on the inside of the belt.
5. Move the tension lever (E) Fig. 39 left to the "TIGHTEN" position.
6. Replace the support bracket, backstop and upper sanding drum guard, removed in STEPS 1 and 2.
7. Connect the electrical power to the sander. If the belt is not tracking properly, refer to section "TRACKING THE
SANDING BELT."
F
E
G
G
F
REPLACING THE SANDING DISC
Disconnect machine from power source.
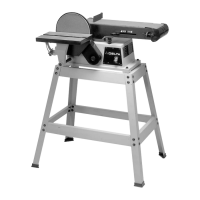
1. Loosen the screw (A) Fig. 41, and remove the table
assembly (B).
2. Remove the three screws (C) Fig. 42 and lower the
cover (D).
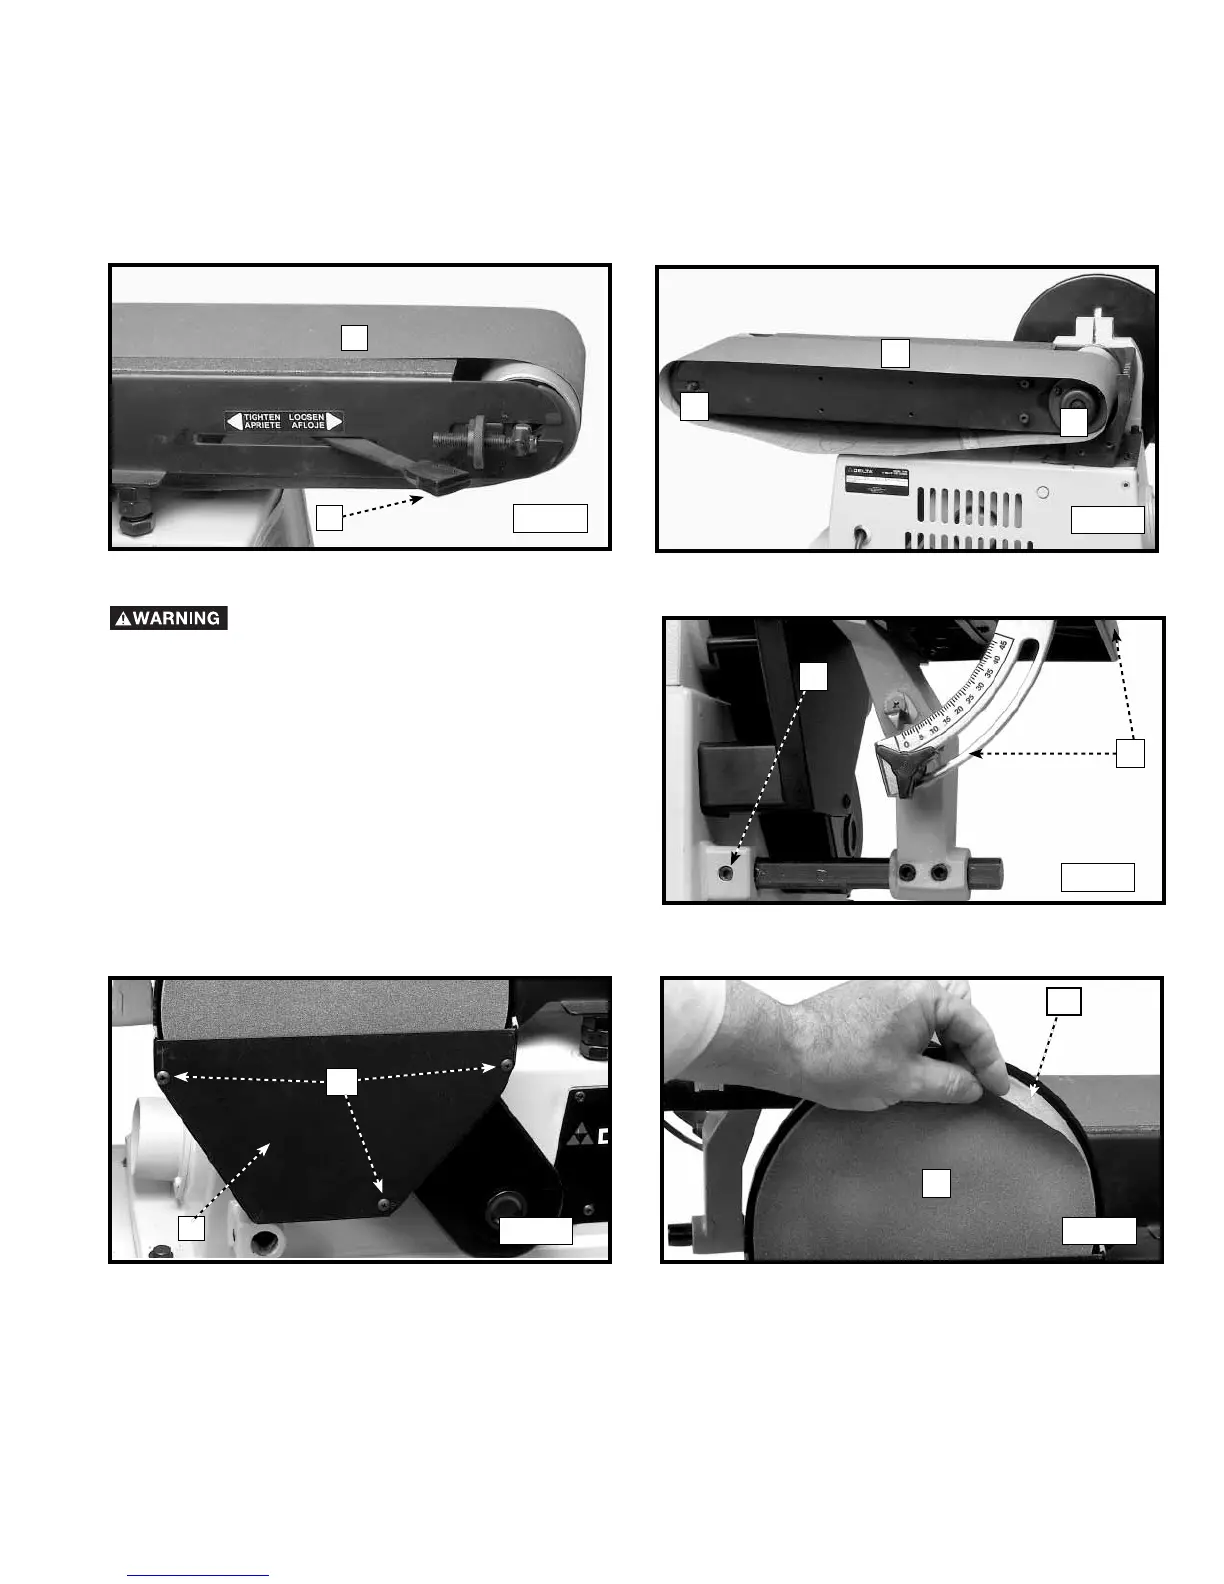
3. Peel off the old disc (E) Fig. 43.
4. Make sure the disc plate (F) Fig. 43 is clean. Peel
the backing from a new sanding disc. Press the new
sanding disc firmly into position on the disc plate (F).
Replace the lower cover and table assembly, removed
in STEPS 1 and 2.
C
D
E
F
Fig. 39
Fig. 40
Fig. 42 Fig. 43
A
Fig. 41
B
 Loading...