16
RCD-M37 / RCD-M37DAB / D-E500 / D-M37
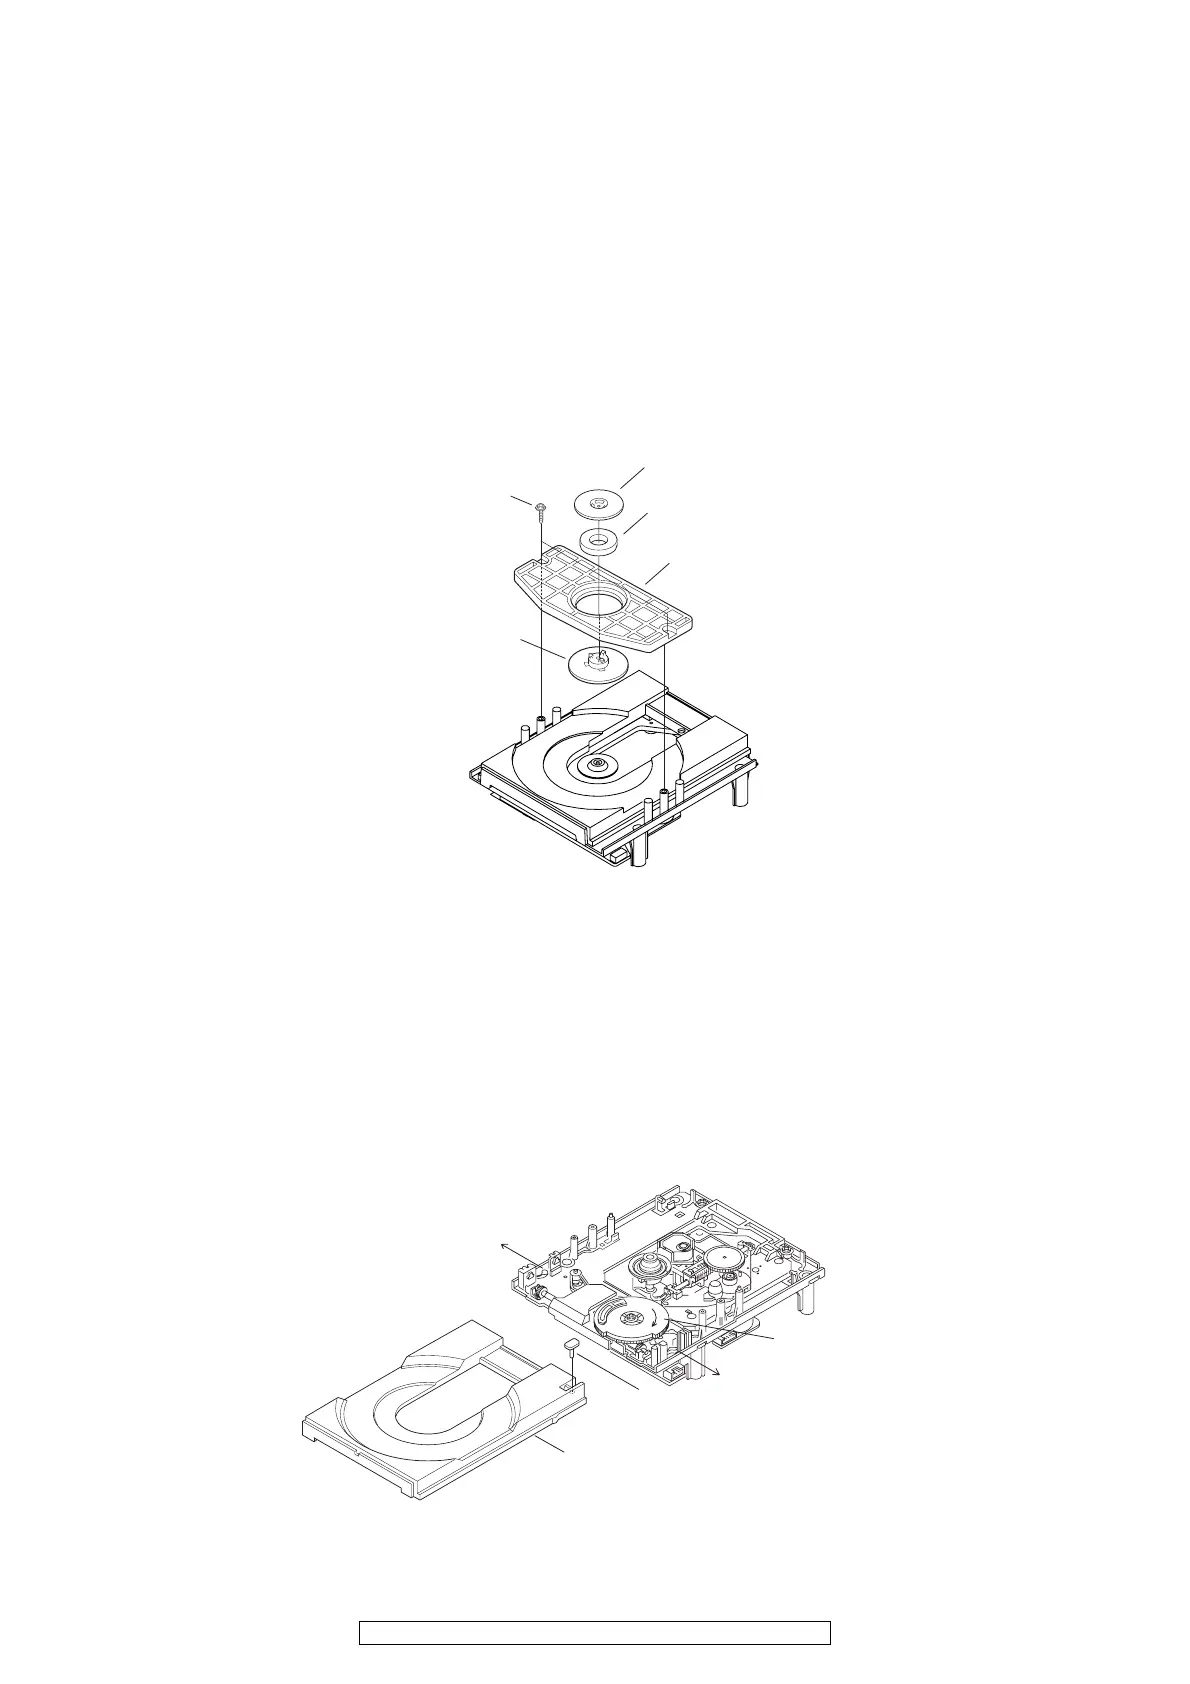
メカのはずしかた
(組み立てるときは、逆の順序でおこなってください。)
注意: 光ピックアップは、人体に帯電した静電気等で静電
破壊することがあります。光ピックアップ周辺を修
理する際には、必要な静電対策をおこなってくださ
い。
1. チャッキングプレート
(1) CD メカのねじ 2 本をはずし、チャッキングプレート
をはずす。
(2) 廃棄の際は、チャッキングプーリーからチャッキング
ヨークのフック3箇所をはずして分離する。
2. CD トレー
廃棄の際は、CD トレーを分離する。
(1) CD トレーの Swpin をはずす。
(2) ドライブギアを時計回りに廻して CD トレーを引き出
す。
(3) ストッパーを矢印方向に開き、CD トレーをはずす。
DISASSEMBLY OF MECHANIC
(Follow the procedure below in reverse order when reassembling.)
Caution : The optical pickup can damaged by sassily by
static electricity charged on human body. Take
necessary anti-static measures when repairing
around the optical pickup.
1. Chucking plate
(1) Remove 2 top screws, then detach the Chucking
plate.
(2) Detaching the Chucking pulley and chucking yoke by
removing the 3 hooks, when abandoning CD MECHA
ass’y.
2. CD tray
When abandoning CD MECHA ass’y, please detach the
CD tray.
(1) Detach the Sw pin on the CD tray.
(2) Open the CD tray by turning the Drive gear clockwise.
(3) Open the Stopper as shown in the fig., then detach CD
tray.
Chucking yoke
Chucking plate
Chucking pulley
Screws
Mugnet
Stopper
Stopper
Sw pin
CD tray
Drive gear
 Loading...