5) After connecting to the logger, click on one of
the SEND SETUP TABLE to Logger command
buttons on the Setup Table screen. Separate
buttons are available at the top and lower left of the Setup Table screen. Sending a new Setup
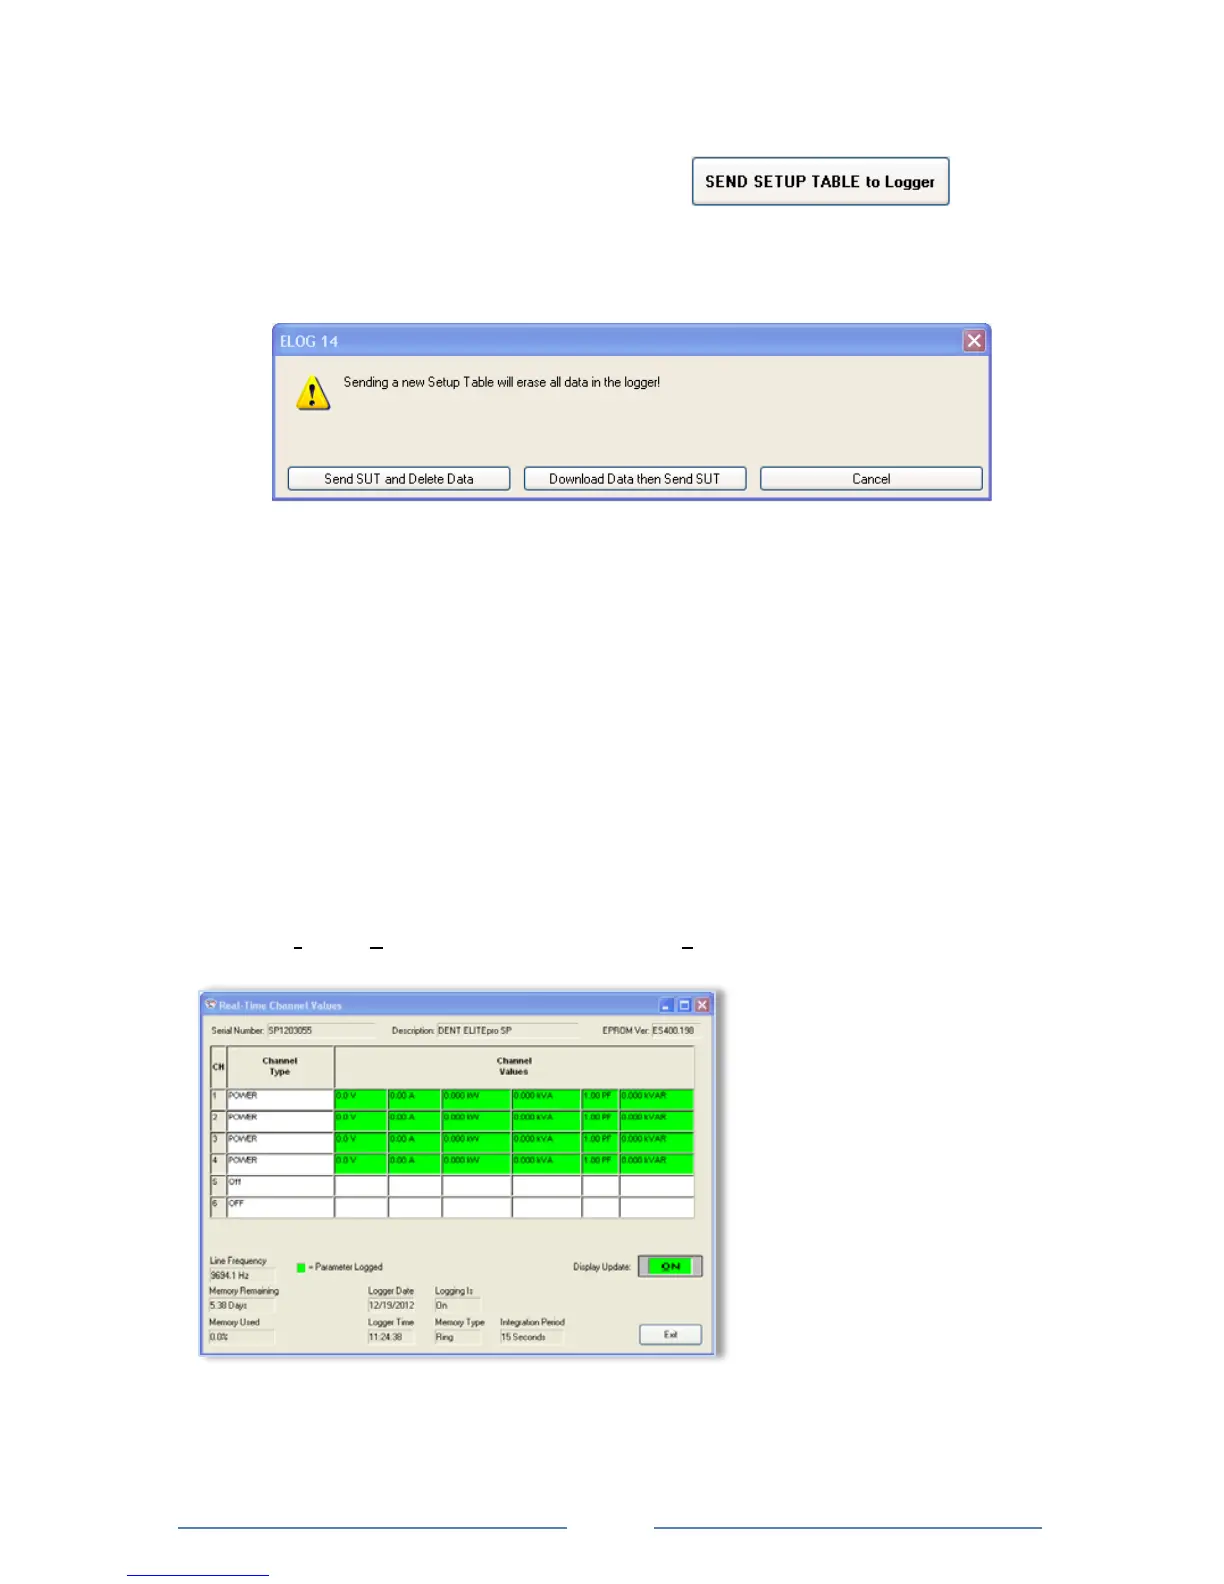
Table to the logger deletes any data still stored in the logger. ELOG 14 displays the following
dialog box to ensure desired data is not lost:
6) Click Send SUT and Delete Data. This loads the new Setup Table into the meter and clears the
data in the logger. The Logging is now ON dialog box briefly displays.
-or-
Click Download Data then Send SUT. The Select A Directory and A Name… dialog box
displays. Enter the name and location for the Setup Table data file. After the data is
downloaded to the PC and saved, ELOG automatically sends the new Setup Table to the
meter and starts logging.
-or-
Click Cancel.
ELOG automatically initiates logging when a Setup Table is downloaded to the Logger unless the
Data Logging delayed start time is being used.
View and Retrieve Logger Data
1) Select Logger > Display Real-Time Values > Show As Text to view the real-time values
measured by the logger.
Allow the logger to collect several minutes of data. Collected data can be saved as an .elog file on
the hard drive.

 Loading...