11
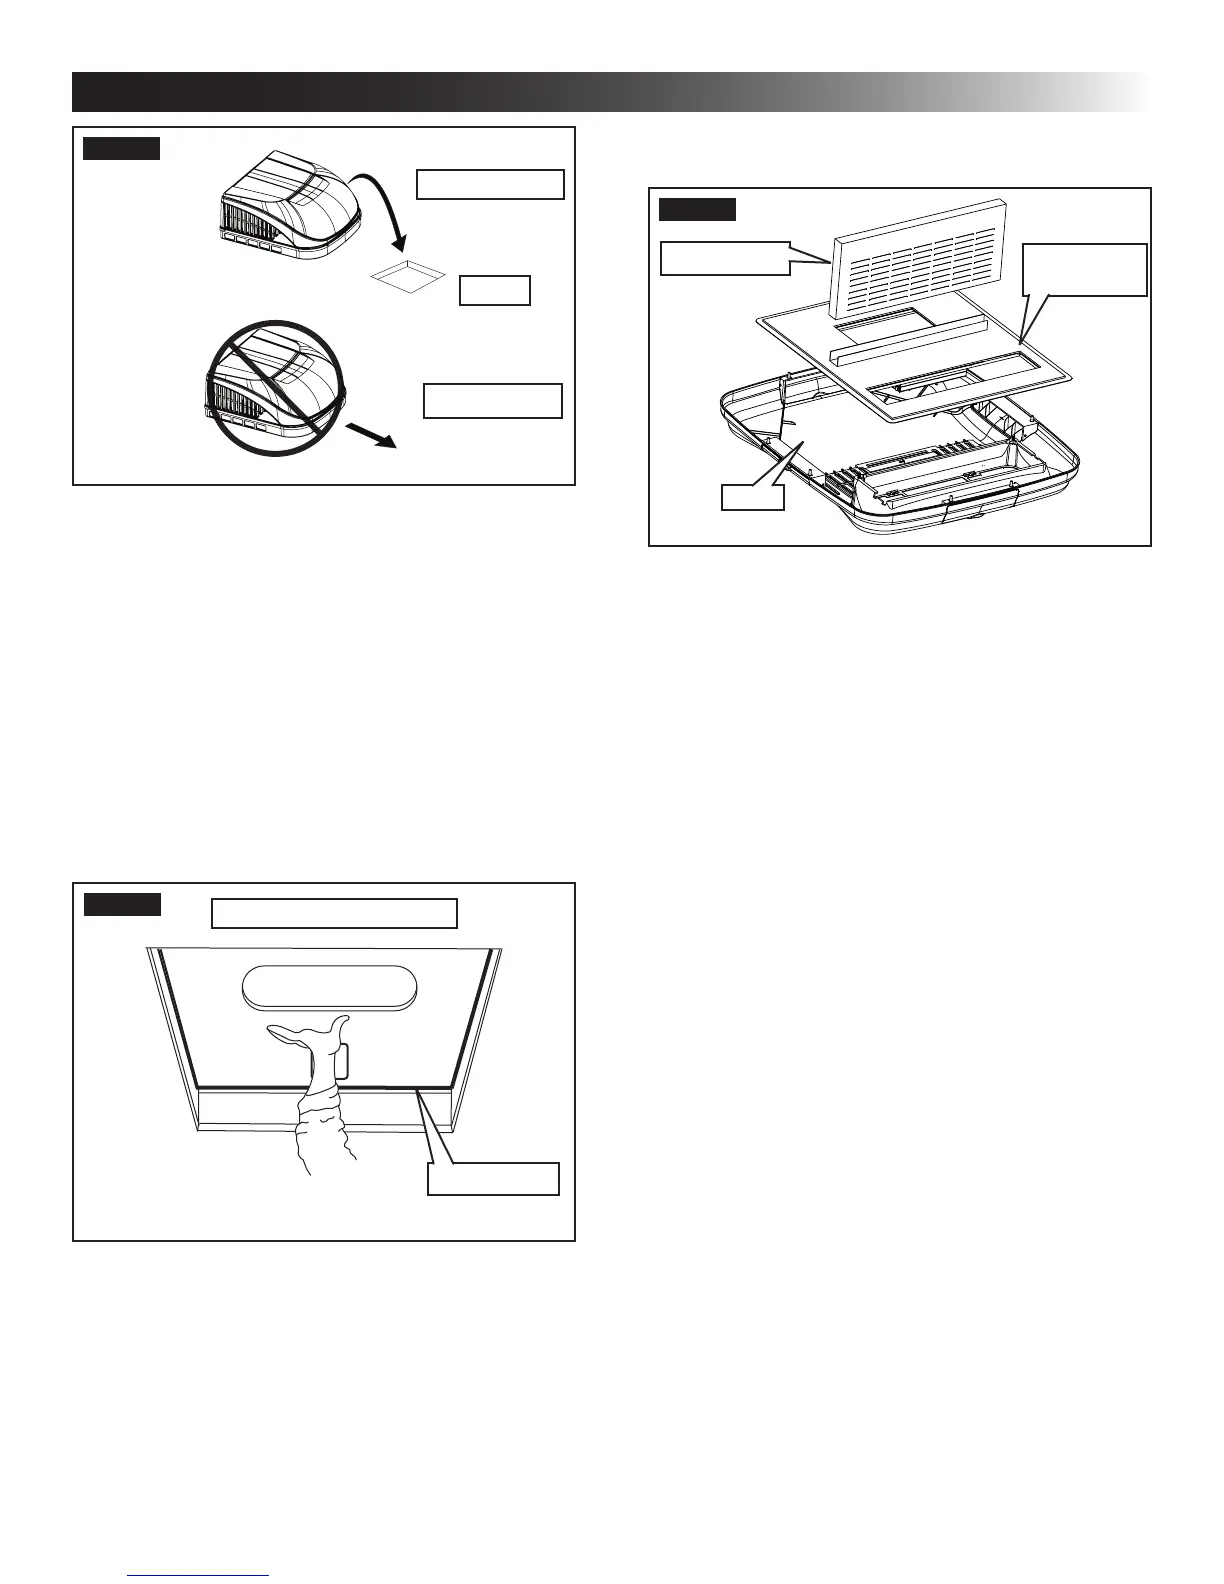
FIG. 14
Do Not Slide
Lift And Place
Front
4. Place the electronic control box kit (if applicable)
and the ADB kit inside the RV. These boxes con-
tain mounting hardware for the unit and will be
used inside the RV.
This completes the outside work. Minor
adjustments can be done from inside the
RV if required.
G. Installation Preparation
1. Check gasket alignment of the unit over the
roof opening and adjust if necessary. Unit may
be moved from below by slightly lifting. See
(FIG. 15).
FIG. 15
Center Unit From Below
Roof Gasket
2. Remove ADB and mounting hardware from car-
ton. See (FIG. 16).
FIG. 16
Duct Divider
Ceiling
Template
ADB
3. All models in this manual will use a four (4) bolt
pattern for installing the ADB kit.
H. 120 Vac Power Supply Connection
For models 541815A, 541816A, 541915A,
541916A, 551816A, 551916A, 641815H,
641816H, 641835H, 651815H, and 651816H
go to section "I".
1. ELECTRICAL SHOCK HAZARD.
Verify 120 Vac power is disconnected from RV.
Failure to obey this warning could result in death
or serious injury.
2. ELECTRICAL SHOCK HAZARD.
Provide grounding in compliance with all appli-
cable electrical codes. Failure to obey this warn-
ing could result in death or serious injury.
3. Reach up into the return air opening of the unit
and pull down the unit electrical cord and power
supply wires. See (FIG. 17) & (FIG. 18).
INSTALLATION INSTRUCTIONS

 Loading...