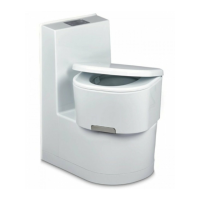
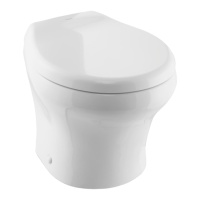
Installing the toilet Saneo B, Saneo C
26
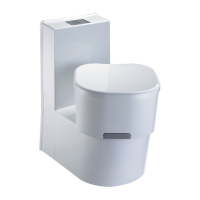
5.5 Setting up the Saneo BW, Saneo CW, Saneo BS,
Saneo CS, Saneo BLP, Saneo CLP toilets
These models have a wall connection console. The control and operating panel is
integrated in the wall connection console.
Models Saneo BW and Saneo CW feature a built-in water tank, while models
Saneo BS and Saneo CS do not have a water tank.
Set up all models with wall connection console directly against the room wall
(fig. f, page 14). A previously attached wall bracket is used to secure the toilet and
the wall bracket.
➤ Screw on the wall bracket, level, at the following height (fig. g, page 14):
Variant A:
Variant B:
– Saneo BW, Saneo BS: h = 661 mm
– Saneo CW, Saneo CS: h = 661 mm
– Saneo BLP, Saneo CLP: h = 478 mm
➤ Put the entire toilet module into the desired position in front of the wall bracket.
➤ Lift the toilet and hook the housing into the wall bracket (fig. h, page 15).
➤ Tightly fasten the base plate with four screws (fig. b 2, page 12).
➤ Insert the caps (fig. b 1, page 12).
➤ Slide in the mobile tank cassette (fig. i, page 15).
5.6 Water connection
I
➤ Connect the water supply using a smooth hose connection (fig. j 1, page 16).
The connection socket is not included in the scope of delivery.
Model A B C D
Saneo BW, Saneo BS 170 mm 96 mm 645 mm 652 mm
Saneo CW, Saneo CS 170 mm 96 mm 645 mm 652 mm
Saneo BLP, Saneo CLP 170 mm 96 mm 462 mm 469 mm
NOTE
For the Saneo xW models with an integrated water tank, the water con-
nection is installed at the factory.
Saneo-B-Saneo-C--I-EN-DE-FR-IT-NL.book Seite 26 Montag, 20. Februar 2017 10:08 10
 Loading...