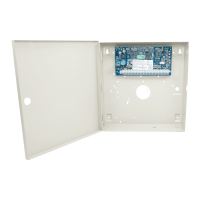
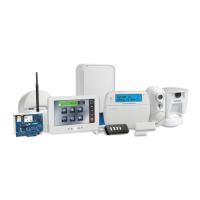
PowerSeries Neo Installation Guide
To confirm that a module has been successfully enrolled, use Installer
Programming section [903].
Enroll Wireless Devices
Wireless devices are enrolled via the wireless transceiver module and
Installer Programming section [804][000].
Auto Enrollment
To enroll a wireless device using this method, press and hold the Enroll
button on the device for 2-5 seconds until the LED lights then release the
button. The alarm panel automatically recognizes the device and the keypad
displays a confirmation message. The device ID and next available zone
number are displayed. Press [*] to accept or scroll to another available
zone number. Batteries must be installed in the wireless device in order to
enroll.
Pre-Enrollment
Pre-enrollment is a two step process. The first step requires entering each
device ID ([804][001]-[716]). Every wireless device has an ID printed on
the sticker attached to the device. The format is XXX-YYYY where:
l XXX identifies the type or model of the device
l YYYY is a short encrypted ID used by the system to identify the
specific device
Pre-enrollment can be done at a remote location and using DLS/SA. The
second step is to press the enrollment button on the device, usually done
on location. Installer Programming does not have to be entered at this step.
Both steps must be performed in order to complete the enrollment.
Programming Methods
The alarm system can be programmed using the following methods:
Table 1-6 Programming Methods
Method Description Procedure
Template
programming
Use pre-defined templates to
quickly apply basic programming
and to set up DLS downloading.
Press [899] at the
“Enter Section”
screen.
See Template
Programming below
for details.
DLS
programming
Download and apply programming
using DLS 5 v1.3 for Neo v1.0
panels and DLS 5 v1.4+ for Neo
v1.0 and up products.
For local DLS, use a
PC-Link cable and
laptop with DLS-5
software installed.
For remote DLS, use
a telephone line,
cellular network or the
Internet.
Installer
programming
Manually program all alarm system
and device options.
Press [*][8][installer
code] while the
system is disarmed.
Viewing Programming
Programming sections can be viewed from any system keypad. The
method for viewing and selecting programming options using LCD, LED
and ICON keypads depends on the keypad type used. See below for
specific instructions on programming with each keypad type.
Generally, programming options are accessed in the following way:
1. Enter Installer Programming mode ([*][8]).
2. Navigate to a specific programming section.
3. Select an option to view or change its programming.
All programming options are numbered and can be accessed by navigating
through the menu (LCD) or by keying in the program section number. For
toggle options, the name of the option is displayed (LCD) or LEDs 1-8 are
illuminated (LED and ICON).
Use the keypad numbers to toggle options on or off. Sections requiring
data input, such as phone numbers, display the full data in fields up to 32
characters long (LCD). To input data, use the scroll keys to select a
character then press the keypad button corresponding to the number/letter
required. Scroll to the next character and repeat the procedure as needed.
Press the [#] key to save changes and exit the program section.
Minimum Required Programming
Once basic installation of the alarm panel is complete, the following
general configuration options can be set.
[000] Language Selection
(LCD keypads only)
Use this section to set the language displayed by LCD keypads. To select a
language:
1. Enter Installer Programming: [*][8][Installer Code].
2. Enter programming section [000]>[000].
3. Key in the 2-digit number corresponding to the language required. See
below:
01 = English 11 = Swedish 22 = Bulgarian
02 = Spanish 12 = Norwegian 23 = Latvian
03 = Portuguese 13 = Danish 24 = Lithuanian
04 = French 14 = Hebrew 25 = Ukrainian
05 = Italian 15 = Greek 26 = Slovakian
06 = Dutch 16 = Turkish 27 = Serbian
07 = Polish 18 = Croatian 28 = Estonian
08 = Czech 19 = Hungarian 29 = Slovenian
09 = Finnish 20 = Romanian
10 = German 21 = Russian
Time and Date
Use this section to program the alarm system clock.
Menu: [*][6][Master Code] > Time and Date
Keypad: [*][6][Master Code] + 01
Enter time and date using the following format: (HH:MM); (MM-DD-
YY). Valid time entries are 00-23 hours, 00-59 minutes. Valid date entries
are 01-12 months, 01-31 days.
Setting Up a Partition
Partitions are added or removed from the system by applying or removing
a partition mask via Installer Programming section [200]. The number of
available partitions depends on the alarm panel model.
Bell/Siren Operation
Each partition must have a siren. The system siren connected to the bell
output of the alarm controller can be mounted in a central location within
hearing range of all partitions. Each partition can also have wireless sirens
activated only on the assigned partition.
Keypad Partition Setup
Keypads can be configured to control an individual partition or all
partitions. In general, a partition keypad controls the partition it is assigned
to. A Global keypad controls all partitions. Global keypads should be
- 6 -
 Loading...