18
Mount the inverter
Eaton 1250W / 1500W / 1800W Inverter Operation and Installation Guide IM SP180164 / Rev D www.eaton.com
Mount the inverter
To mount:
1. Remove the inverter from packaging and check that all components are present.
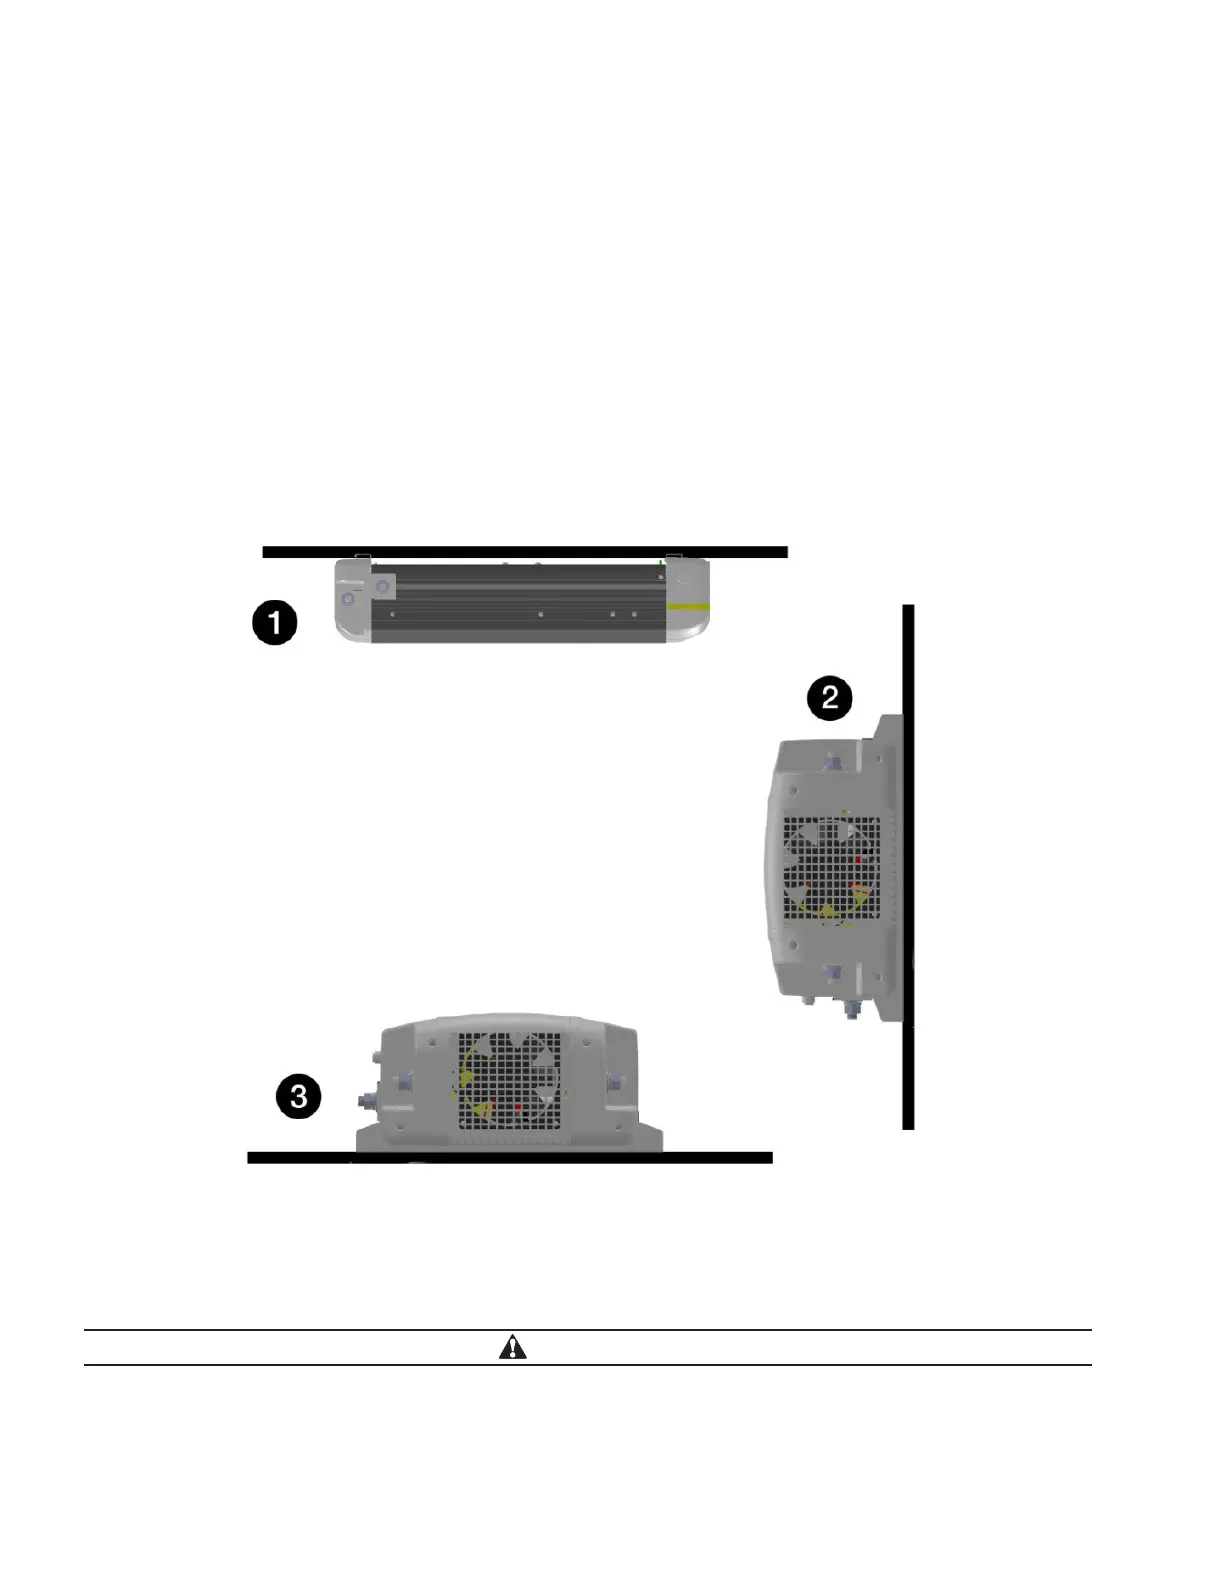
2. Select the mounting location (see illustration Figure 6. One of the following approved orientations is required:
• Under horizontal surface (1)
• Horizontal position on vertical surface (2)
• On horizontal surface (3)
3. Using the inverter as a template, mark and drill pilot-holes for the desired mounting location.
4. Fasten the inverter to the mounting surface using pan-head wood or sheet metal screws if mounting to a wall or bulk-
head. Do not block vents on bottom of inverter.
Figure 6. Approved mounting orientation
The inverter has a ground stud on the side near the DC end. Use this to connect the inverter’s chassis to ground; usually the vehicle’s chassis or DC negative bus ground using
a properly insulated copper wire. There are no restrictions on length for the equipment ground cable. General practice is to not have a ground cable within one (1) AWG of the
supply cable.
WARNING
Fire hazard - Improper grounding may result in a fire hazard. It is crucial to never operate the inverter without ensuring the
equipment is properly connected to ground.
 Loading...