I.B. 3A74792H08 Page 43
Effective 09/2014
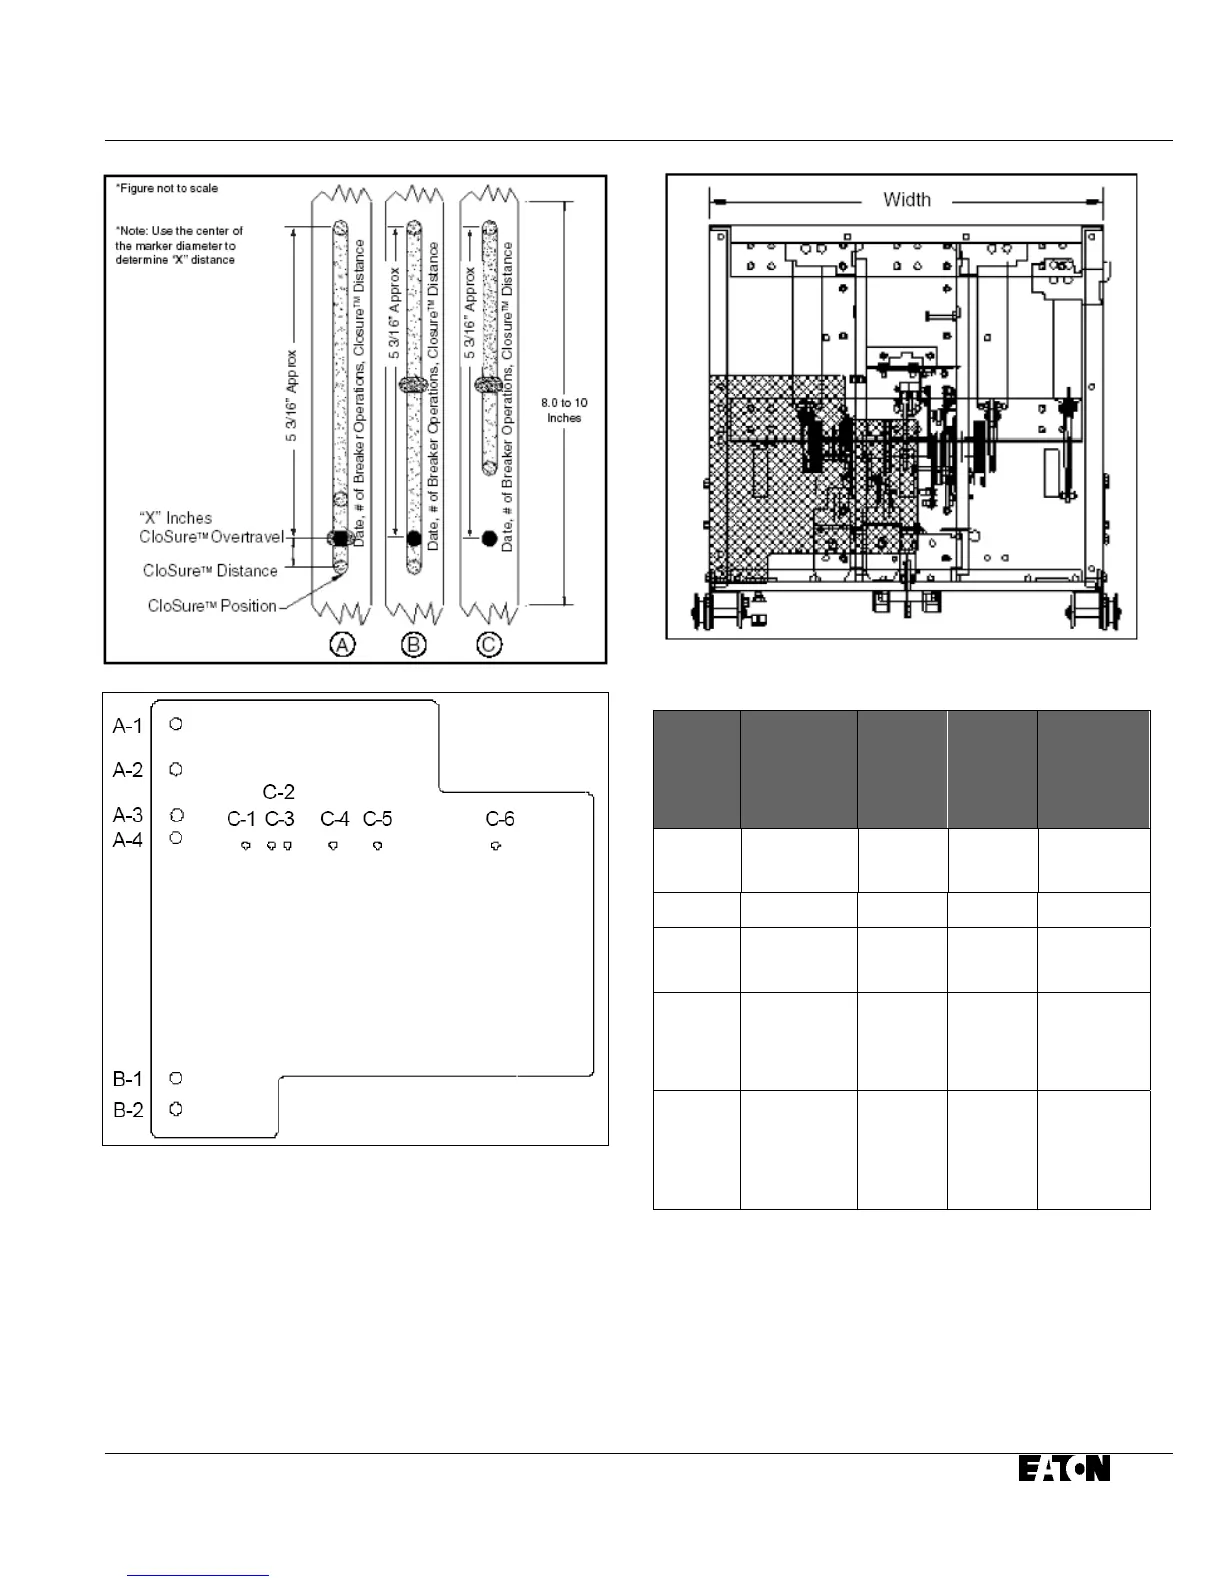
Figure 6-20 Illustrative Testing Tape Sample
Figure 6-21 Front View of CloSure
TM
Tool Showing
Mounting/Testing Hole Locations (6352C49H01)
Step 13 - Evaluate the CloSure
TM”
performance by
comparing the test tape with the illustrations in Figure
6-
20.
If the marking is similar to 6-20A, measure the over
travel “x”: If “x” is greater than or equal to 0.6 inches, the
circuit breaker performance is satisfactory. If “x” is less
than 0.6 inches or if the marking is similar to
6-20B or 6-
20C,
immediately contact the Product Integrity Center
Figure 6-22 Typical Circuit Breaker Front View with
CloSure
TM
Tool Attached (approximate mechanism
chassis width)
Breaker
Line
Approximate
Mechanism
Cabinet
Width (inch)
Upper
Mounting
Hole
Lower
Mounting
Hole
Marker
Placement
Hole
DHP-VR
20
27
A1
A2
B2
B1
C2
C1
VCPW-ND
20/21 A1 B2 C2
VCP-W
27
33
A1
A2
B2
B2
C5
C6
VCP-WR
18
20
27
A1
A1
A1
B2
B2
B2
C1
C2
C5
W-VAC,
W-VACR
18
25
33
A1
A1
A2
B2
B1
B2
C1
C4
C6
Table 6.3 Closure
TM
Tool Mounting/Testing Locations
by Circuit Breaker Type
for Technical Support at (412) 787-6518.
Step 14 - Remove the CloSure
TM
Tool. Reassemble
the front cover onto the circuit breaker. Return the
circuit breaker to its original configuration and setup.
 Loading...