16
Series NRX Low Voltage Power (Air)
Circuit Breakers User Manual
EATON CORPORATION www.eaton.com
Instructional Book MN01301003E
Effective July 2011
Section 3: Breaker General Operation
CAUTION
MAKE CERTAIN THAT THE CASSETTE IS PROPERLY MOUNTED OR SEATED
SECURELY ON A WORK TABLE BEFORE ATTEMPTING TO HAVE THE BREAKER
FULLY EXTENDED ON THE CASSETTE’S DRAWOUT RAILS. FAILURE TO
COMPLY COULD RESULT IN THE CASSETTE TIPPING FORWARD RESULTING IN
EQUIPMENT DAMAGE AND/OR BODILY INJURY.
Installing drawout circuit breaker into cassette
In a structure equipped for a drawout circuit breaker, a bolted-in
cassette with movable, captive extension rails supports the circuit
breaker.
CAUTION
IT IS IMPORTANT TO TAKE CARE WHEN PLACING A DRAWOUT CIRCUIT
BREAKER ON ITS EXTENSION RAILS. IF THE CIRCUIT BREAKER IS NOT
PROPERLY SEATED ON THE RAILS, THE BREAKER COULD FALL CAUSING
EQUIPMENT DAMAGE AND/OR BODILY INJURY.
To install the drawout circuit breaker, proceed first with the following
four steps:
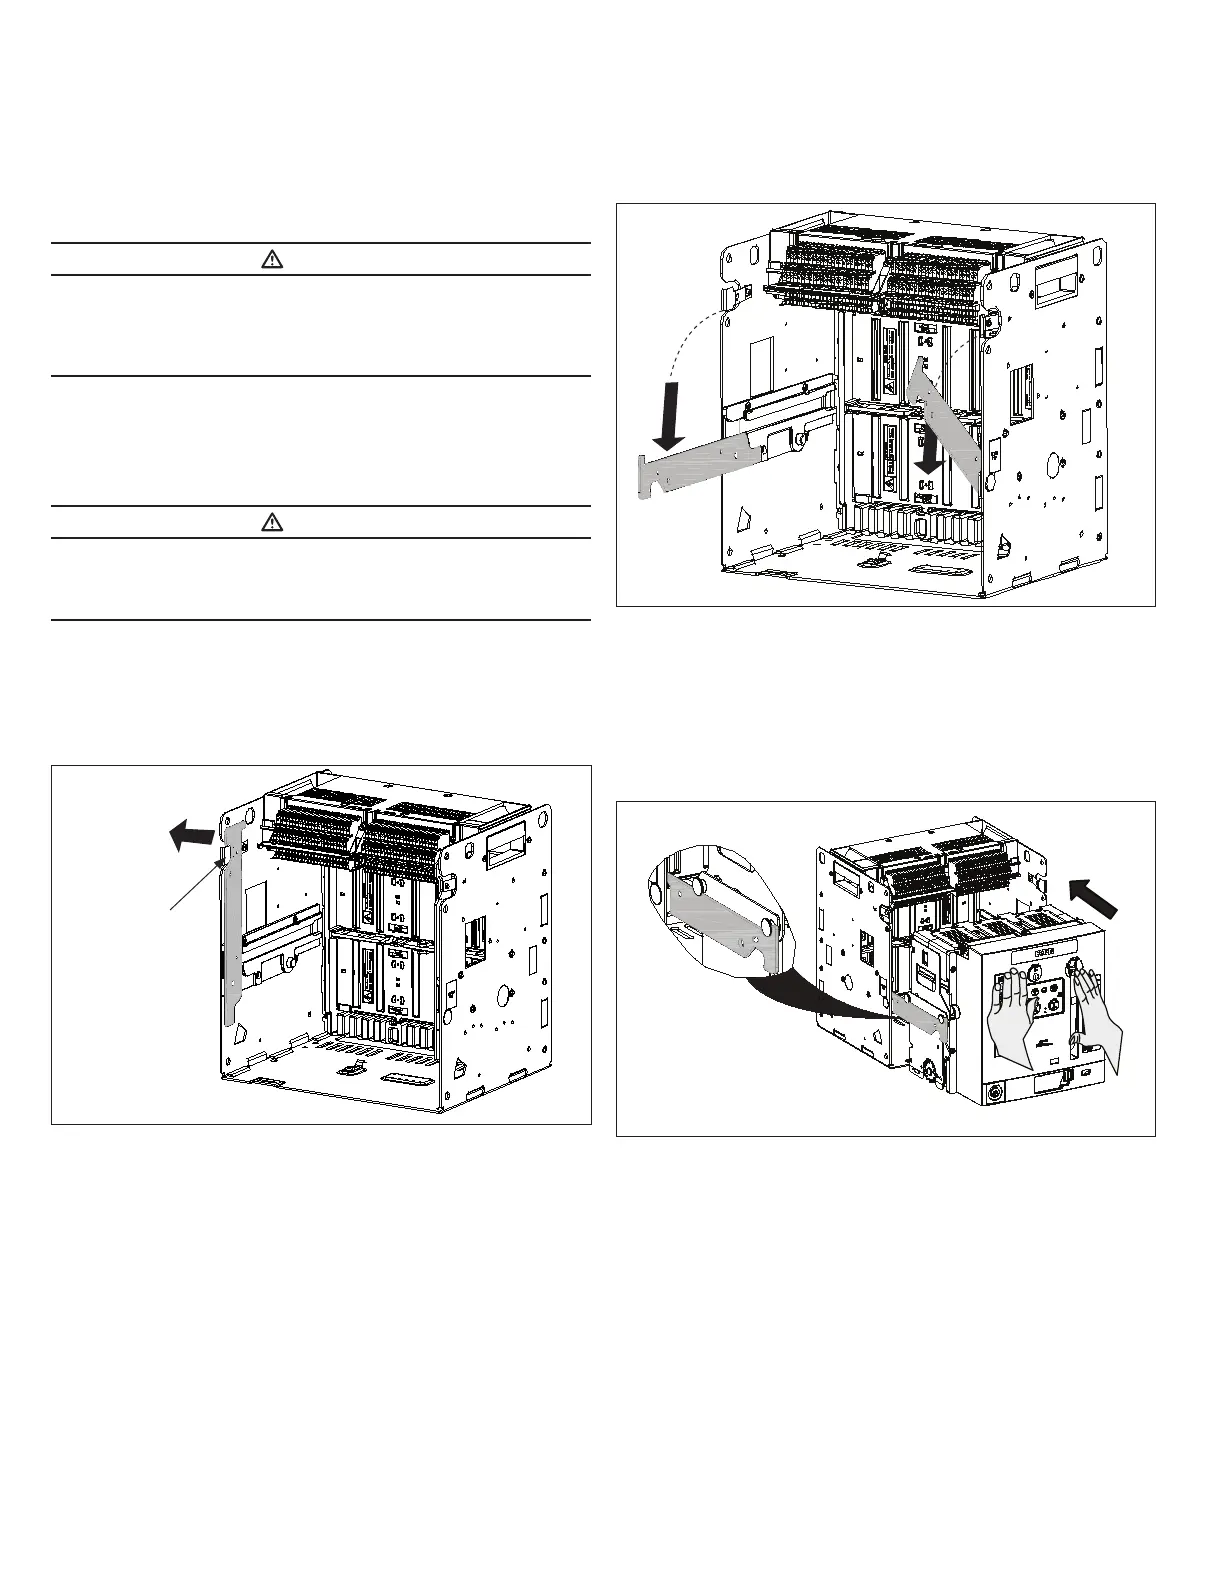
Step 1: Press the extension rail spring away from the extension rail
until the retaining pin is fully released. Each drawout rail is provided
with a curved cutout to accommodate a gloved hand.
Extension
Rail Spring
Figure 10. Step 1
Step 2: Lower both rails down into their extended and locked position.
Figure 11. Step 2
Step 3: Carefully place the circuit breaker on the extended rails. Be
certain that the circuit breaker’s metallic support wheels (two on each
side of the circuit breaker) are properly seated on the extension rails.
With breaker properly seated on the extension rails slide the breaker
fully into the cassette and raise both rails up into the cassette so
that they engage the extension rail spring. The breaker is now in the
cassette in the DISCONNECT position.
Figure 12. Step 3
Step 4: To remove the breaker from the cassette lower both rails down
into their extended and locked position. Using the charging handle pull
the breaker out onto the extension rail.
 Loading...