46
Series NRX Low Voltage Power (Air)
Circuit Breakers User Manual
EATON CORPORATION www.eaton.com
Instructional Book MN01301003E
Effective July 2011
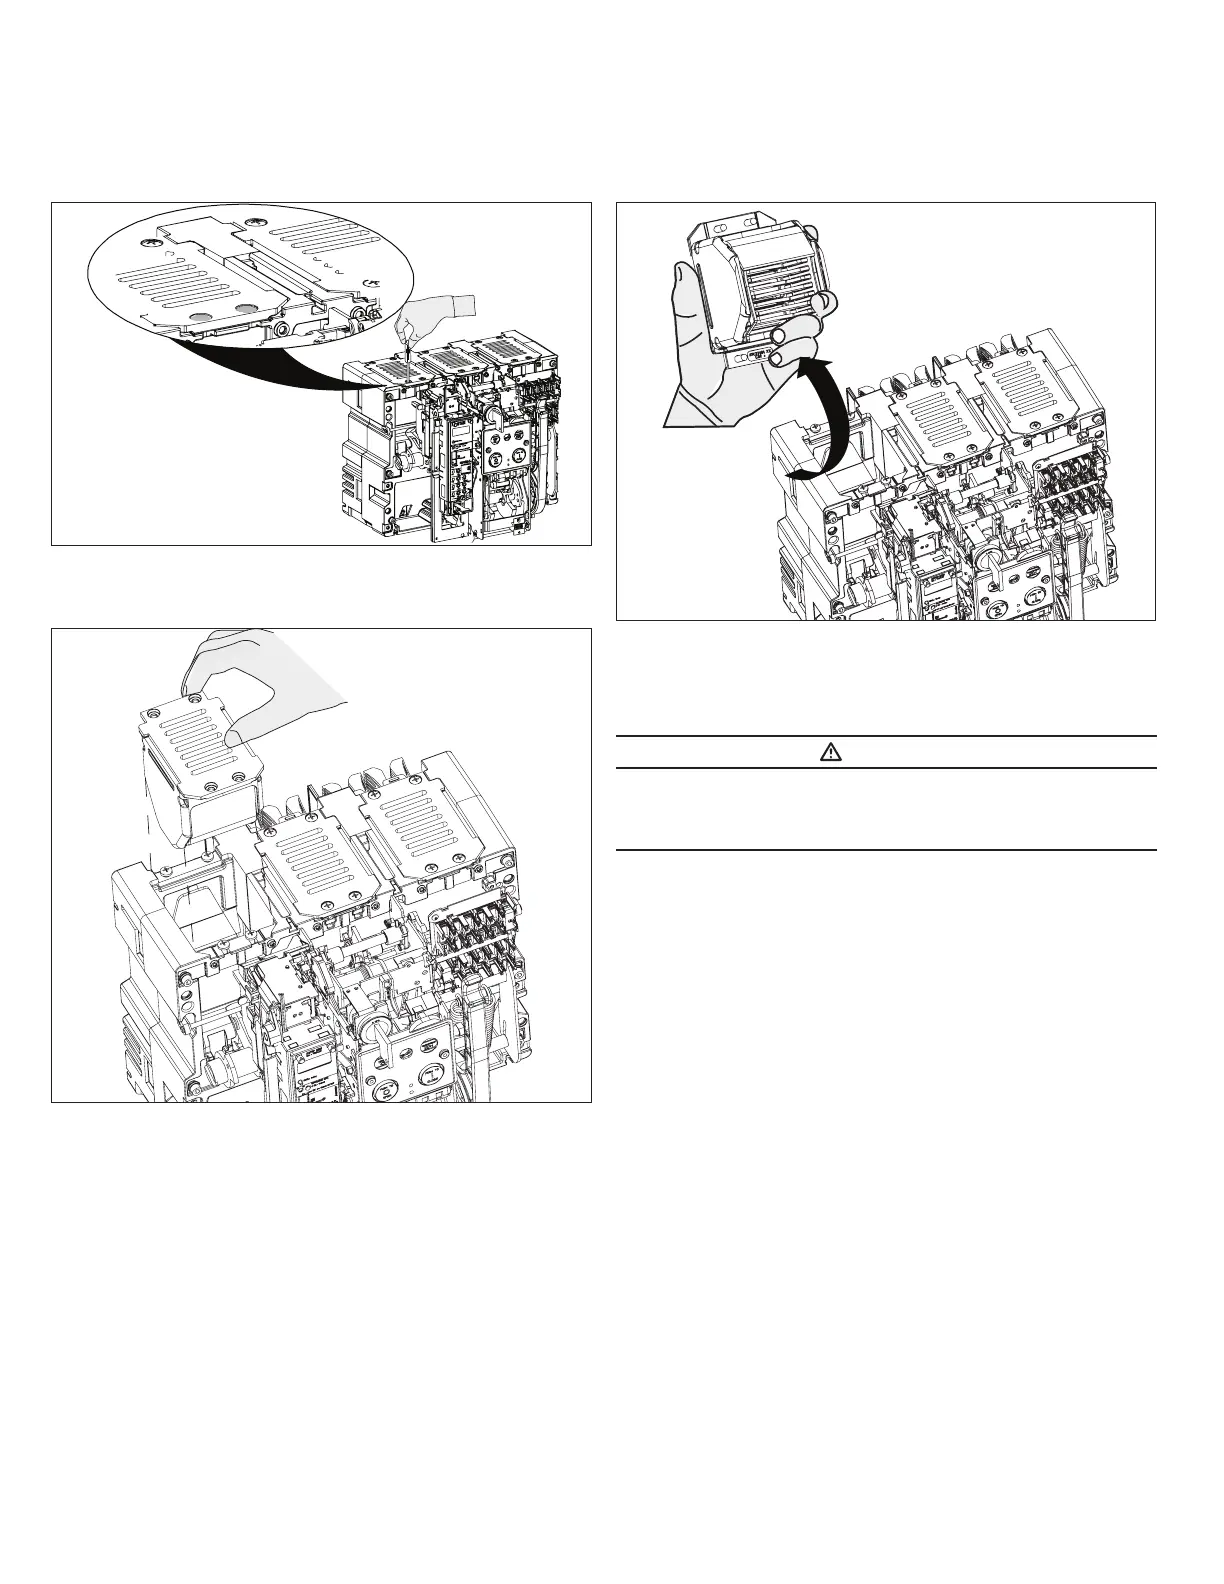
Figure 49. Step 1
Step 2: Lift the arc chute up and out of the arc chamber.
Figure 50. Step 2
Step 3: Follow the same procedure to remove the remaining two arc
chutes.
Step 4: Inspect the arc chutes for obvious damage and turn them over
to inspect the inside for obvious damage or dirt accumulation. Series
NRX arc chutes cannot be replaced. If damage or dirt accumulation is
observed, contact Eaton for additional information.
Figure 51. Step 4
Step 5: When inspections are complete, secure arc chutes in place
with their mounting screws.
WARNING
ARC CHUTES AND THEIR COVER PLATES MUST ALWAYS BE SECURED
PROPERLY IN PLACE BEFORE A BREAKER IS INSTALLED IN ITS
COMPARTMENT. FAILURE TO DO SO COULD RESULT IN EQUIPMENT
DAMAGE, BODILY INJURY, OR EVEN DEATH.
Primary contact inspection
With the arc chutes removed, visually inspect each primary contact
structure for signs of wear and/or damage with the circuit breaker
open. Series NRX primary contacts/carrier assemblies cannot be
replaced. Contact Eaton for additional information.
Miscellaneous modifications and/or changes
The topics discussed here cover additional actions that relate to
updating, maintaining, or repairing Series NRX circuit breakers. Some
actions may not be able to be accomplished in the field. In addition,
this information does not include most accessory devices that are
covered by separate instruction leaflets dedicated to individual devices.
Trip unit or rating plug replacement
To replace a trip unit or rating plug, refer to Instructional Leaflet
IL01301051E (Digitrip520) or IL01301064E (Digitrip 1150) dedicated to
the trip unit.
Current sensor replacement
The Rogowski type current sensors are not field replaceable.
Frame rating module replacement
The frame rating module is not field replaceable.
 Loading...