45
Instructional Book MN01301003E
Effective July 2011
Series NRX Low Voltage Power (Air)
Circuit Breakers User Manual
EATON CORPORATION www.eaton.com
,V
,V
,V,V
,V
2
1
3
4
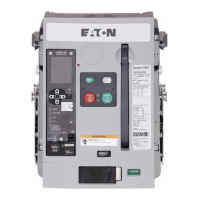
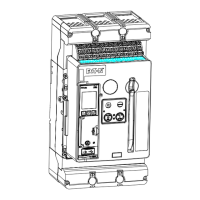
Figure 48. Typical Nameplate Information
Manual operation functional test
Perform the following seven steps and verify if the circuit breaker is
appropriately opened or closed as indicated by the indicator flags on
the front of the breaker (Figure 6).
Step 1: Charge mechanism springs using charging handle or motor
operator.
Step 2: Press ON pushbutton to close breaker manually.
Step 3: Charge mechanism springs using either charging handle or
motor operator (If using motor operator, disconnect power to motor to
prevent automatic recharging).
Step 4: Press OFF pushbutton to manually open breaker.
Step 5: Press ON pushbutton to manually close breaker.
Step 6: Press OFF pushbutton to manually open breaker.
Step 7: Repeat first six steps three times.
Electrical operation functional test
This test procedure is based on the assumption that the circuit
breaker is equipped with both a shunt trip and spring release. If one
of the accessories is missing, use the manual button to replace the
accessory’s function. Perform the following seven steps and verify if
the circuit breaker is appropriately opened or closed as indicated by
the indicator flags on the front of the breaker (Figure 6).
Step 1: Charge mechanism springs using charging handle or motor
operator.
Step 2: Close breaker by applying rated voltage to the spring release
accessory.
Step 3: Charge mechanism springs using either charging handle or
motor operator. (If using motor operator, disconnect power to motor
prevent automatic recharging.)
Step 4: Open breaker by applying rated voltage to shunt trip
accessory.
Step 5: Close breaker using spring release accessory.
Step 6: Open breaker using shunt trip accessory.
Step 7: Repeat first six steps three times.
Trip unit test procedure
Refer to trip unit manual entitled “Functional Test Kit Instructions” for
detailed information on the Series NRX circuit breaker test procedure.
Arc chute inspection
When a circuit breaker experiences a high level fault or during
regularly scheduled maintenance periods, the arc chutes should be
inspected for any kind of damage or dirt. Be especially alert for signs
of significant erosion within the arc chute.
IMPORTANT
FIXED BREAKERS HAVE AN ARC HOOD POSITIONED OVER THE ARC CHUTES/
ARC CHAMBERS THAT MUST BE REMOVED FIRST. REFER TO IL01301014E FOR
INSTALLATION AND REMOVAL INSTRUCTIONS. AFTER THE INSPECTION,
REINSTALL THE ARC HOOD.
To remove the arc chutes and inspect both the arc chutes and arc
chambers, proceed with the following five steps.
Step 1: Using a phillips screwdriver, remove four top-inserted
mounting screws.
 Loading...