12 Printer Installation
Load Cards
If you plan to insert cards through the exception slot, make sure that blank cards are available
near the printer.
Handle cards by the edges only, or wear approved card inspection gloves.
Cards can stick together. Slide or fan the cards to separate the edges before placing them in
the input hopper.
Insert ISO magnetic stripe cards with the stripe (back side) facing down and to the right.
Insert smart cards with the smart card chip facing up and toward the back of the hopper.
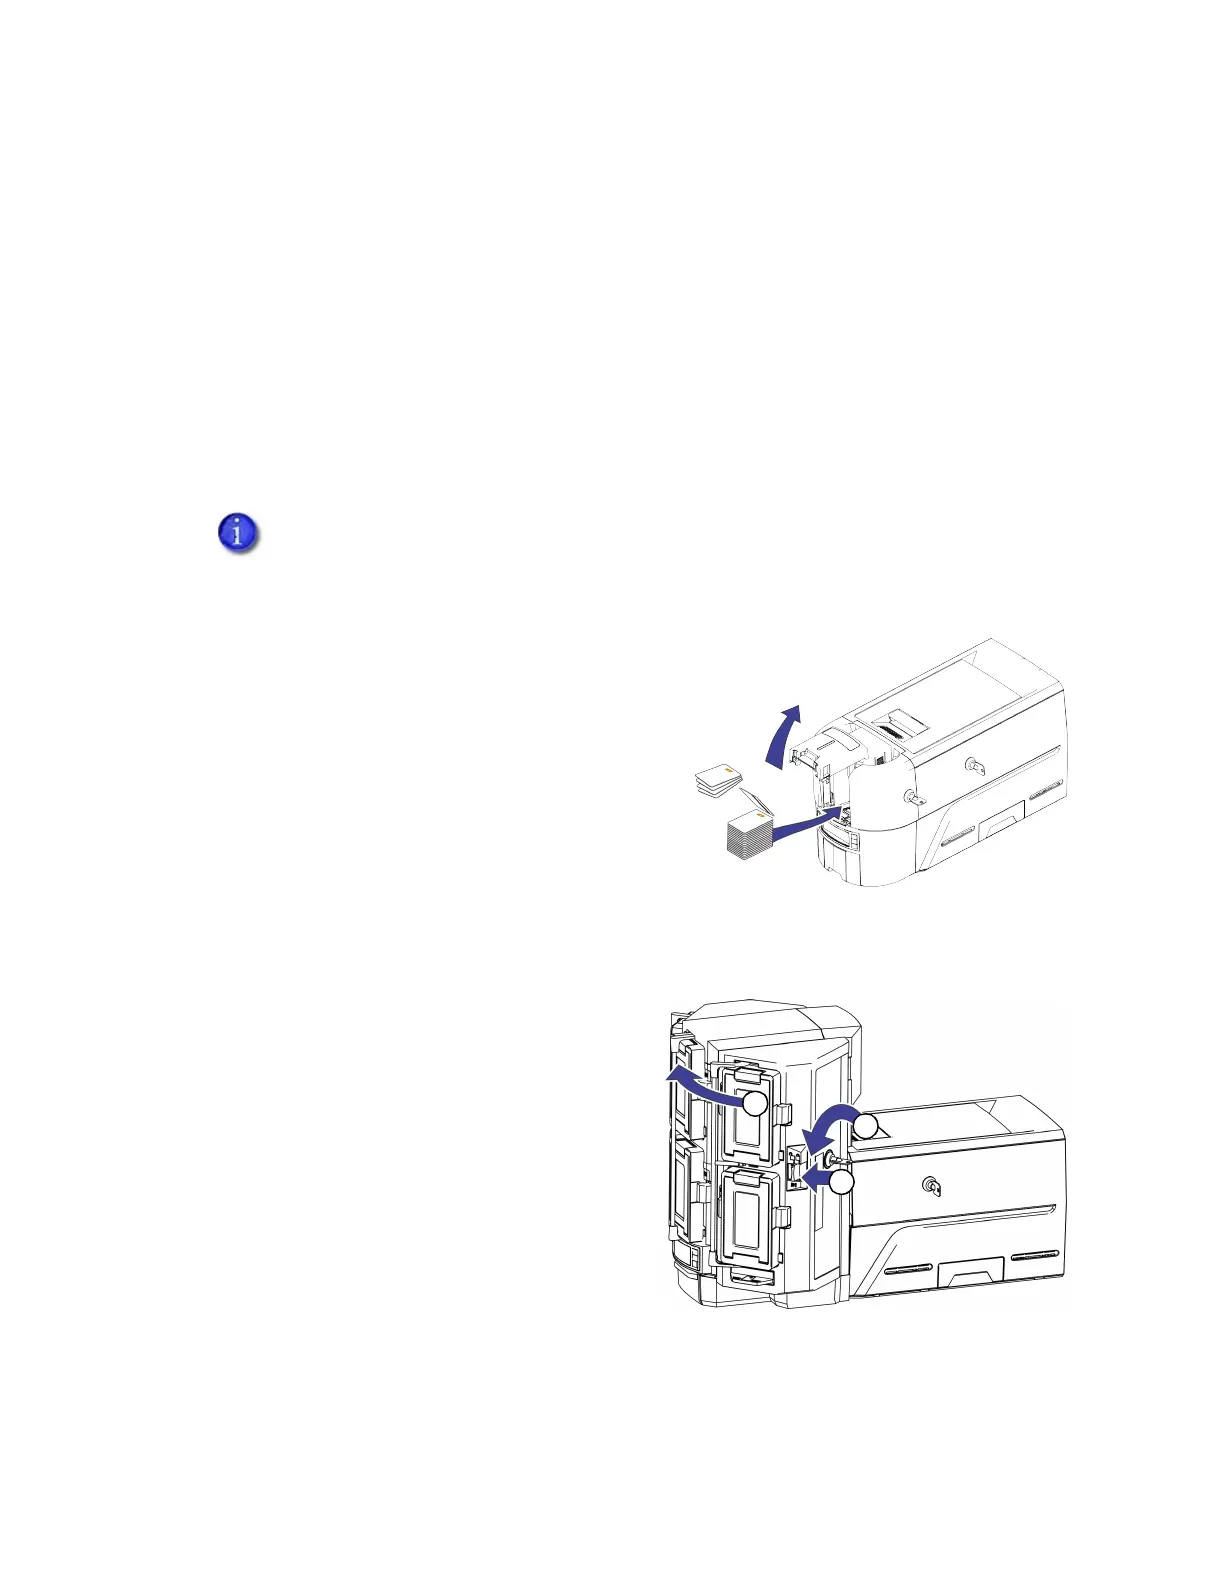
Single-Hopper Printer
1. Open the input hopper door. If your printer has
locks, unlock the hopper lock to open the input
hopper.
2. Load the cards into the input hopper. The
hopper can hold up to 125 cards.
3. Close and lock the input hopper.
Multi-Hopper Printer
1. Unlock the multi-hopper lock.
2. Slide the lock bar release button (B1) to the
left to release the hopper lock bars.
3. Rotate a lock bar to the left to provide
access to the multi-hopper input cartridge
that you want to load.
A diagram inside the input hopper shows the correct orientation for each type of card.
1
2
3
 Loading...