Connecting the Scanner to the Computer
Follow these steps to connect the scanner to your computer
and, for Windows 95, to configure the scanner port:
1.
Turn off your computer, scanner, and any other peripheral
devices.
e
Caution:
Be sure that your computer, scanner, and other peripheral
devices are turned off before you plug in the cable.
2.
Connect the 25-pin end of the parallel cable to the parallel
port on your computer; then tighten the connector screws.
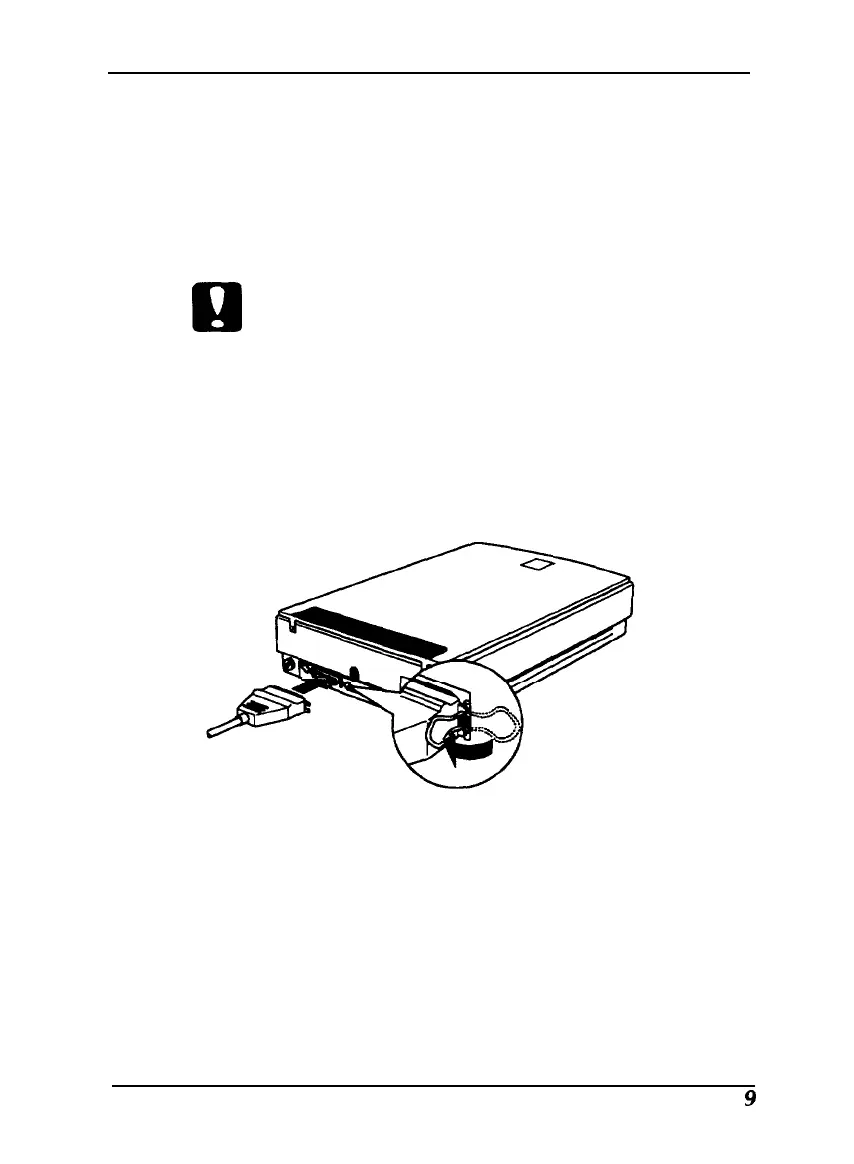
3.
Connect the other end of the cable to the scanner’s parallel
interface and fasten it with the wire clamps, as shown.
4.
Turn on the scanner by pressing the
OPERATE
button. The
green
OPERATE
light on the top right side of the scanner
comes on. The
READY light
comes on when the scanner has
warmed up.
5.
Turn on your monitor and all your other peripheral devices.
Then turn on the computer. (Always turn on the scanner
before the computer.)
 Loading...