10
Maintenance (continued)
MOTOR AND SEAL SERVICE
NOTE: Refer to the Replacement Parts section for illustrations of part and part numbers referenced in this section.
DISASSEMBLY AND INSPECTION
1. Remove the screen, volute, and impeller as previously stated
and drain oil from the motor housing.
2. Loosen the gland nut (17) and slide it back on the cord (18).
3. Remove the hex nuts (20) and lock washers (21) from the
studs (26) and pull the housing end (19) from the motor
housing (25).
4. Disconnect the cord set (18) and check for damage or cracks.
Replace if required.
5. Remove the grommet (15) and friction rings (16) from the
housing end (19). Replace if damaged.
6. Pull the motor housing (25) from the bearing sleeve (9).
7. Remove the V-ring (6) from the shaft.
8. Loosen the motor screws and pull the bearing sleeve (9) with
the shaft seal (8) from the motor.
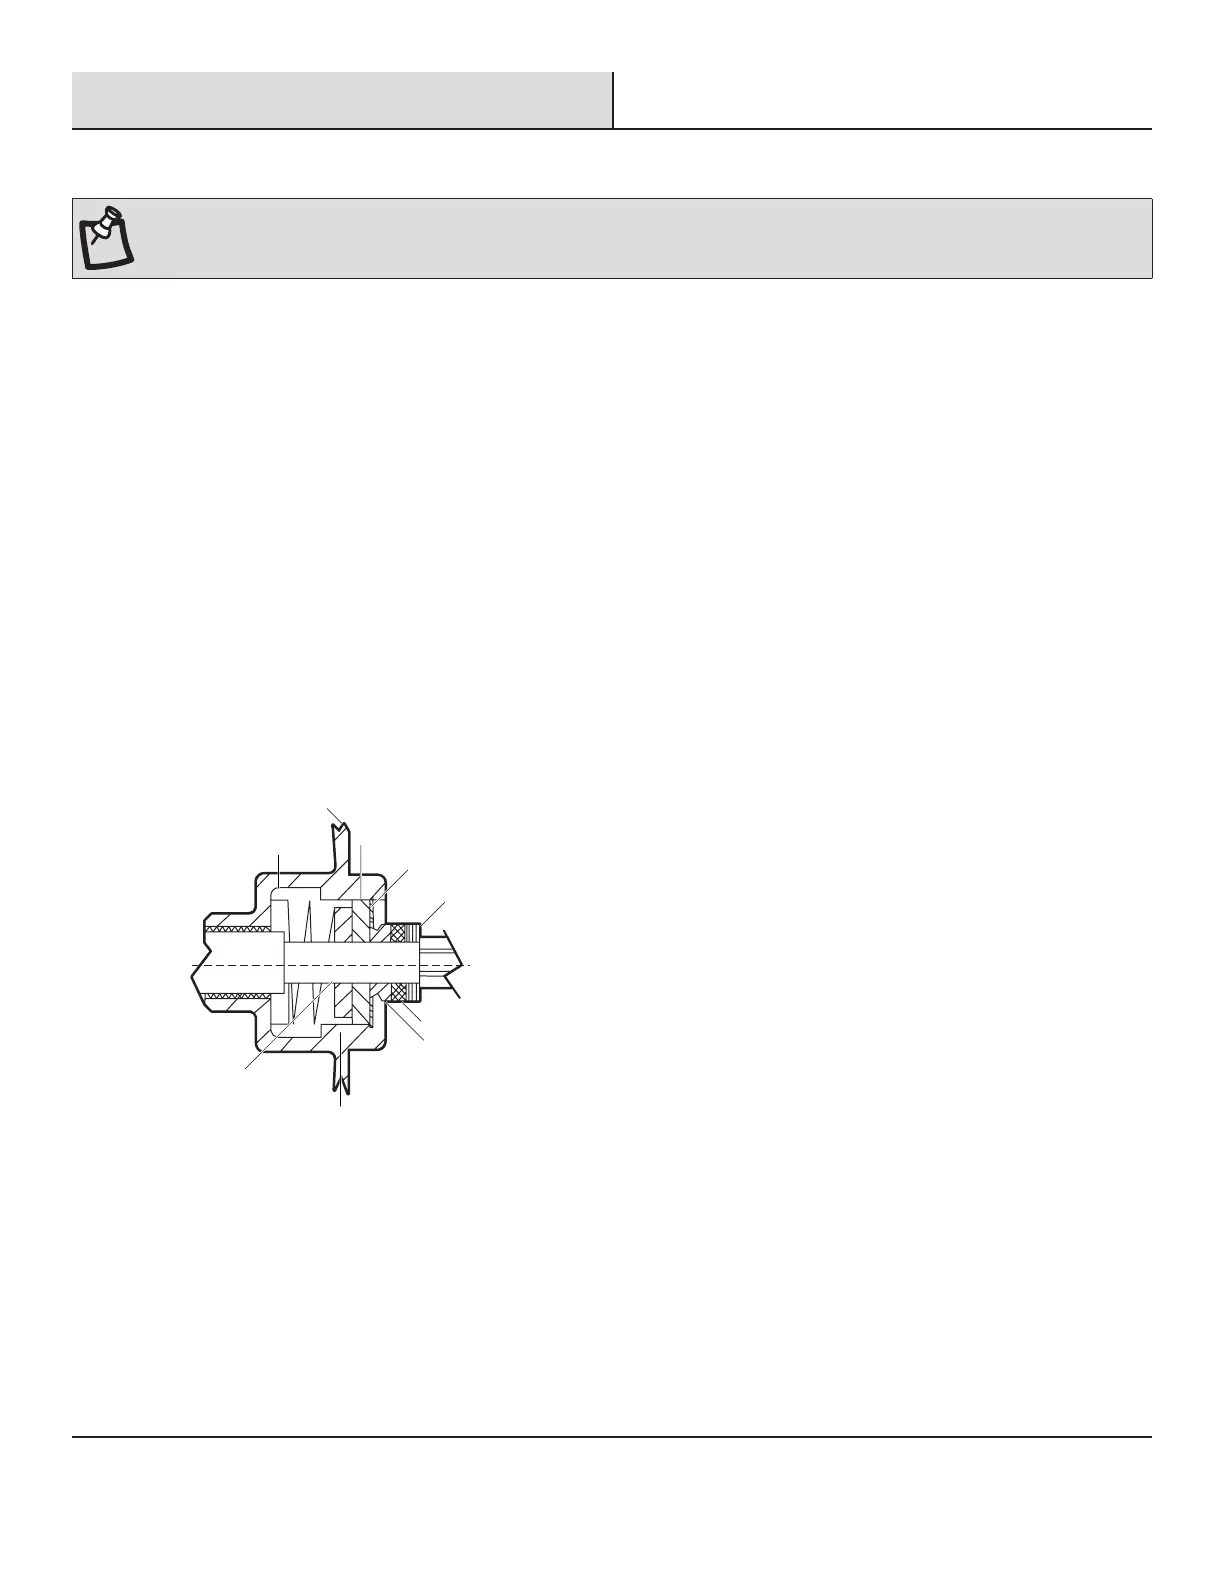
Rotating Memeber
Retainer
Bearing Sleeve
Stationary
Snap Ring
Shims
Spacer
V-Ring
Spring
9. Mark the location of the overload in relation to the bearing
sleeve (9).
10. Remove the retaining ring (7) and press the seal assembly (8)
out of the bearing sleeve.
11. Replace the complete seal if the seal shows signs of uneven
wear on seal faces, chips, or scratches. If replacing the seal,
remove the stationary by prying out with a screwdriver.
12. Examine the O-rings (23) and replace if damaged.
13. Check the motor capacitor (12) with an Ohm meter by rst
grounding the capacitor by placing a screwdriver across both
terminals and then removing the screwdriver. Replace the
capacitor if required.
14. Inspect the motor winding for shorts and check the resistance
values.
15. Check the rotor for wear. If the rotor or the stator windings are
defective, the complete motor must be replaced.
16. To test the overload, check the continuity between the black
and white wires.
 Loading...