Initial Setup and Calibration
November 1999
3-1
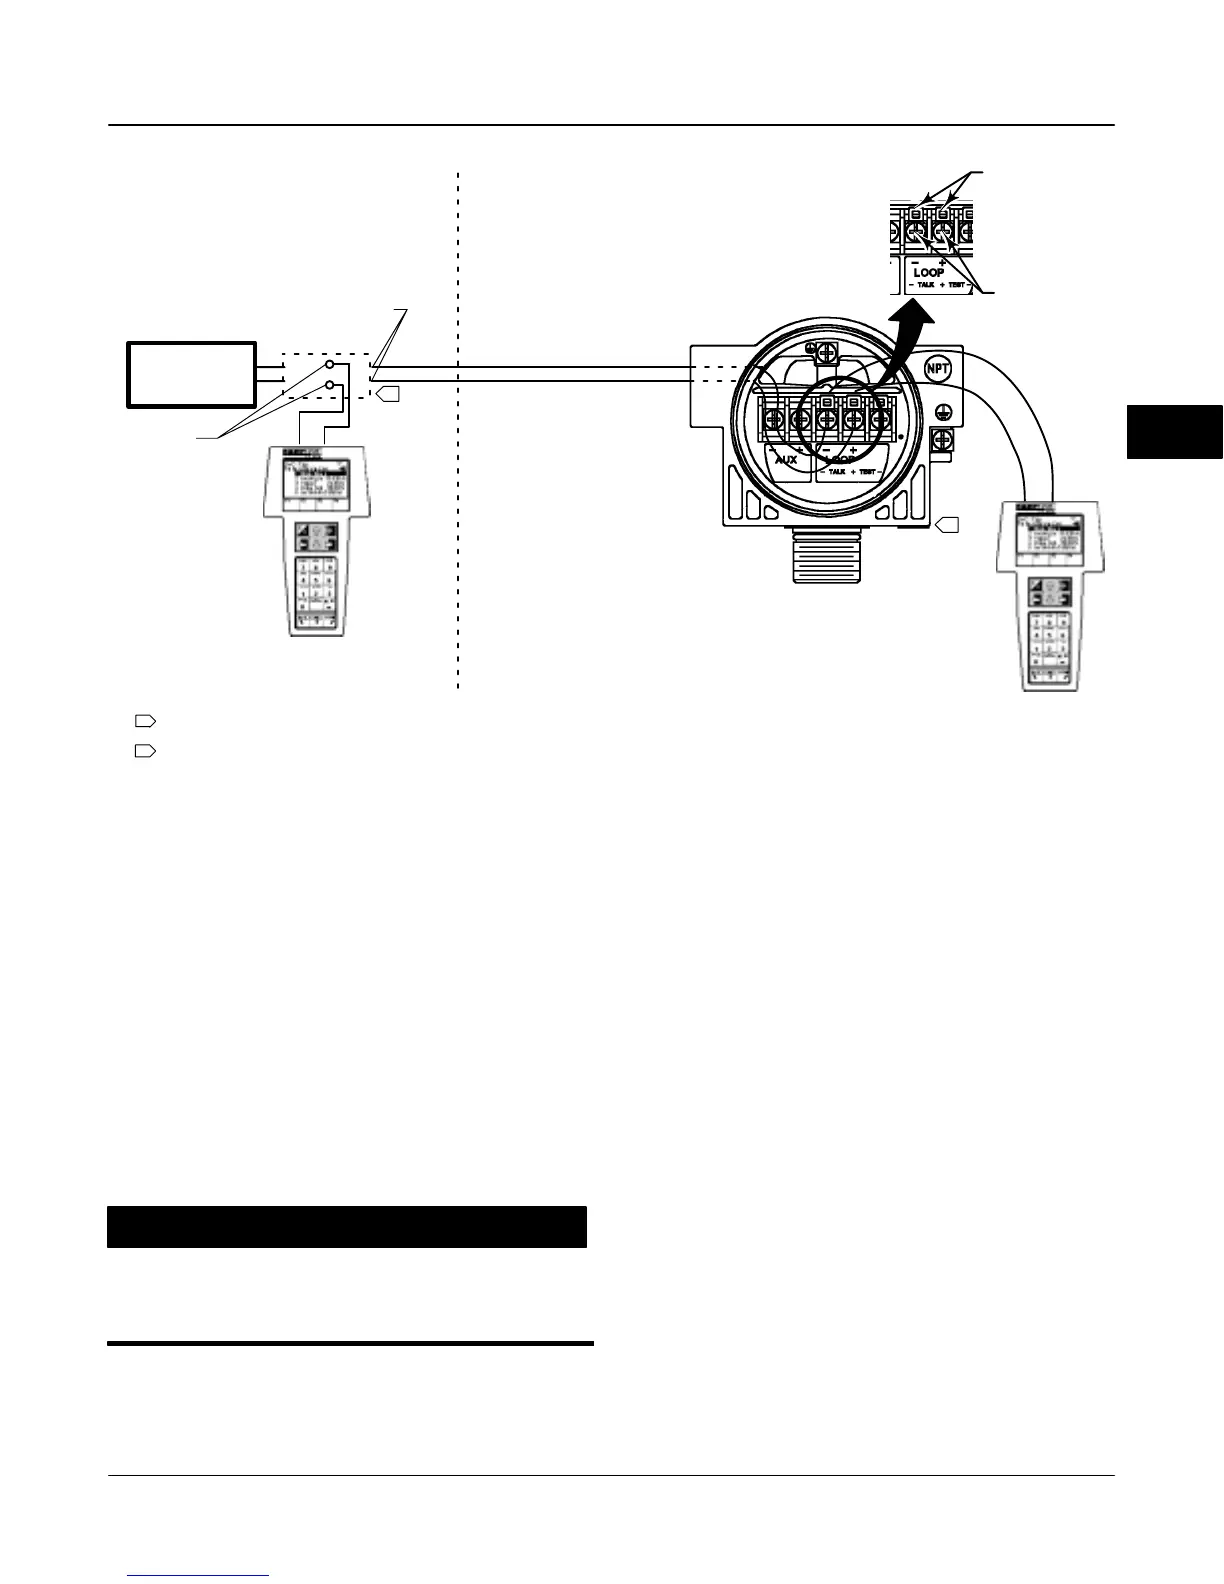
Figure 3-1. Connecting the HART Communicator to a FIELDVUE Instrument
FIELD
CONTROLLER
I/O
1
+
–
–
+
HF200 SERIES
HART FILTER
FIELD INSTRUMENT
CONNECTION
2
HART
COMMUNICATION
CONNECTION
NOTE: THE POSITION OF THE TALK TERMINALS
IS DIFFERENT THAN IN PREVIOUS UNITS
HART COMMUNICATOR
CONNECTIONS
4-20 MA LOOP
CONNECTIONS
NOTE:
NOT ALL CONTROL SYSTEMS REQUIRE A HART FILTER. IF NO HART FILTER IS PRESENT, CONNECT
HART COMMUNICATOR TO CONTROL SYSTEM OUTPUT TERMINALS.
SEE FIGURE 2-3 FOR TERMINAL BOX DETAILS
1
2
38B6470-A / DOC
A6194–2 / IL
CONTROL ROOM
3-3 3
Connecting the Model 275 HART
Communicator to the Digital Valve
Controller
The HART Communicator may be connected to the 4
to 20 mA loop wiring or directly to the digital valve
controller (see figure 3-1).
If the HART Communicator is connected directly to the
digital valve controller , attach the clip-on wires
provided with the HART Communicator to the TALK
terminals, or the LOOP + and – terminals, in the digital
valve controller terminal box (see figure 2-3).
Initial Setup
CAUTION
Changes to the instrument setup may
cause changes in the output pressure
or valve travel.
Before beginning initial setup, be sure the instrument
is correctly mounted. Refer to the installation
instructions supplied with the mounting kit.
Connect a 4–20 mA current source to the instrument.
Connect the HART Communicator to the instrument
and turn it on. For information on connecting the
HART Communicator, see Connecting the Model 275
HART Communicator to the Digital Valve Controller .
Typical Mountings
The Setup Wizard determines the required setup
information for the actuators listed in table 3-1 based
upon the actuator manufacturer and model specified.
Turn on the HART Communicator and start the Setup
Wizard by proceeding through the menu sequence
shown in figure 3-2 or enter the fast-key sequence
1-1-1-1 on the keypad. Follow the prompts on the
HART Communicator display to setup the instrument.
If the actuator on which the instrument is mounted is
not listed by the Setup Wizard, specify OTHER as the
actuator manufacturer or actuator type and go to
“Other Mounting” on page 3-3 of this guide.
During initial setup, the Setup Wizard will ask you if
you want to use factory defaults. If you select YES,
the Setup Wizard sets the setup parameters to the
values listed in table 3-2. If you select NO, the setup
parameters listed in the table remain at their previous
settings
3
 Loading...