EasyManua.ls Logo

Furuno GP-1650 User Manual

Furuno GP-1650
94 pages
To Next Page IconTo Next Page
To Previous Page IconTo Previous Page
Page #34 background imageLoading...
Page #34 background image
5-4
DGPS 3D
ABCDEFGHIJKL
FISH01
WPT
LOCAL
RETURN
GO TO
NEW
WPT
EDIT
WPT
ERASE
WPT
BRG. 23.8°
RNG. 1.75nm
33°12.345' N
135°23.456' W
WPT001
12:30 29SE97
BRG. 90.0°
RNG. 2.51nm
33°23.456' N
135°23.567' W
ABCDEF
15:21 01OCT97
BRIDGE
16:45 01OCT97
BRG. 180.0°
RNG. 5.07nm
34°12.345' N
135°54.321' W
34°12.345' N
135°54.321' W
BRG. 359.9°
RNG. 8.01nm
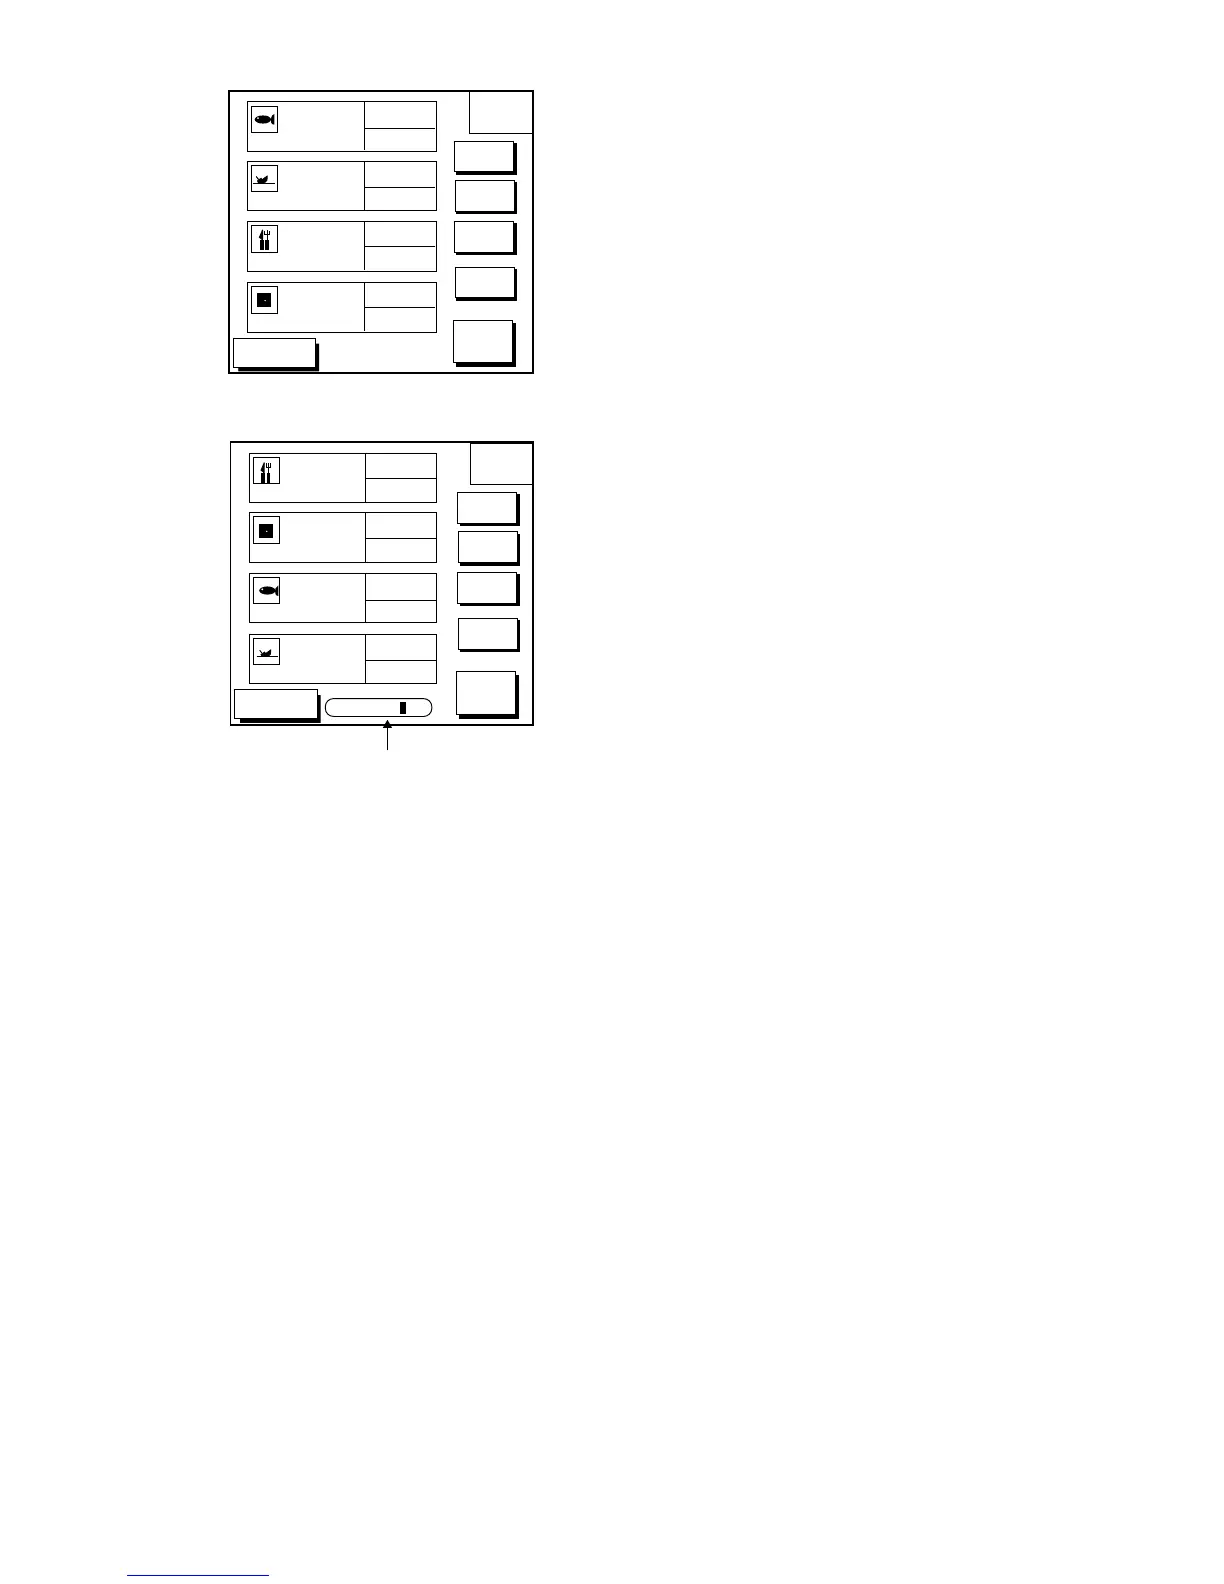
Figure 5-9 Local list
DGPS 3D
WPT
ALPHA
RETURN
GO TO
NEW
WPT
EDIT
WPT
ERASE
WPT
ABCDEFGHIJKL
FISH01
BRG. 23.8°
RNG. 1.75nm
33°12.345’ N
135°23.456’ W
WPT001
12:30 29SE97
BRG. 90.0°
RNG. 2.51nm
33°23.456’ N
135°23.567’ W
ABCDEF
15:21 01OCT97
BRG. 180.0°
RNG. 5.07nm
34°12.345’ N
135°54.321’ W
BRIDGE
16:45 01OCT97
34°12.345’ N
135°54.321’ W
BRG. 359.9°
RNG. 8.01nm
SEARCH FOR _ _ _
Search window
Figure 5-10 Alpha/numeric list
4. Press the soft key NEW WPT to show the
waypoint window. Own ship’s position is
shown. Change the data similar to how
you did in “Entering waypoints by the cur-
sor.”
5. Press the soft key SAVE.
5.2 Erasing Individual
Waypoints
Individual waypoints can be erased by the
cursor or through the waypoint list.
Erasing waypoints by the cursor
1. Press the cursor pad to turn on the cur-
sor.
2. Operate the cursor pad to place the cur-
sor on the waypoint you want to erase. A
flashing diamond mark appears over the
waypoint when it is correctly selected.
3. Press the [CLEAR] key. You are asked if
you are sure to erase the waypoint.
4. Press the [ENTER] key. The waypoint is
erased from both the plotter screen and
the waypoint list.
Erasing waypoints through the
waypoint list
1. Press the [WPT/RTE] key to open the
waypoint & route menu.
2. Press the soft key WAYPOINTS to open
the waypoint menu.
3. Press the soft key LOCAL LIST or ALPHA/
NUMERIC LIST.
4. Press or to select the waypoint you
want to erase.
5. Press the soft key ERASE WPT. You are
asked if you are sure to erase the
waypoint.
6. Press the [ENTER] key. The waypoint is
erased from both the waypoint list and the
plotter screen.
5.3 Changing Waypoint Data
You can change the waypoint data through
the list.
1. Press the [WPT/RTE] key, soft key
WAYPOINTS, and soft key LOCAL LIST
or ALPHA/NUMERIC LIST.
2. Press or to select the waypoint you
want to change.
3. Press the soft key EDIT WPT.
4. Change data as you did in “Entering
waypoints by the cursor.”
5. Press the soft key SAVE.

Table of Contents

Questions and Answers:

Furuno GP-1650 Specifications

General IconGeneral
Display Size5.7 inches
GPS Channels12
Routes50
Display TypeColor LCD
Track Points10000

Summary

Safety Instructions

Warning Labels and Precautions

Highlights critical safety warnings and cautions to prevent injury or equipment damage.

Foreword

Introduction for Owners

Welcomes owners and introduces the FURUNO brand's reputation for quality and reliability.

Key Features

Summarizes the main features and capabilities of the GP-1650D/GP-1650 units.

System Configuration

System Components Overview

Illustrates the system layout and connection of main units.

Operational Overview

Display Unit Controls

Describes the function of each button and control on the display unit.

Basic Operations

Covers inserting chart cards, powering on/off, and adjusting display settings.

Menu Navigation and Displays

Guides users on navigating menus, using soft keys, and understanding display modes.

Plotter Displays

Presentation Modes

Describes different screen orientations like North-up and Course-up.

Cursor Operation

Details how to use the cursor to select and display information on the plotter.

Shifting the Display

Explains how to pan or scroll the chart display.

Selecting Chart Scale/Range

Instructions on how to zoom in/out to change the chart scale.

Mini Chart Cards

Information about using chart cards and understanding chart icons.

Navigation Data Display

Shows how to display navigation data like position, speed, and course.

Steering Display

Provides steering information such as bearing, ETA, course, and speed.

Highway Display

Offers a graphic track presentation for monitoring course and XTE.

Changing Operation Mode

Details how to switch between Pleasure and Fishing modes.

Navigation Trip Distance

Explains how to view and reset navigation trip distance data.

Track Management

Displaying Track Data

Instructions on enabling and viewing the ship's track on the display.

Stopping and Restarting Track Plotting

How to conserve memory by stopping and restarting track recording.

Changing Track Color

Options for changing the color used to display the track.

Track Plotting Method and Interval

Settings for how track data is recorded (time/distance interval).

Changing Track Memory Capacity

How to adjust the memory allocation for tracks and marks.

Erasing All Track Data

Procedure for clearing all recorded track data.

Mark Management

Entering Marks

Steps for creating and placing marks on the plotter display.

Changing Mark Attributes

How to modify the shape, line style, and color of marks.

Changing Mark Size

Options for adjusting the size of waypoint marks.

Erasing Marks

Procedures for erasing individual or all marks.

Waypoint Management

Entering Waypoints

Methods for entering waypoints (own ship, MOB, cursor, range/bearing).

Changing Waypoint Mark Appearance

Customizing the visual appearance of waypoint marks (shape, color).

Editing Waypoint Details

Editing waypoint details like name, comments, and alarm settings.

Changing Waypoint Position

How to relocate a waypoint on the plotter display.

Erasing Individual Waypoints

Procedures for deleting specific waypoints.

Changing Waypoint Data

Modifying existing waypoint information.

Waypoint Mark Size

Adjusting the display size of waypoint marks.

Searching Waypoints

How to find specific waypoints in the list.

Route Management

Entering Routes

Creating routes by linking existing waypoints or new locations.

Connecting Routes

Combining two existing routes into a single route.

Inserting and Removing Waypoints in Routes

Adding or deleting waypoints within an established route.

Creating Track-based Routes

Building routes based on recorded ship's tracks.

Erasing Routes

Procedures for deleting saved routes.

Navigation

Navigating to "Quick Points"

Using quick points for temporary navigation targets without storing data.

Navigating to Waypoints (Waypoint List)

Setting destinations from the waypoint list.

Navigating to Ports and Port Services

Setting destinations for ports or services using chart data.

Following a Route

Instructions for navigating along a pre-defined route.

Navigation Control

Restarting navigation, setting ETA, switching waypoints, and cancelling navigation.

Cancelling Navigation

Steps to stop an active navigation session.

Plotter Alarms

Alarm Overview and Audio Control

Introduction to alarms and managing audible alerts.

Specific Alarms

Details on Arrival, Anchor Watch, XTE, Speed, and Proximity alarms.

Alarm Information Display

How to view and acknowledge active alarms and silence the buzzer.

Data Management

Memory Card Operations

Formatting, saving, and loading data to/from memory cards.

Loading Data from Memory Card

How to retrieve saved data from a memory card.

Customizing Your Unit

Chart Setup Options

Accessing settings for chart offset, track control, and chart details.

Display Options

Setting up various plotter display parameters and modes.

GPS/DGPS/TD Options

Configuring GPS receiver settings and position display formats.

DGPS and TD Setup

Setting parameters for DGPS receiver and Loran/Decca chains.

Configuration Settings

Accessing settings for data ports, uploads, downloads, and system tests.

Data Transfer

Managing data transfer to/from a PC or memory card.

Using C-MAP NT Model

Chart Card Operations

Instructions for inserting chart cards and basic cursor functions for data display.

Chart Features and Navigation

Displaying tidal info, lighthouse data, and navigating to ports.

Chart Setup and Scale Options

Customizing chart display features and adjusting scale.

Displaying Program Number

Viewing software version and test results.

Maintenance & Troubleshooting

Routine Maintenance

Routine checks and cleaning procedures for the unit and antenna.

Troubleshooting and Diagnostics

Simple solutions for common problems, error messages, and system tests.

Clearing Unit Memories

Resetting the unit by clearing stored data and settings.

Appendices

Loran C and Decca Chains

Lists of Loran C and Decca chains with their associated data.

World Time and Geodetic Charts

World time zones map and list of supported geodetic datums.

Specifications

General and GPS Receiver Specifications

Details on display, projection, and GPS receiver technical data.

Display and Plotter Specifications

Information on display resolution, plotter projection, and memory capacity.

Data, Power, and Environmental Specifications

Details on data formats, power source, and environmental operating conditions.

Related product manuals