10-1
This section describes the various options
which allow you to set up your unit to suit
your needs.
10.1 CHART SETUP OPTIONS
menu
The chart offset options menu provides three
menus: chart offset, track control, and chart
details.
1. Press the [MENU] key to open the main
menu.
2. Press the soft key CHART SETUP OP-
TIONS.
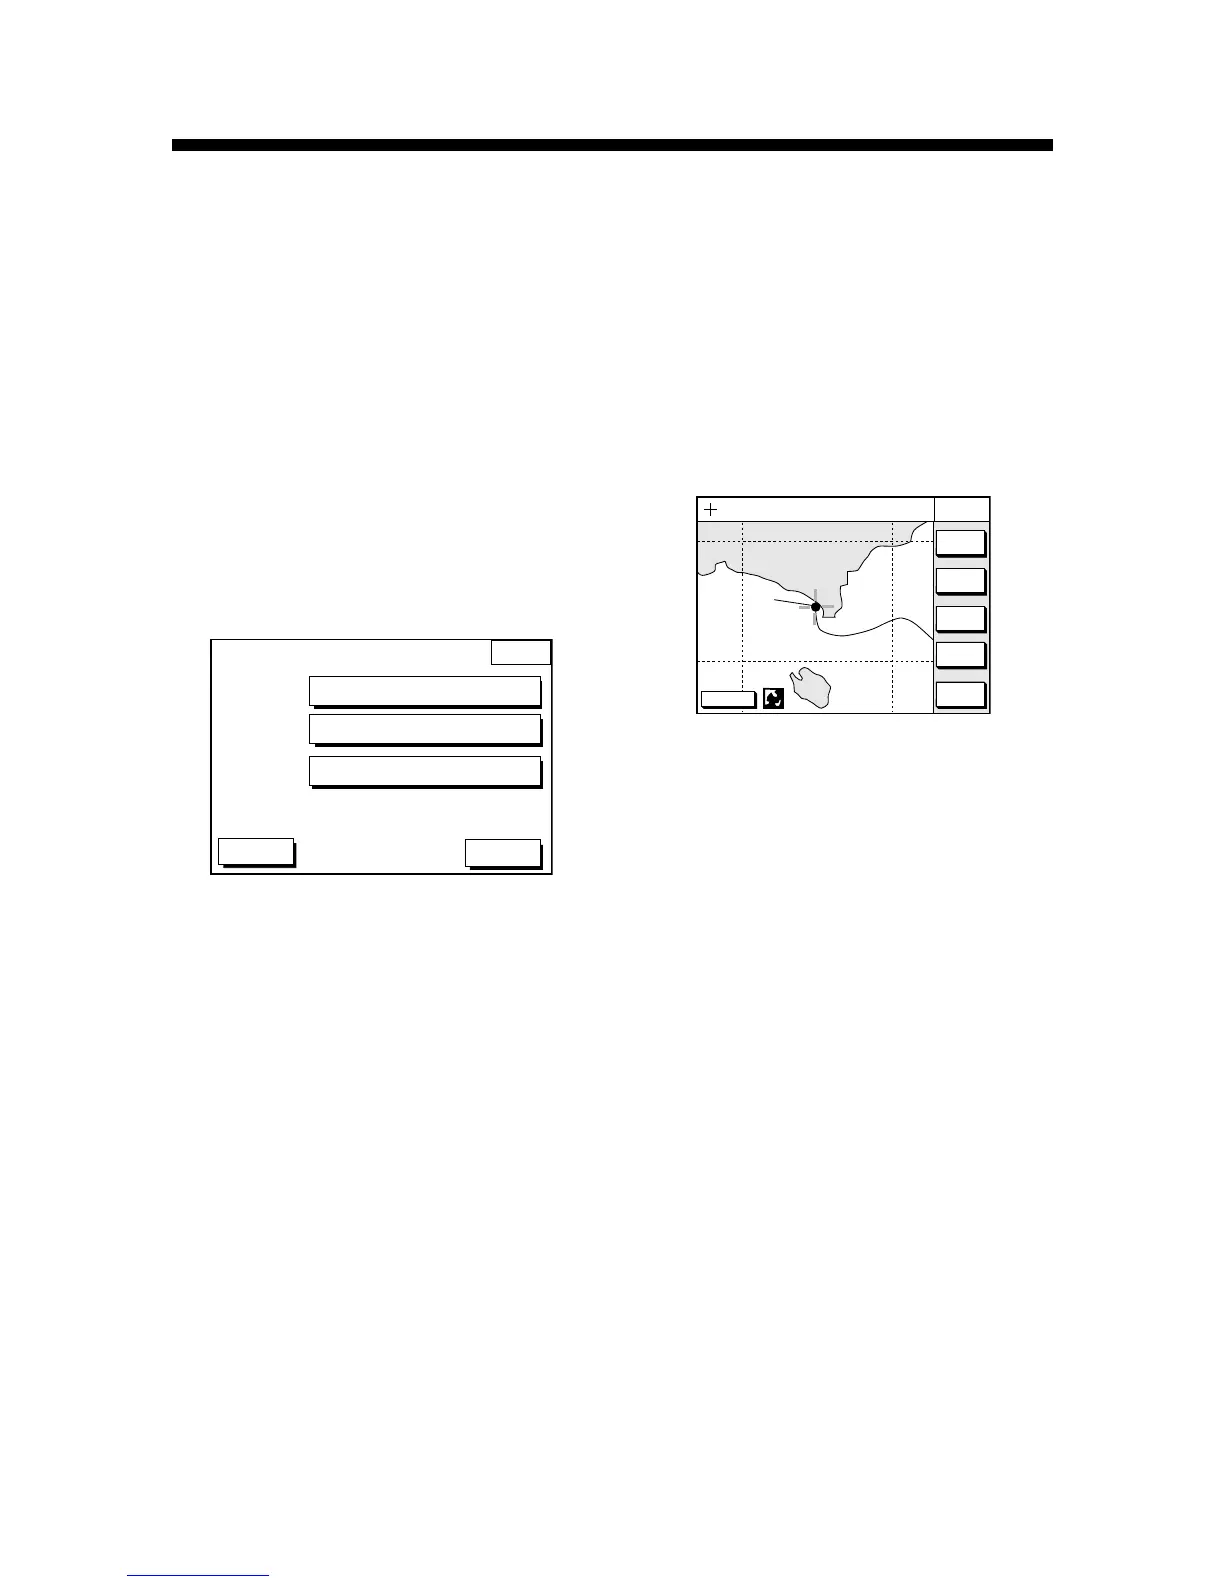
CHART
SETUP
DGPS 3D
CHART OFFSET
CHART DETAILS
TRACK CONTROL
RETURN
Figure 10-1 Chart setup options menu
10. CUSTOMIZING YOUR UNIT
CHART OFFSET menu
In some instances position may be off by a
few minutes. For example, the position of the
ship is shown to be at sea while it is in fact
moored at a pier. You can compensate for
this error by offsetting chart position as fol-
lows:
1. Press the [MENU] key followed by the soft
keys CHART SETUP OPTIONS and
CHART OFFSET.
DGPS 3D
RETURN
SET
OFFSET
ZOOM
OUT
ZOOM
IN
CHART
OFFSET
135° 12.345’ E
34° 12.345’ N
OS
FROM
276.9°
16.41 nm
RESET
OFFSET
Figure 10-2 Plotter display,
chart offset selected
2. Use the cursor pad to place the cursor
where to offset chart position.
3. Press the soft key SET OFFSET.
4. Press the soft key RETURN to finish.
To cancel chart offset, press the soft key RE-
SET OFFSET at step 3 in the above proce-
dure.
TRACK CONTROL menu
This menu mainly controls track color and
track plotting interval. For further details see
Chapter 3.