Installation Instructions
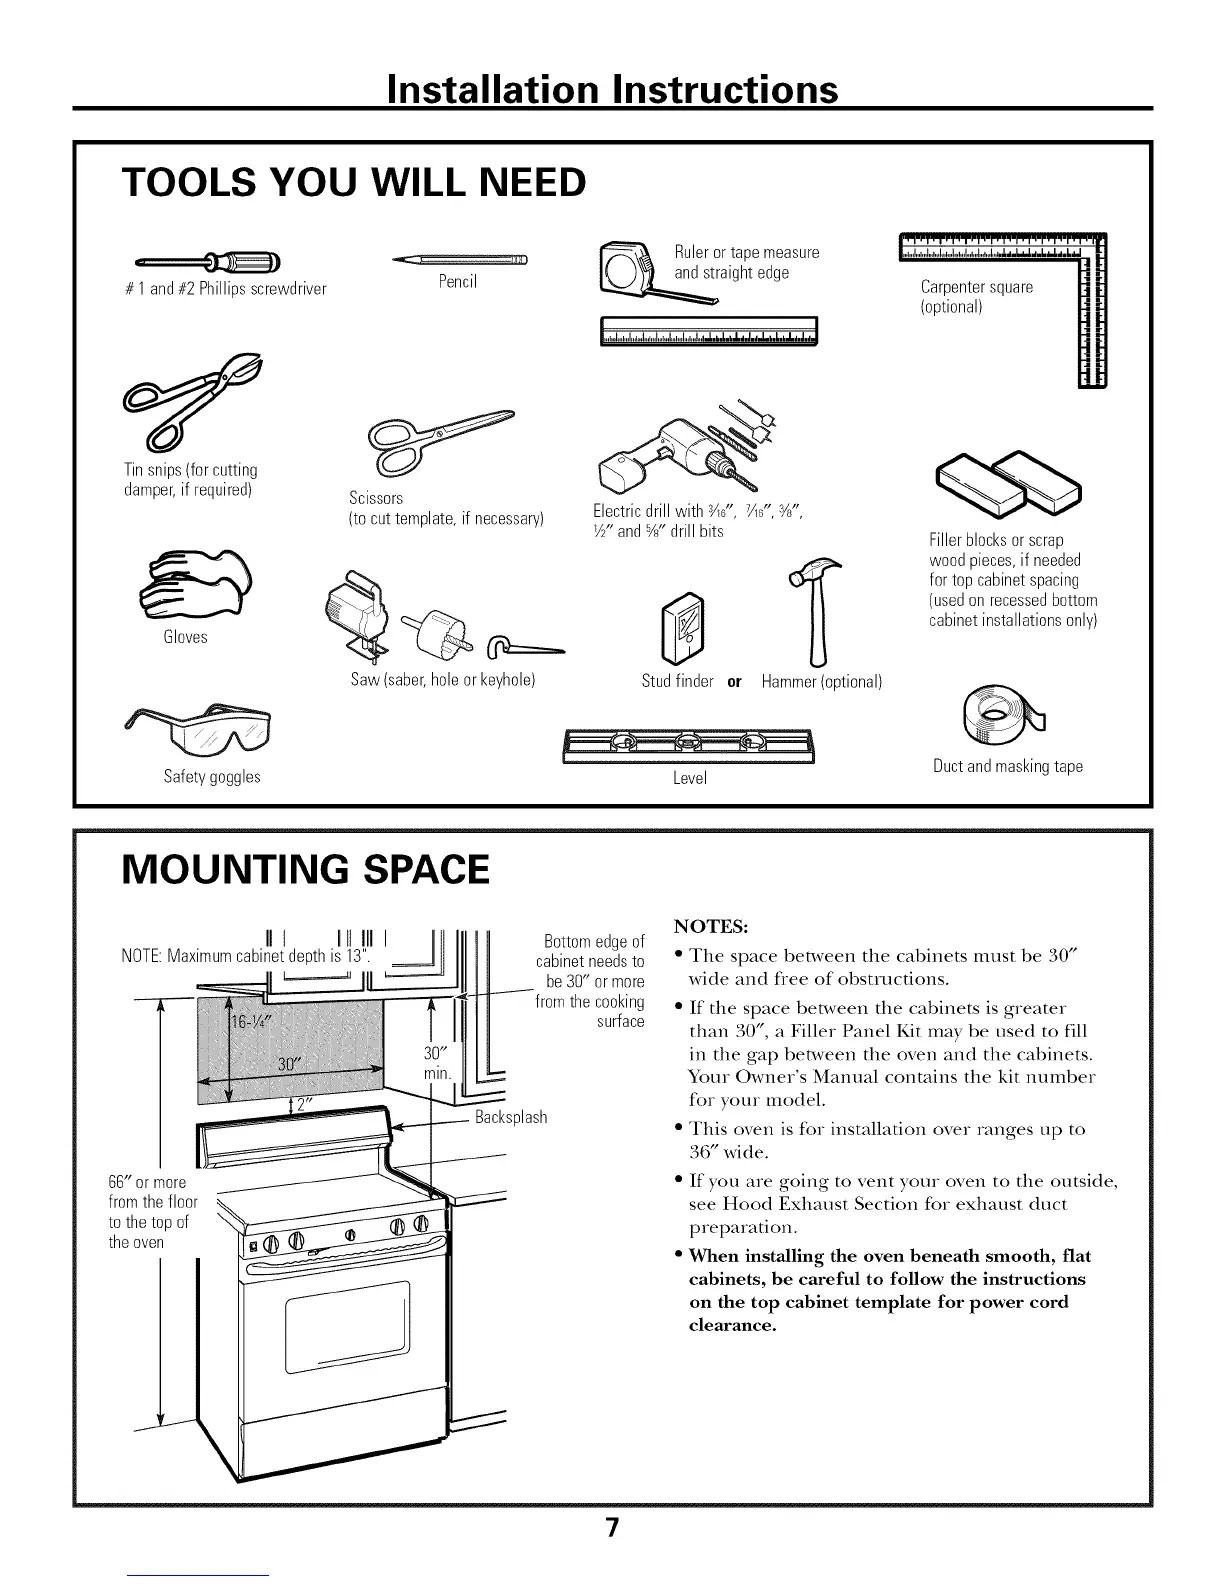
TOOLS YOU WILL NEED
# 1 and#2 Phillipsscrewdriver
Pencil
Ruleror tapemeasure
aightedge
Carpentersquare
(optional)
Tinsnips(forcutting
damper,if required)
Gloves
Scissors
(to cuttemplate,if necessary)
Saw (saber,holeor keyhole)
Electricdrill with ¾g', 7½s',3_-,
_½"and%" drill bits
8
Studfinder er
Hammer (optional)
Fillerblocksor scrap
woodpieces,if needed
for top cabinetspacing
(usedonrecessedbottom
cabinetinstallationsonly)
Safety goggles
Level
Duct and masking tape
MOUNTING SPACE
Iit Utl III
NOTE:Maximumcabinetdepthis 13".
L_
66" or more
from the floor
to the top of
the oven
Bottom edge of
cabinet needs to
be 30" or more
from the cooking
surface
Backsplash
NOTES:
• The space between the cabinets must be 30"
wide and flee of obstructions.
• If the space between the cabinets is greater
than 30", a Filler Panel Kit mW be used to fill
in the gap between the oven and the cabinets.
Your Owner's Manual contains the kit number
for your model.
• This oven is for installa6on over ranges up to
,t6" wide.
• If you are going to vent your oven to the outside,
see Hood Exhaust Section for exhaust duct
preparation.
• When installing the oven beneath smooth, fiat
cabinets, be careful to follow the instructions
on the top cabinet template for power cord
clearance.
7
 Loading...