– 17 –
Front Panel
The front panel is a removable, galvanized sheet
metal section. The front panel is fastened at the
top by 2 metal spring clips, and at the bottom by 2
metal tabs which protrude from the base of the
unit into slots in the panel bottom.
Most major mechanical components can be
accessed by removing the front panel.
To remove the front panel:
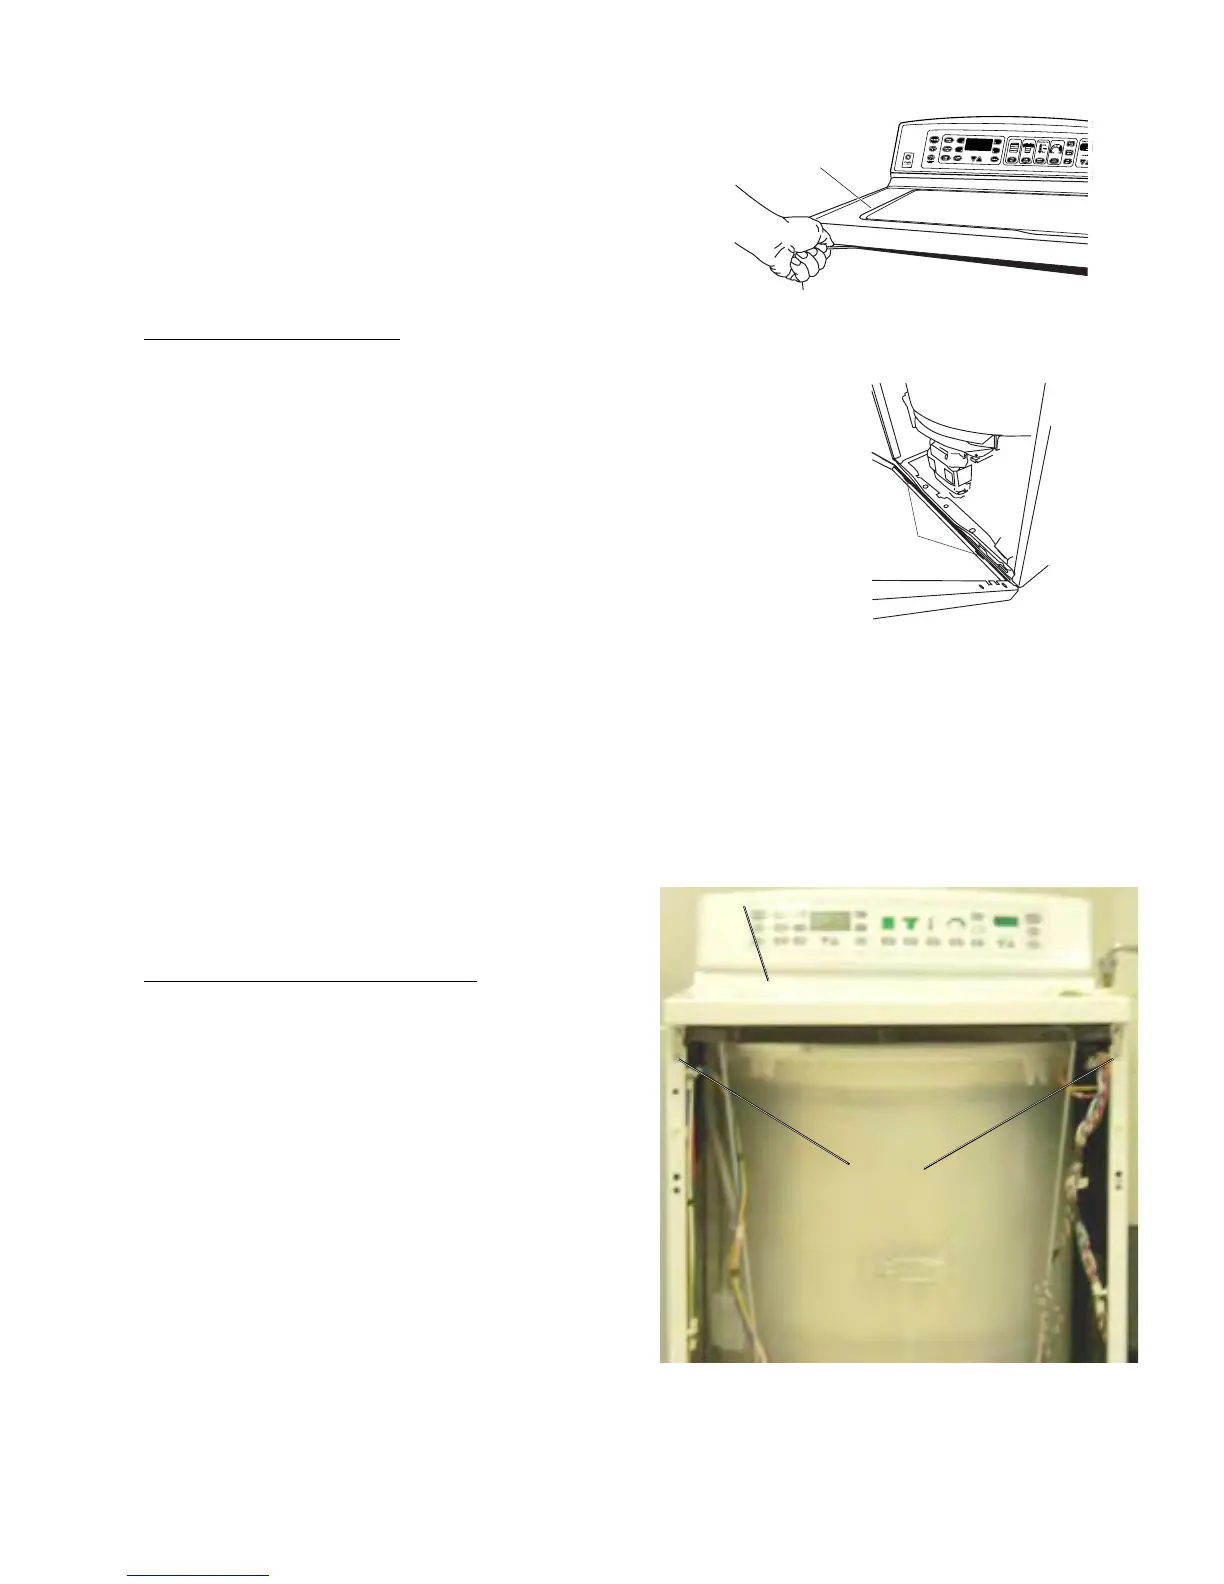
1. Locate 2 spring clips between the top cover
and front panel by aligning a putty knife with
left or right edge of lid (see illustration).
2. Insert the putty knife and push forward to
release clips.
3. Rotate the front panel forward and lift off the
bottom tabs.
Align Putty Knife
To Groove In Lid
Cover/Lid Assembly
The cover/lid assembly is fastened at the front by
2 screws, on the sides by 2 metal catches, and at
the back by 3 locking tabs which protrude from the
bottom of the control panel.
Note: Do not allow lid to swing open when cover/
lid assembly is removed. Damage may result.
To remove the cover/lid assembly:
1. Remove the front panel and control panel (see
Front Panel and Control Panel).
2 Disconnect 2 wire clips and the lid lock
harness from the electronic control board.
3. Remove 2 (1/4-in.) hex screws securing the
front of the cover/lid assembly to the cabinet.
4. Remove the lid switch from the cover/lid
assembly (see Lid Switch).
5. Pull the top cover toward you while lifting up
the front edge to release the side catches and
rear locking tabs. Remove the top cover.
Screws
Screws
Cover/Lid Assembly
Cover/Lid Assembly
 Loading...