22
User and Service Manual
Doc # M010-004WWE July 2005
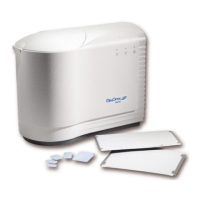
Gendex DenOptix® QST
4.7 Installation
The DenOptix QST System is designed to be installed by a qualified equipment professional
from your local dental dealer. Ask your local dental dealer for more information.
We do not recommend that an untrained person try to install and configure the system.
4.8 Site selection
The DenOptix QST scanner can be located almost anywhere in the dental office. The site
you pick should have:
• Subdued lighting conditions. You should have the ability to turn down/off the lights and
block sunlight with blinds. The area to be used for mounting imaging plates should not
exceed 20 lux as measured on a light meter. This will give you about one minute to mount
all of your imaging plates without encountering excess signal fading. If you cannot meas-
ure the light in the room where you wish to mount the imaging plates, you should turn
off the room lights, close all blinds and leave the door open just enough so that you can
see to mount the imaging plates. This should make the light level about 10-20 lux. If you
need more than one minute, refer to appendix B.
• A stable, flat countertop large enough to hold the scanner plus provide a working area. We
suggest a minimum of 189x369 in. (46x92 cm). The computer does not need to be on the
countertop, but must be within the length of the USB 2.0 cable (9ft or 3m provided). The
countertop must be able to hold the weight of the unit or a minimum of 60 lbs (27 kg).
• Access to a standard grounded electric outlet.
• Enough room to allow the operator to mount imaging plates and use the computer
effectively.
• Do not position the DenOptix QST scanner in a dusty environment. Excessive dust levels
can result in additional scanner service, beyond normal service intervals.
If y
ou choose to put the system in your darkroom, please prepare the site by:
• Removing all old film processing equipment and plumbing.
• Remove the safelight filter and adjust the intensity of the light by lowering the bulb
wattage until the intensity of the light around the scanner is 20 lux or less.
• We recommend that you keep the light off and the door open when mounting imaging
plates to the carousel. The light from the open door will allow you to see enough to mount
the imaging plates but will not adversely effect the image.
 Loading...