9 Adjusting the hot water temperature
22 Installation and maintenance instructions EASICOM 3 0020239562_02
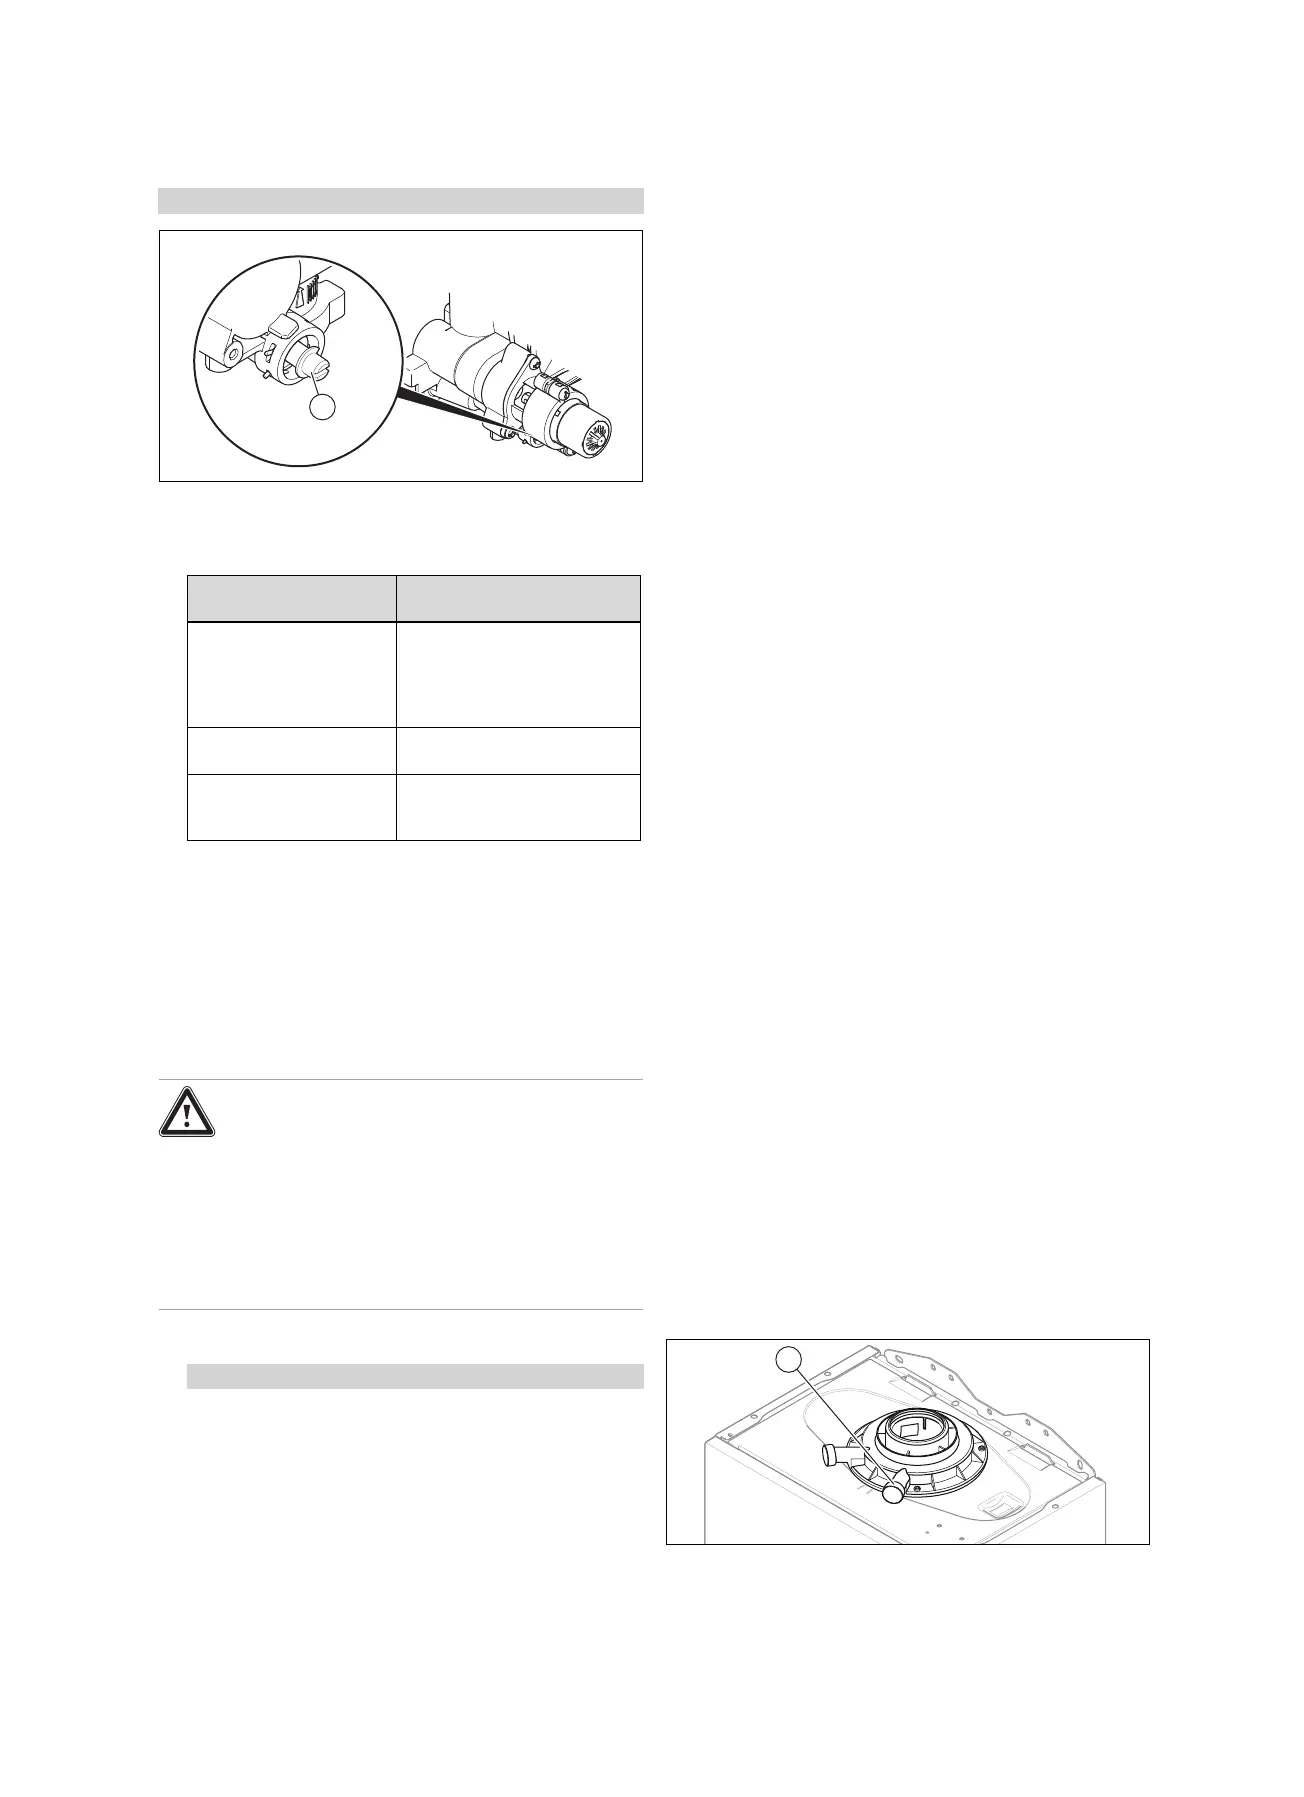
8.3 Setting the bypass
Conditions: Two-stage pump
▶ Remove the front casing. (→ Page 10)
▶ Regulate the pressure using the adjusting screw (1).
▶ Install the front casing. (→ Page 10)
Position of the adjusting
screw
Notes/application
Right-hand stop (screwed
all the way in)
If the radiators do not heat
up sufficiently at the default
setting. In this case, you must
set the pump to the maximum
speed.
Mid-position (six anti-
clockwise rotations)
Default setting
Five further anti-clockwise
rotations starting from the
mid-position
If noises are produced in the
radiators or radiator valves.
9 Adjusting the hot water temperature
You can reset/change the system parameters (→ section
"Using diagnostics codes").
Overview of diagnostics codes (→ Page 30)
9.1 Setting the hot water temperature
Danger!
Risk of death from legionella.
Legionella multiply at temperatures below
60 °C.
▶ Ensure that the end user is familiar with
all of the Anti-legionella measures in order
to comply with the applicable regulations
regarding legionella prevention.
▶ Set the hot water temperature.
Conditions: Water hardness: > 3.57 mol/m³
– Hot water temperature: ≤ 50 ℃
10 Handing the product over to the end
user
▶ When you have finished the installation, attach the sticker
supplied (in the end user's language) to the product
cover.
▶ Explain to the end user how the safety devices work and
where they are located.
▶ Inform the end user how to handle the product.
▶ In particular, draw attention to the safety information
which the end user must follow.
▶ Inform the end user that they must have the product
maintained in accordance with the specified intervals.
▶ Instruct the end user about measures taken for routing
the combustion air supply and flue system.
11 Inspection and maintenance
11.1 Using original seals
If you replace components, use only the enclosed original
seals; additional sealing materials are not required.
11.2 Observing inspection and maintenance
intervals
▶ Adhere to the minimum inspection and maintenance in-
tervals. The inspection may require maintenance to be
carried out earlier, depending on the results.
Inspection and maintenance work – Overview
(→ Page 38)
11.3 Procuring spare parts
The original components of the product were also certified
by the manufacturer as part of the declaration of conformity.
If you use other, non-certified or unauthorised parts during
maintenance or repair work, this may void the conformity of
the product and it will therefore no longer comply with the
applicable standards.
We strongly recommend that you use original spare parts
from the manufacturer as this guarantees fault-free and safe
operation of the product. To receive information about the
available original spare parts, contact the contact address
provided on the reverse of these instructions.
▶ If you require spare parts for maintenance or repair
work, use only the spare parts that are permitted for the
product.
11.4 Checking the CO₂ content
1. Start up the product with the check programme (P.01)
and set the value.
– Setting value for the programme P.01: 100
Check programmes – Overview (→ Page 30)
2. Wait until the value that is read is stable.
– Waiting period for reading a stable value: 5 min
3. Unscrew the cover from the flue gas analysis point (1).
4. Measure the CO₂ content at the flue gas analysis point
(1).
 Loading...