13
Unit Installation
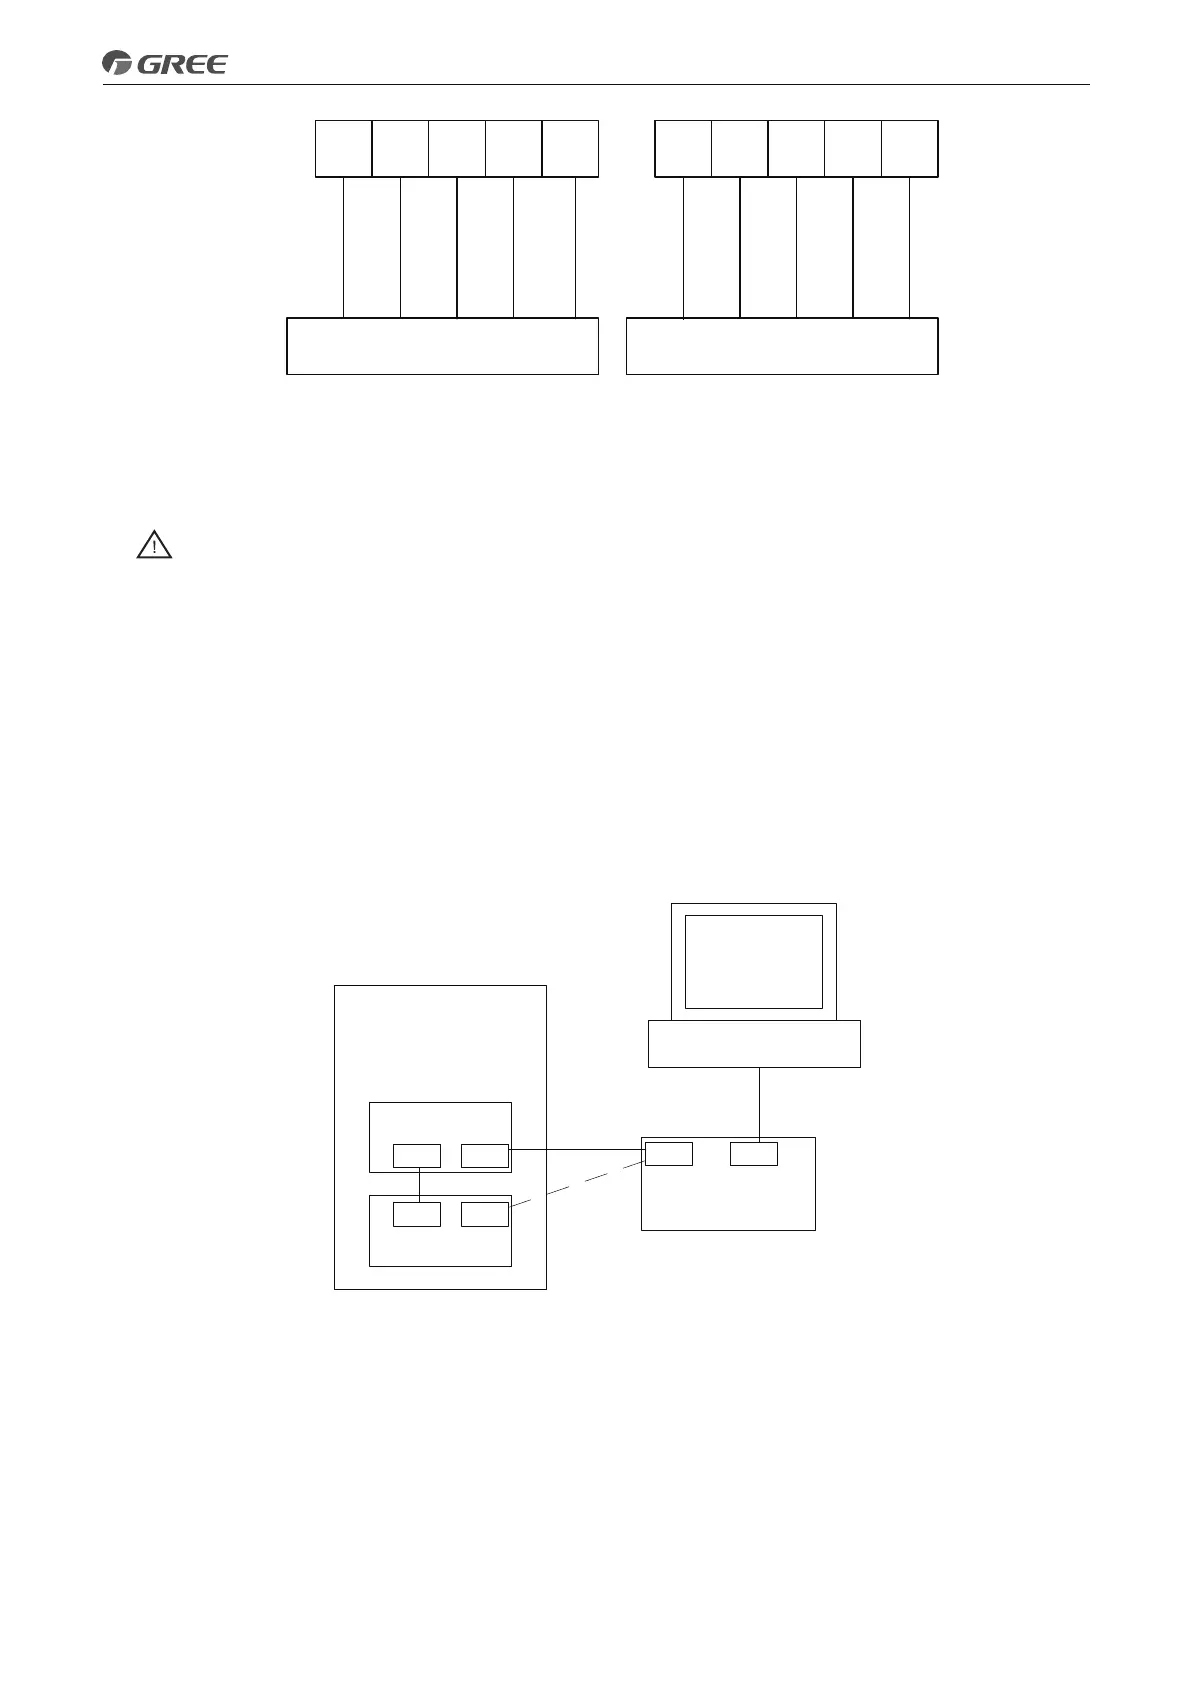
21 22 23 24 25 26
Thermostat
XT3
220V AC
24V AC
2220V GND
224V GND
OFF
OFF
HEAT
COOL
COOL
HEAT
27 28 29 30
Thermostat
How to Wire Thermostat
(1) Uncover the front cover of the monobloc unit and open the control box.
(2) Identify the power specification of the thermostat, if it is 230V , find terminal block XT3 as NO.21~25;
Otherwise, if it is 24V, nd terminal block XT3 as NO.26~30;
(3) If it is the heating/cooling thermostat, please connect wire as per the gure above;
CAUTION!
①
Never use 230V AC and 24V AC thermostat at the same time, otherwise, it will cause short circuit and
power cut-off by the circuit breaker;
②
Setting temperature by the thermostat(heating or cooling) should be within the temperature range of the
product ;
③
For other constrains, please refer to previous pages about the remote air temperature sensor;
④
Do not connect external electric loads. Wire 220V AC(24V AC) and 220V GND(24V GND) should be
used only for the electric thermostat.
⑤
Never connect external electric loads such as valves, fan coil units, etc. If connected, the mainboard of
the unit can be seriously damaged.
⑥
Installation of the thermostat is very similar to that of the remote air temperature sensor.
4.14 Wiring of the Control
CN8CN7
CN6CN5
AP1
AP2
Wired controller
CN5 CN4
Long-distance
Minitor PC
Control Box
Notes:
①
The wired controller can be connected to the terminal of AP1 CN6 or AP2 CN 8 through the four-wire
communication line.
②
AP1 (CN 5) and AP2 (CN 7) have been connected with the communication line (three-wire communication
line before delivery.
③
The remote monitoring device can be connected to the CN4 of the wired controller through a four-wire
communication line.
 Loading...