Chapter 2, Machine Part Replacement Reference 2-13
Bushing Adjustment Kit
Note: For this procedure you should have the following equipment:
Screwdriver
1/8" L-hex wrench or equivalent
1/2" box wrench or equivalent
Primer “T” P/N 10425-01
Loctite #222 (purple) P/N 10422-00
Hinge Bushing Adjustment Kit P/N 38064-00
Torque wrench (set to 15/16 in./lb) with a regular 6-point 1/2" socket
Warning!
Primer “T” activator is flammable and may be harmful if it comes
in contact with skin or eyes. It is recommended that eye protection
and rubber gloves be worn when using Primer “T.” Do not use
near heat or an open flame.
1. Ensure the centrifuge cover is in the “unlocked” (or up) position.
2. Using the screwdriver, remove the two (2) headless shoulder screws at
the centrifuge cover hinge area. These are the screws that are set
inside the brass bushings. Apply the Primer “T” activator to the
screws and set them aside.
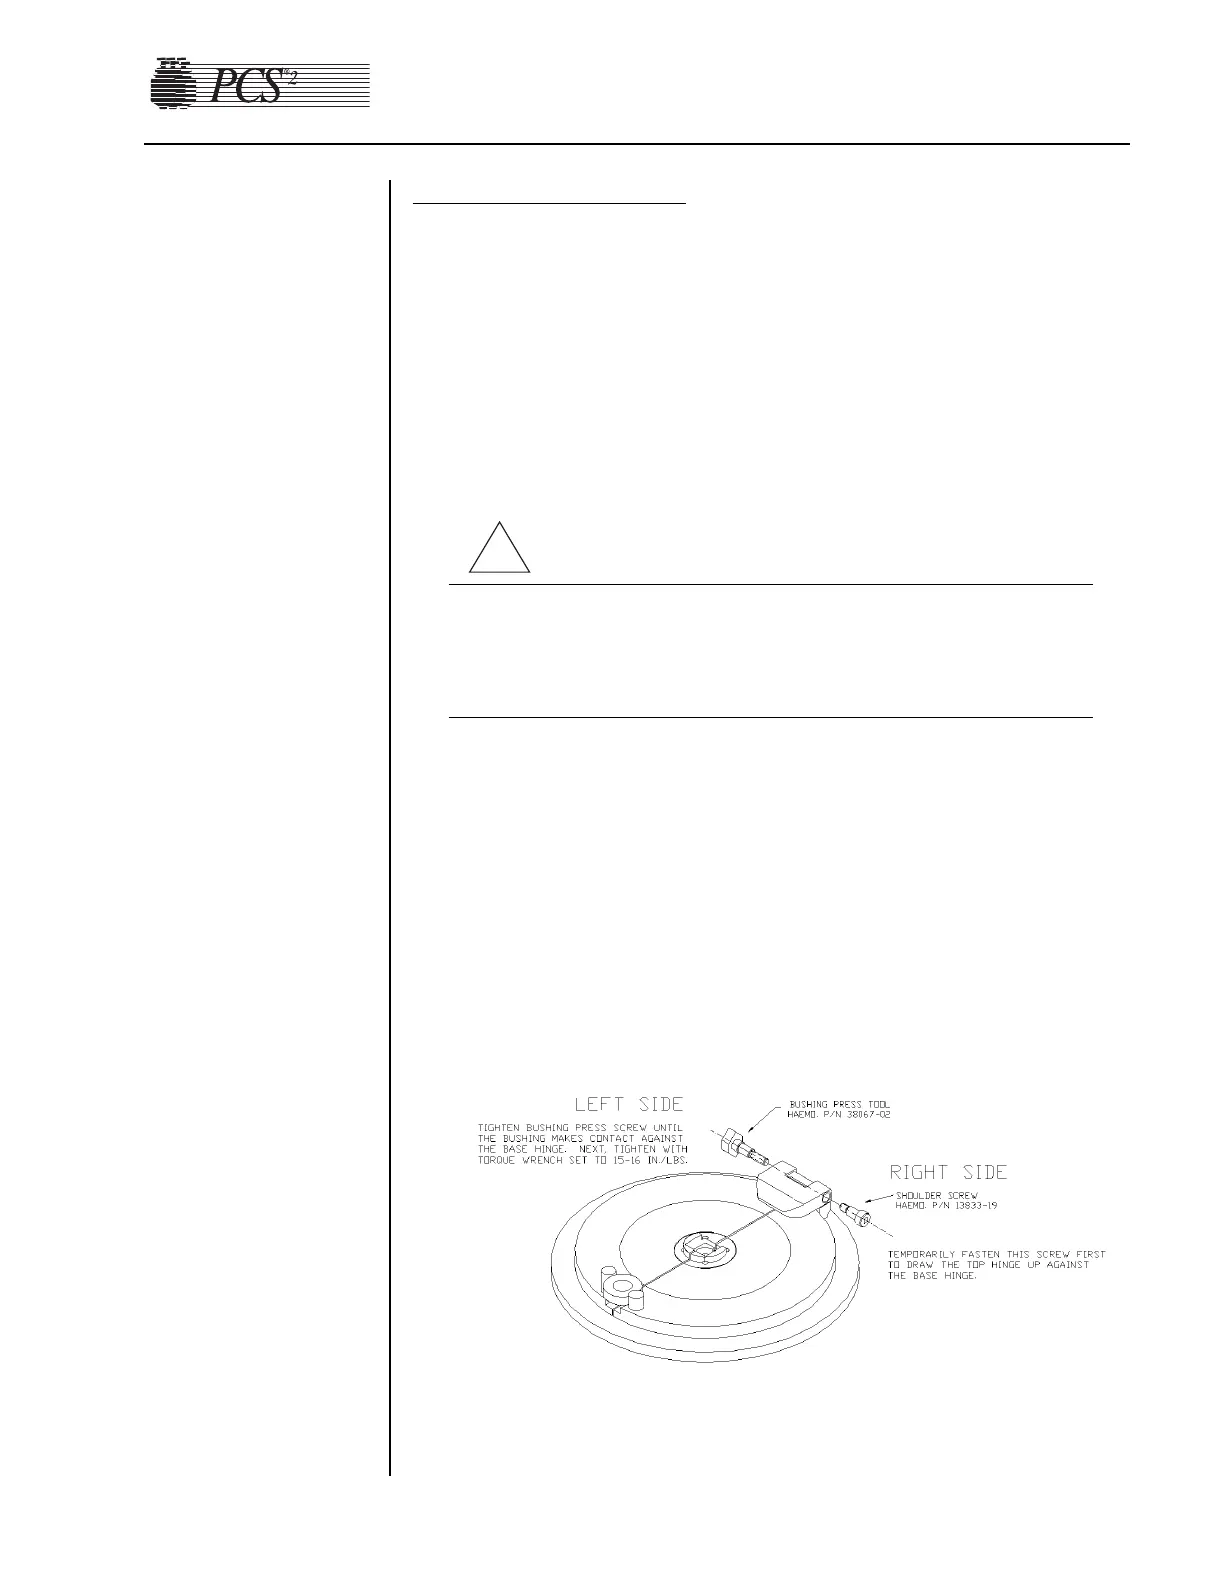
3. Using the L-Hex wrench, temporarily fasten the centrifuge cover
hinge on the right side with hex head shoulder screw, P/N 13833-19.
Tighten the screw until the top hinge is drawn up against the base
hinge. (See illustration below.)
 Loading...