Fluid Sensor Test
1. Select the Centrifuge test in Diagnostics using the MODIFY
PROGRAM and DRAW keys.
2. Open the centrifuge cover and place a moist paper towel or cotton
swab on the fluid sensor located in the centrifuge well. Verify that the
SPILL value changes to TRUE.
3. Remove moisture and wipe dry. Verify that the SPILL value changes
to FALSE.
Centrifuge Cover and Lock Functional Test
1. Close centrifuge cover and slowly rotate the cover lock until the
COVER value changes from UNLOCKED to LOCKED. Verify that
the cover knob can be turned an additional 3/8" to 5/8" after the cover
lock switches activate.
2. If adjustment is required, refer to Chapter 2, Machine Part
Replacement Reference.
Centrifug
e Speed and Bowl Vibration Test
1. Install a bowl partially filled with water (approximately 2/3 full) into
the centrifuge. Close and lock the centrifuge cover.
2. Start the centrifuge by pressing the DRAW key. Verify that the
centrifuge speed stabilizes to 7000 ± 100 rpm.
3. If calibration is required, refer to Chapter 4, Calibration.
4. As the centrifuge is spinning, observe the air/water interface in the
bowl and listen for any signs of centrifuge contact with the chassis.
Verify that the air/water interface never becomes discontinuous,
indicating excessive vibration.
5. If excessive vibration or noise is observed, refer to the Chapter 2,
Machine Part Replacement Reference to realign the centrifuge.
6. Press the STOP key to stop the centrifuge and remove the bowl from
the centrifuge.
7. Exit the centrifuge test by pressing the MODIFY PROGRAM key.
Donor Lights Test
1. Select the Donor Lights test in Diagnostics using the MODIFY
PROGRAM and DRAW keys.
2. Verify that when instructed all LEDs light and extinguish.
3. Exit the Donor Lights test by pressing the MODIFY PROGRAM key.
Chapter 3, Basic Care and Preventive Maintenance 3-7
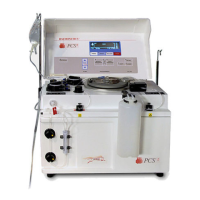
Centrifuge
Testing
 Loading...