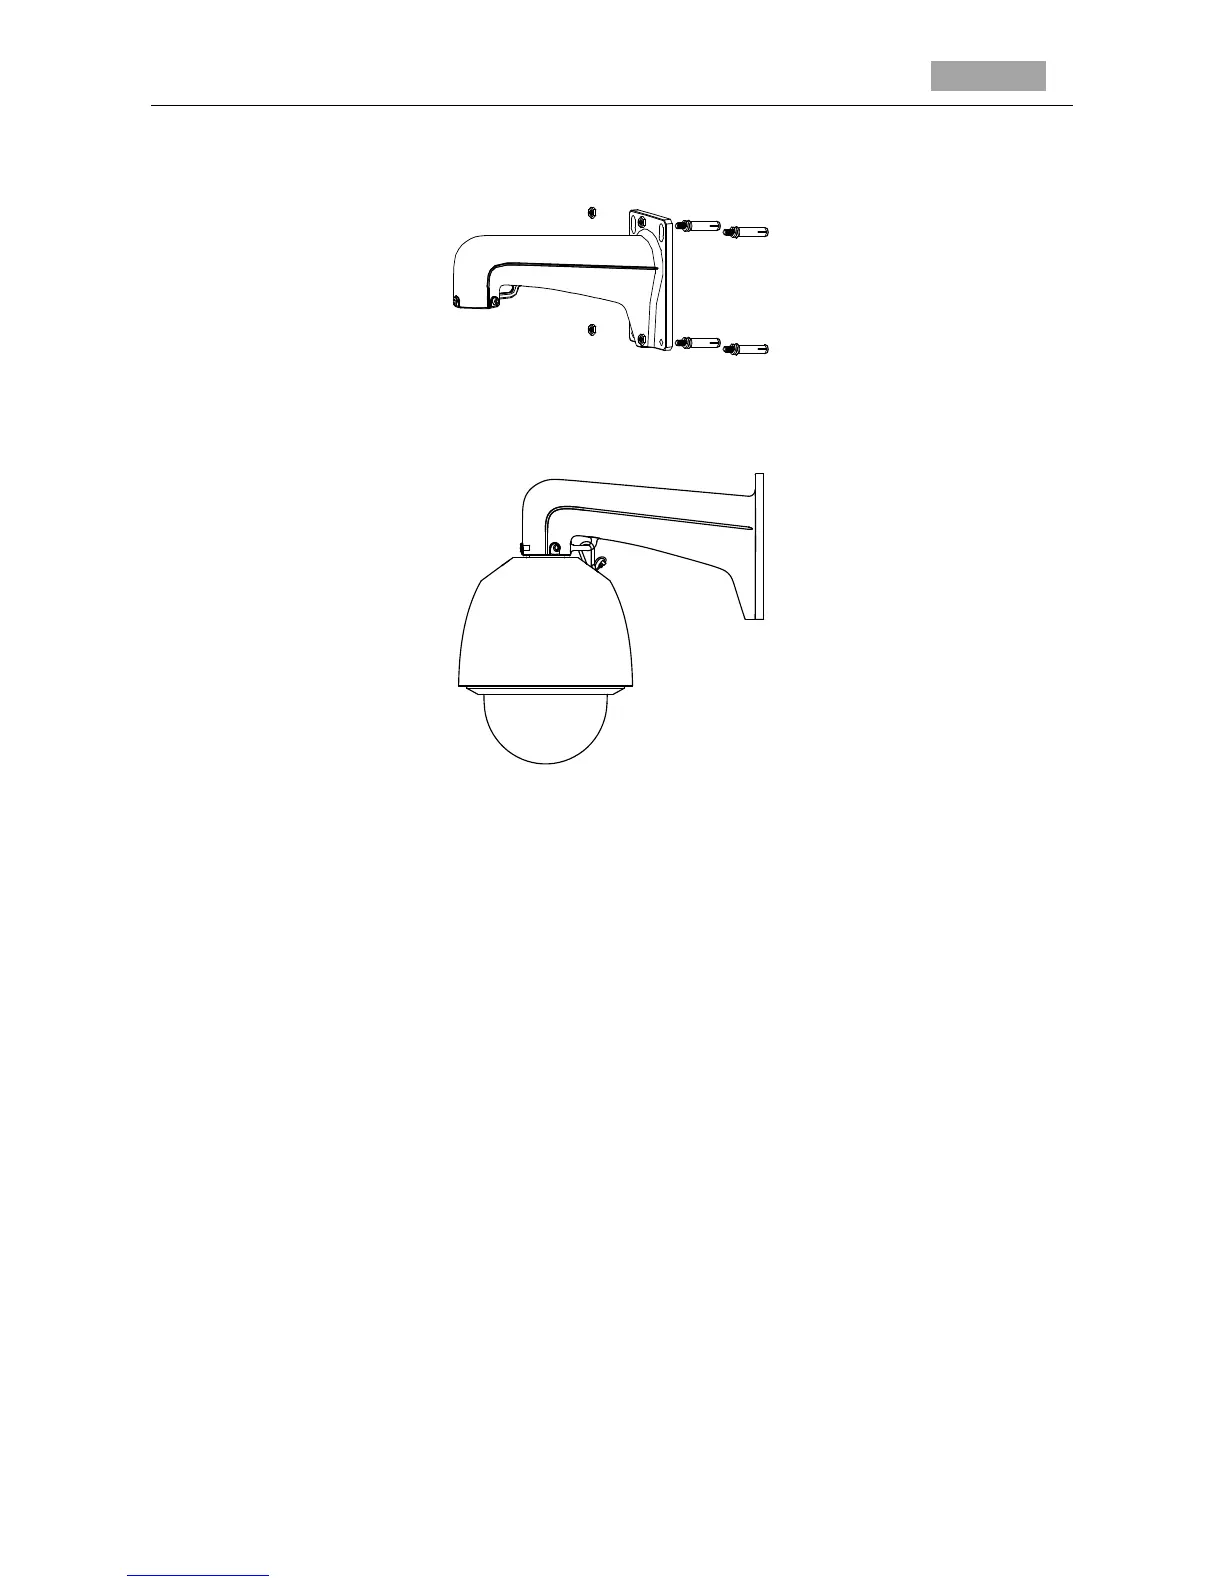
bracket with expansion screws on the wall.
3. Secure the bracket with 4 hex nuts and washers.
Figure 2-3 Drill Screw Holes
4. Install the speed dome to the bracket. Please refer to Section 1.1 Installation and Cabling for
installation details.
Figure 2-4 Finish the Installation
2.2 In-ceiling Mounting Applications
The in-ceiling mounting is only applicable to the indoor models of 5-inch speed dome.
2.2.1 Installation Conditions
Before you start:
The in-ceiling mounting is applicable to the indoor ceiling construction. The followings are the
mandatory precondition for mounting:
The height of the space above the ceiling must be more than 250mm.
The thickness of the ceiling must ranges from 5 to 40mm.
The ceiling must be strong enough to withstand more than 4 times the weight of the dome and
its accessories.
2.2.2 In-ceiling Mounting
Steps:
1. Rotate the lower dome counterclockwise to separate it from the back box as shown in Figure
 Loading...