Steps
1. Click Access Control → Elevator Control Parameter to enter
the sengs page.
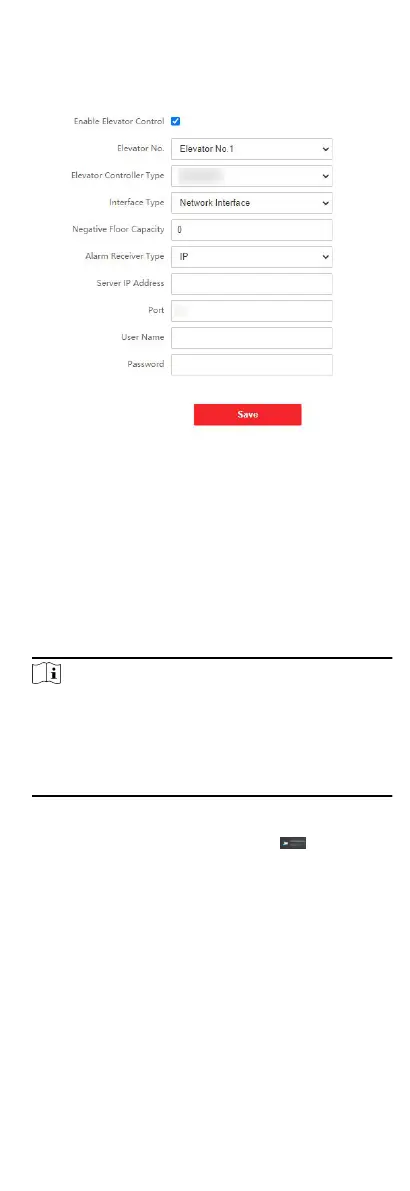
Figure 7-23 Elevator Control
2. Check to enable elevator control funcon.
3. Select an Elevator No., and select an elevator controller.
4. Select Interface Type.
5. Enter
Negave Floor Capacity, and select Alarm Receiver
Type.
6. Enter the elevator controller's Server IP Address, Port No.,
User Name, and Password.
7. Click Save to enable the
sengs.
Note
●
Up to 4 elevator controllers can be connected to one door
staon.
●
Up to 10 negave oors can be added.
●
Make sure the interface types of elevator controllers, which
are connected to the same door staon are consistent.
7.4 Organizaon Management
On the main page of the Client Soware, click
PersonalManagement to enter the conguraon page.
7.4.1 Add
Organizaon
Steps
1. In the organizaon list on the le, click +Add.
2. Enter the Organizaon Name as desired.
3. Click OK to save the adding.
4. Oponal: You can add mulple levels of organizaons
according to the actual needs.
73
 Loading...