Panic Alarm Station User Manual
40
7. Optionally, you can select the schedule time bar,
And then click the icon to delete the selected time bar,
Or click the icon to delete all the time bars,
Or click the icon to copy the time bar settings to the other dates.
8. Click Save to save the template, or click cancel to exit the interface.
9. Click Advanced Settings button to set the pre-record time, post record time, video expired time, redundant record and audio
recording.
10. Click Copy to to copy all these settings to other Zones.
11. Click Save to save the settings.
Capture Schedule Settings
1. Check the checkbox of Capture Settings to enable the device local capturing.
2. Click the icon to set the capture schedule. For details, refer to Steps 5, 6, 7 in Record Schedule Settings.
3. Click Copy to to copy all these settings to other Zones.
4. Click Save to save the settings.
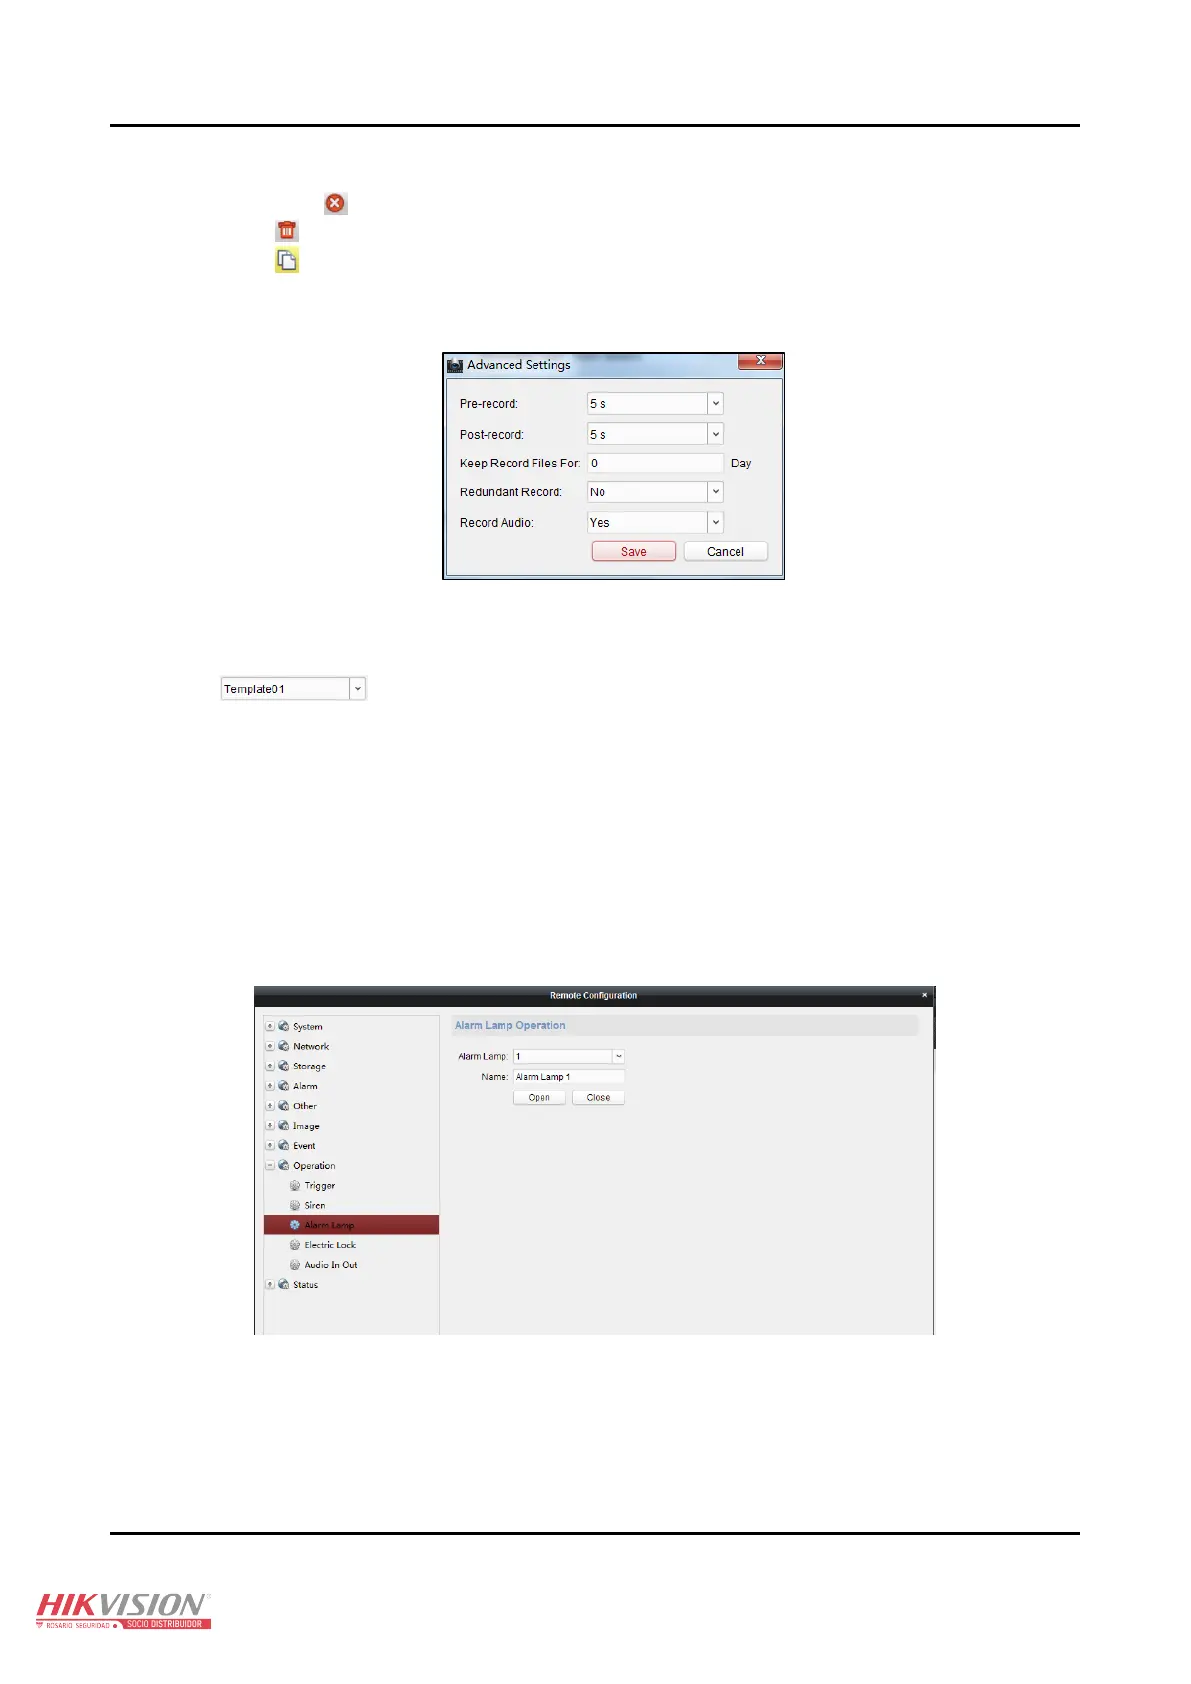
Operation 4.2.7
You can configure the trigger, siren, alarm lamp, electric lock, and audio in/out in this section.
Click Remote Configuration > Operation to enter the interface.
Trigger: you can select to turn on/off the selected trigger.
Siren: you can enable/disable the specified siren.
Alarm Lamp: You can enable/disable the alarm lamp.
Electric Lock: You can enable/disable the electric lock.
Audio In/Out: You can adjust the input volume and output volume.
Status 4.2.8
Click Remote Configuration > Status to view status of the partition, zone, trigger, siren ,and storage battery.

 Loading...