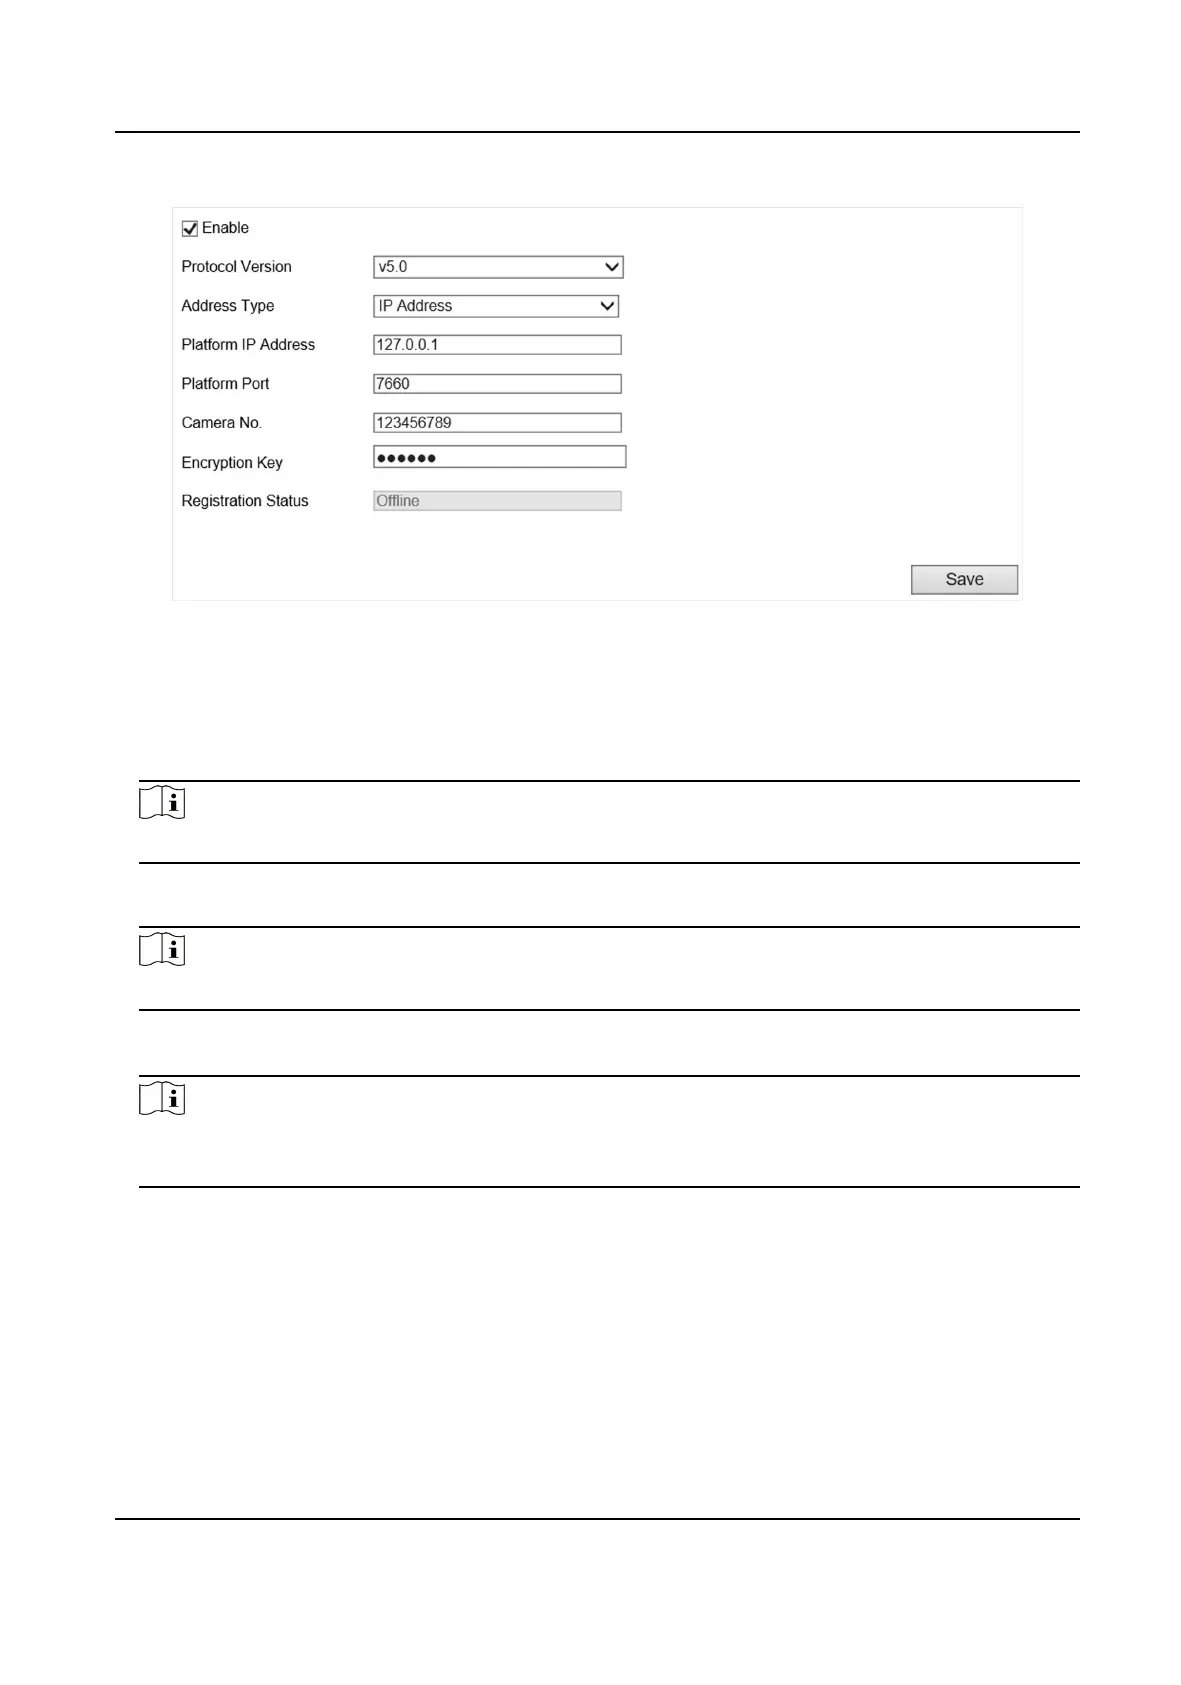
Figure 6-2 Connect to ISUP Plaorm
2.
Check Enable.
3.
Select Protocol Version.
4.
Select Address Type.
5.
Enter Sever IP Address, Server Port, and Device ID.
Note
You need to enter Key if you select Protocol Version as v5.0.
6.
Enable Upload Binary Image if you need to upload images which are full of black or white pixel
points.
Note
Enable Output Binary Image in BMP Format if you want to output images in this format.
7.
Click Save.
8.
Oponal: View Register Status.
Note
When the registraon status shows online, you can add or manage the device via the plaorm
soware. Refer to its corresponding manual for details.
6.3 Set DDNS
You can use the Dynamic DNS (DDNS) for network access. The dynamic IP address of the device can
be mapped to a domain name
resoluon server to realize the network access via domain name.
Network Trac Camera Operaon Manual
33

 Loading...