20
DP45
Condition: User controls are set to the initial set
positions (for shipment)
Measuring point-Screen center.
STICKING OUT OF BLUE
UNEVENNESS SPECIFICATION: ±1cd/m
2
Defocus sticking out specification
Screen Size Blue sticking out
51”,57”,65” 1.0mm
2.12 Blue Def
ocus adjustment
Adjustment Preparation
(1) Optical and electrical focus adjustment should
have been completed.
(2) The convergence adjustment should have been
completed.
(3) Set Video conditions to factory preset.
(4) Input the cross-hatch signal.
Adjustment procedure
(1) Turn the B Focus VR (Focus Pack) fully
clockwise.
(2) Adjust sticking out level of blue to specification
shown in table below, by turning the (B) FOCUS
VR counter clockwise.
(6) BLUE defocus ADJ. should be finished.
(7) The vertical incident illumination on the screen
should be 20 Lux. or less.
(8) Picture Format is 16:9 Standard Mode.
(9) Go into I
2
C service mode.
Table 1: White Balance Adjustment Signal
Table 1 shows amplitude of White raster (without sync,
termination impedence: 75ohm).
Table 2: White Balance Adjustment Specification
Adjustment Procedure
A. High Light W/B adjustment
(1) Receive signal for High Light white balance ADJ.
(2) Adjust white balance at center of screen, using R
DRV/ G DRV within I
2
C adjust mode (see Table 2).
B. Low Light W/B adjustment
(1) Receive signal for Low Light white balance ADJ.
(2) Adjust white balance to center of screen, using R
CUT OFF/G CUT OFF/B CUT OFF within I
2
C adjust
mode. Do not touch screen VRs (see Table 2).
(3) Take Green color as a reference color, then adjust
Low Light W/B by increasing other two colors CUT
OFF data. Do not change GREEN CUT OFF data.
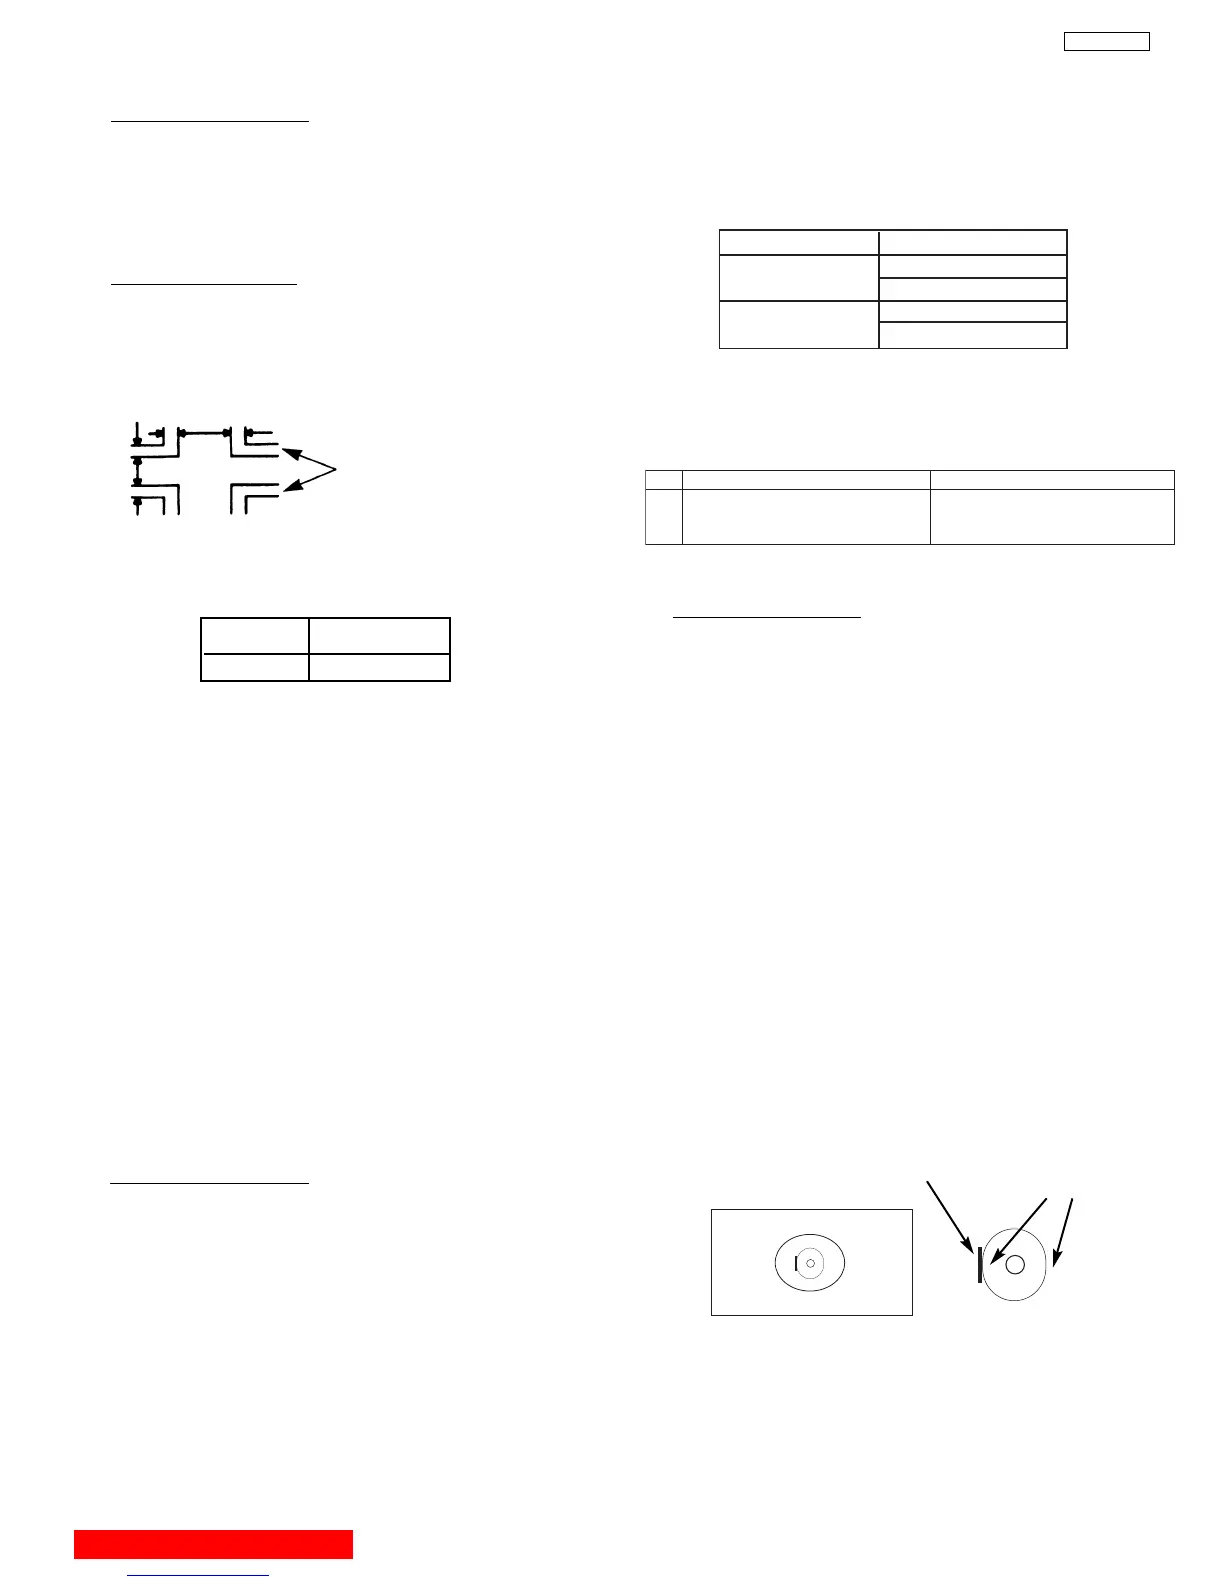
CA-100 Probe should be set to a direction as shown
below.
Repeat A & B two or three times, until no adjustment
is needed (white balance tracking-GOOD). If W/B
tracking is not good, set all data (Both DRV and CUT
OFF) to inital data, and change ref
erence color to
different color.
Note: If Low Light adj. spec cannot be followed, apply
pre
vious adj.
spec.
(adjust b
y eye.)
Screen Size 51”, 57” and 65”
High light [IRE] 100
[Vpp] 0.715
Low l
ight [IRE] 25.0
[Vp
p] 0.175
Set probe to above direction.
(Screw hole side should
be on the left side)
Top view of
CA-100 Probe
Screen
Screw Hole
Flat F
ace
Size
Highlight Lowlight
51”
57”
65”
10800K
±0MPCD 10800K±0MPCD
(x=0.277 ± 0.004, y=0.284 ± 0.004) (x=0.277 ± 0.004, y=0.284 ± 0.004)
2.13 White balance adjustment
(1) Screen adjustment
(2) High light white balance.
(3) Low light white balance.
I
2
C data for High light white balance
Green : G DRIVE (HIGH) 3F (initial data)(Adjustable)
Red : R DRIVE (HIGH) 3F (initial data)(Adjustable)
I
2
C data f
or Lo
w light white balance
Green : G CUT OFF (HIGH) 7F (initial) (Fixed data)
Red : R CUT OFF (HIGH) 7F (initial) (Adj. data)
Blue :
B CUT
OFF
(HIGH) 7F (initial) (Adj.
data)
Adjustment Prepar
ation
(1)
Adjustment should star
t 20 min. or more after the TV
power is turned ON.
(2)
CUT OFF
ADJ
. should be finished.
(3) VIDEO control : Contrast is MAX., Others are center.
(4) Color temp. : HIGH
(5) Signal:
*
Hight Light white Balance Adj.
White raster 0.715Vpp (w/o sync., termination
incidence : 75ohm.) 100IRE
* Low Light white balance ADJ.
White raster 0.180Vpp (w/o sync., termination
incidence :
75ohm.) 25 IRE (The br
ightness
equal to 20cd/m
2
at screen center.
BACK TO ADJUSTMENTS
 Loading...