EasyManua.ls Logo

Hitachi SJ100 Series User Manual

Hitachi SJ100 Series
160 pages
To Next Page IconTo Next Page
To Previous Page IconTo Previous Page
Page #94 background imageLoading...
Page #94 background image
C Group: Intelligent Terminal Functions
Configuring
Drive Parameters
328
C Group: Intelligent Terminal Functions
The six input terminals 1, 2, 3, 4, 5, and 6 can be configured for any of 19 different
functions. The next two tables show how to configure the six terminals. The inputs are
logical, in that they are either OFF or ON. We define these states as OFF=0, and ON=1.
The inverter comes with default options for the six terminals. These default settings are
initially unique, each one having its own setting. Note that European and US versions
have different default settings. You can use any option on any terminal, and even use the
same option twice to create a logical OR (though usually not required).
NOTE: Terminal 5 has the ability to be a logical input, and to be an analog input for a
thermistor device when the PTC function (option code 19) is assigned to that terminal.
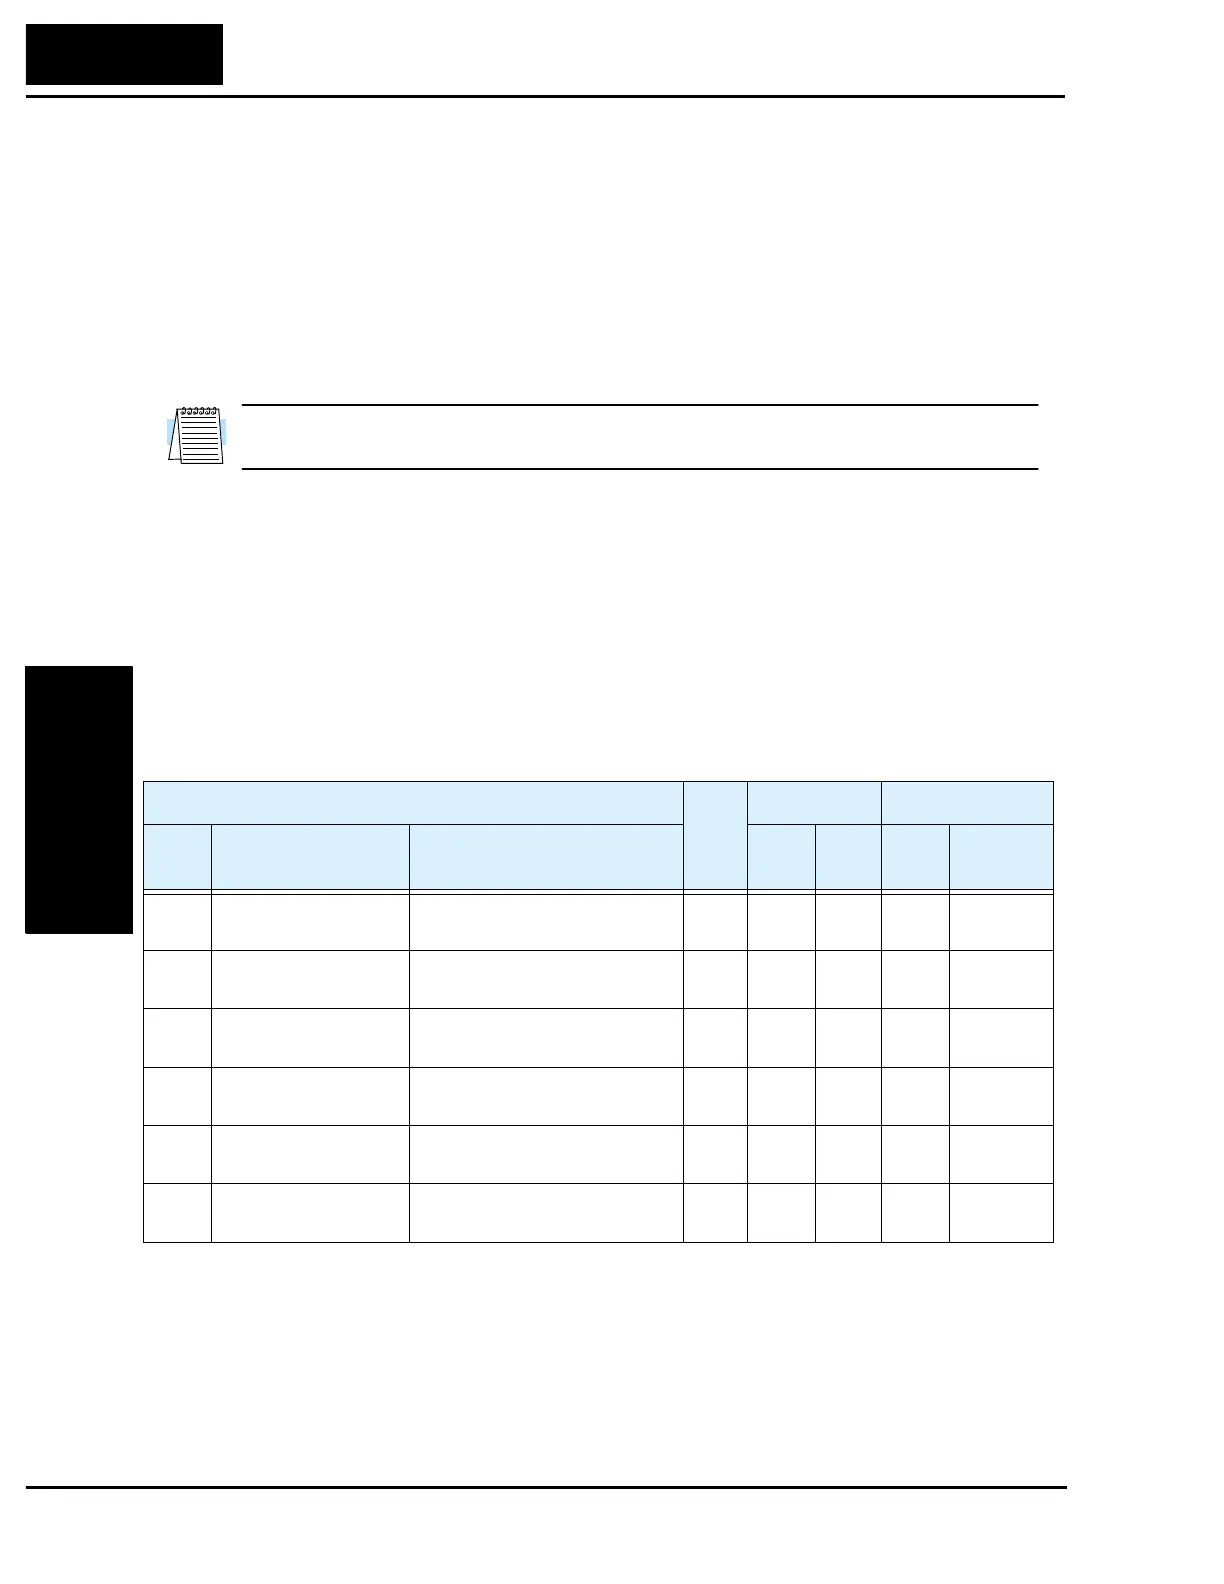
Input Terminal Configuration
Functions and Options The function codes in the following table let you assign one of
nineteen options to any of the six logic inputs for the SJ100 inverters. The functions
C01through C06 configure the terminals 1 through 6 respectively. The value of these
particular parameters is not a scalar value, but it is a discrete number that selects one
option from two or more available options.
For example, if you set function C01=00, you have assigned option 00 (Forward Run) to
terminal 1. The option codes and the specifics of how each one works are in Chapter 4.
C Function
Run-
time
Edit
Defaults DOP,DRW,DOP+
Func.
Code
Name Description
EU/
US
Units
Func.
Code
Name
C01 Terminal 1 function Select function for terminal 1
18 options (see next section)
00 F34 IN-TM1
C02 Terminal 2 function Select function for terminal 2
18 options (see next section)
01/01 F34 IN-TM2
C03 Terminal 3 function Select function for terminal 3
18 options (see next section)
02/16 F34 IN-TM3
C04 Terminal 4 function Select function for terminal 4
18 options (see next section)
03/13 F34 IN-TM4
C05 Terminal 5 function Select function for terminal 5
19 options (see next section)
18/09 F34 IN-TM5
C06 Terminal 6 function Select function for terminal 6
18 options (see next section)
09/18 F34 IN-TM6

Other manuals for Hitachi SJ100 Series

Question and Answer IconNeed help?

Do you have a question about the Hitachi SJ100 Series and is the answer not in the manual?

Hitachi SJ100 Series Specifications

General IconGeneral
Control MethodV/f control, Sensorless vector control
Overload Capacity150% for 60 seconds
Protection FeaturesOvercurrent, Overvoltage, Undervoltage, Overheat, Short Circuit
Built-in FunctionsPID Control, Torque Control
Communication OptionsRS-485 (Modbus RTU)
Cooling MethodForced Air Cooling
Operating Temperature-10°C to +50°C
Humidity5-95% (non-condensing)
AltitudeUp to 1000m above sea level (Derating required above 1000m)

Summary

Chapter 1: Getting Started

General Specifications

General electrical and environmental specifications applicable to all SJ100 inverters.

Chapter 2: Inverter Mounting and Installation

Step-by-Step Basic Installation

Detailed steps for inverter installation, including mounting location.

Preparation for Wiring

Safety warnings and precautions before proceeding with wiring.

Determination of Wire and Fuse Sizes

Table for selecting appropriate wire sizes and fuse capacities.

Wiring the Inverter Input to a Power Supply

Instructions for connecting the inverter to a power supply.

Wiring the Motor to the Inverter Output

Steps for connecting the motor to the inverter output terminals.

Powerup Test Observations and Summary

Performing a powerup test and interpreting observations.

Using the Front Panel Keypad

Introduction to the keypad layout and parameter editing controls.

Chapter 3: Configuring Drive Parameters

Using Keypad Devices

Detailed explanation of the inverter's front panel keypad and its functions.

Chapter 4: Operations and Monitoring

Using Intelligent Input Terminals

Configuring and using the inverter's programmable input terminals.

Using Intelligent Output Terminals

Configuring and using the inverter's programmable output terminals.

Auto-tuning for Sensorless Vector Control

Running the auto-tuning procedure for optimal sensorless vector control.

PID Loop Operation

Configuring and utilizing the built-in PID loop for process control.

Chapter 5: Motor Control Accessories

Chapter 6: Troubleshooting and Maintenance

Troubleshooting

Safety messages and general precautions for troubleshooting.

Monitoring Trip Events, History, & Conditions

Understanding how to monitor fault events and error codes.

Error Codes

A table listing error codes, names, and their causes.

Restoring Factory Default Settings

Procedure to reset all inverter parameters to factory default values.

Maintenance and Inspection

Monthly and yearly inspection chart for the inverter.

Related product manuals