Servicing Your Honda 49
Coolant
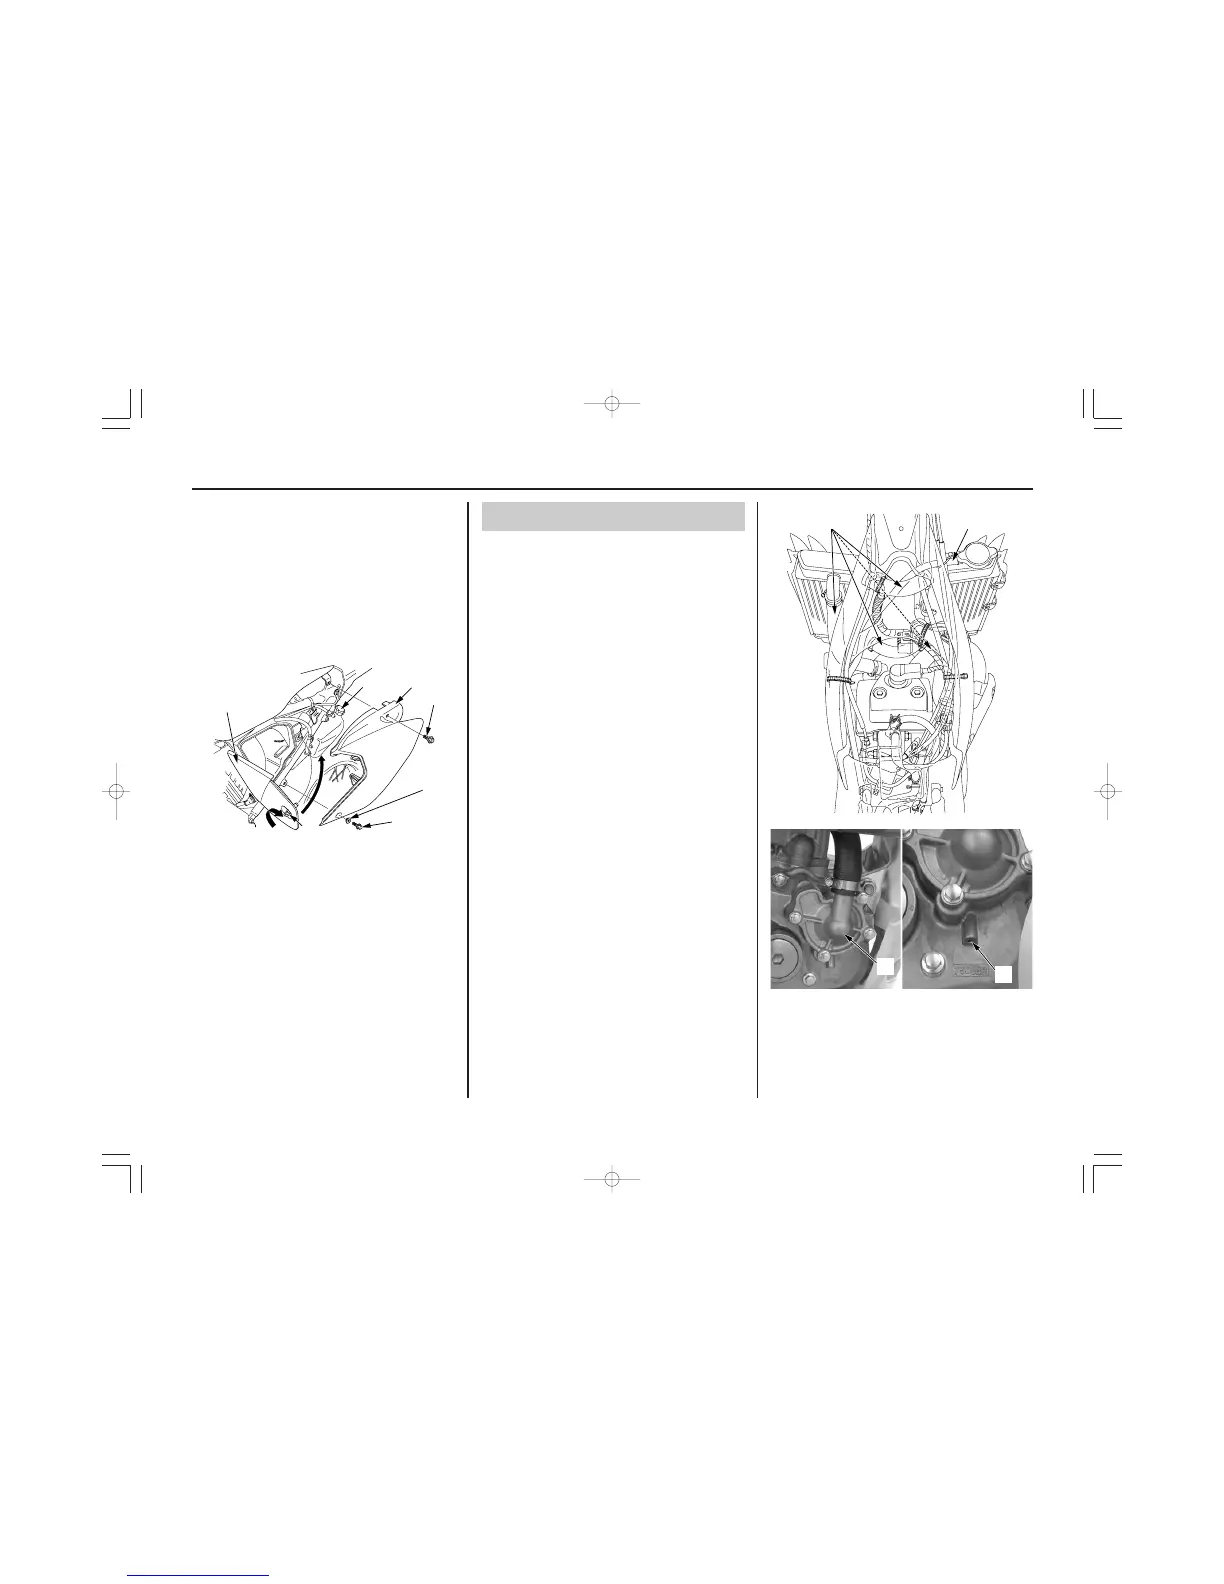
(4) air cleaner housing cover (8) seat mounting bolt
(5) quick fastener (9) left side cover
(6) left side cover bolt (10) reserve tank cap
(7) collar
4. Add coolant to the reserve tank as require to
bring the coolant level to the UPPER level
mark.
5. Install the reserve tank cap (10).
6. Install the left side cover (9), collar (7), seat
mounting bolt (8) and left side cover bolt (6).
Close the air cleaner housing cover (4) and
turn the quick fastener (5) clockwise.
Tighten the seat mounting bolt to the specified
torque:
26 N·m (2.7 kgf·m, 19 lbf·ft)
Cooling System Inspection
1. Check the cooling system for leaks (see the
Honda Shop Manual for troubleshooting of
leaks).
2. Check the water hoses (1) for cracks,
deterioration, and radiator hose clamp for
looseness.
3. Check the radiator mount for looseness.
4. Make sure the siphon hose (2) is connected
and not clogged.
5. Check the radiator fins for clogging.
6. Check the water leakage check hole (3) below
the water pump cover (4) for leakage. Make
sure the hole remains open. If water leaks
through the check hole, the water seal is
damaged. If oil leaks through the check hole,
the engine oil seal is damaged. See the Honda
Shop Manual or consult your Honda dealer for
replacing the water seal or the engine oil seal.
Both seals should be replaced at the same
time.
(1) water hoses
(2) siphon hose
(3) water leakage check hole
(4) water pump cover
 Loading...