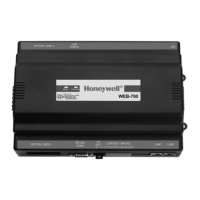
WEB/CP-202-XPR AND WEB/CP-602-XPR CONTROLLERS
29 95-7775—01
Non-replaceable Parts
Fuse
The controller contains a non-user replaceable fuse, soldered on the main circuit board. This fuse provides protection from
internal shorts or connection to incorrect power supplies. If the fuse circuitry is suspect, contact your regional Tridium office for
technical support. See Returning a Defective Unit on page 31.
Standard Replacement Parts
Standard replacement parts are listed in Table 4 and can be ordered from stock without restriction. Standard replacement parts
cannot be returned for credit and should be disposed of in an appropriate manner.
New Replacement Unit
To replace an entire unit, order and install a new WEB/CP-202-XPR or WEB/CP-602-XPR. If the faulty controller is still in
warranty, you may receive credit by returning it to Tridium. Contact Tridium for a return authorization (RMA) number before
shipping any item for return credit. See Returning a Defective Unit on page 31, for more details.
NOTE: Before ordering a new replacement unit, it is strongly recommended that you contact your normal technical support
resource to eliminate the possibility of a software issue or mis-configuration problem.
REPLACING THE WEB/CP-202-XPR OR WEB/CP-602-XPR CONTROLLER
Before replacing, power to the controller must be OFF, and all LEDs out! In addition, power must be removed to
any I/O devices wired back to the controller. Failure to do so may result in electrical shock or equipment damage.
Before handling circuit boards, discharge any accumulated static by touching a nearby grounded object. For
details, see “Static Discharge Precautions” section on page 6.
To replace a controller with a new replacement unit, proceed as follows:
Replacing a controller.
1. If possible, use the appropriate Niagara
AX
software tool to back up the controller’s configuration to your PC.
2. Disconnect power to the controller, including the disconnection of an external 12V battery, if used. The unit should power
down automatically. Wait for all LEDs to remain off.
3. Disconnect all power to any I/O devices wired to the controller.
Table 4. Standard Replacement Parts for WEB/CP-202-XPR or WEB/CP-602-XPR.
Part Number Description
H11393 NiMH Battery Pack Assembly; see Replacing the NiMH Battery on page 27.
H11364 Hardware Bag for WEB/CP-202-XPR or WEB/CP-602-XPR containing removable screw terminal
connector blocks (two 7-position, three 6-position, one 2-position).
H11166 Replacement right-angle GSM/GPRS quad-band SMA coax-mounted stub antenna.
H-GPRS-CBL-EXT 6.56 feet (2m) SMA-type coax extension cable with mounting bracket. See Fig. 2 on page 7.
H10148 Adapter; RJ-45 to DB-9 null modem for onboard RS-232 serial port to connect to DTE device.
H10180 Silver satin patch cable; 4 feet (used between adapter and serial port).
H10181 Silver satin patch cable; 10 feet (used between adapter and serial port).
H10182 Silver satin patch cable; 25 feet (used between adapter and serial port).
712BNP External 12 Vdc sealed lead acid backup battery.
 Loading...