6. Rinse debris from Nozzle.
7. Position Nozzle onto foot, making sure to align the tabs at the bottom of the Nozzle with the notches on the
foot (Fig. G).
Figure: G
8. Snap Nozzle to foot.
9. Rotate Nozzle latch to lock position.
CAUTION
To reduce the risk of injury from moving parts – Unplug before connecting SpinScrub® Hand Tool. Not to be used
for grooming pets.
IMPORTANT
The nozzle must be in the proper position in order for the Dirty Water Tank to go on properly and for the unit to
have proper suction.
BRUSHES: HOW TO CHANGE AND CLEAN
How to Remove
1. To prevent possible leaking, remove Clean Water Tank and Dirty Water Tank.
2. With handle in upright position, tilt cleaner back until handle rests on the floor.
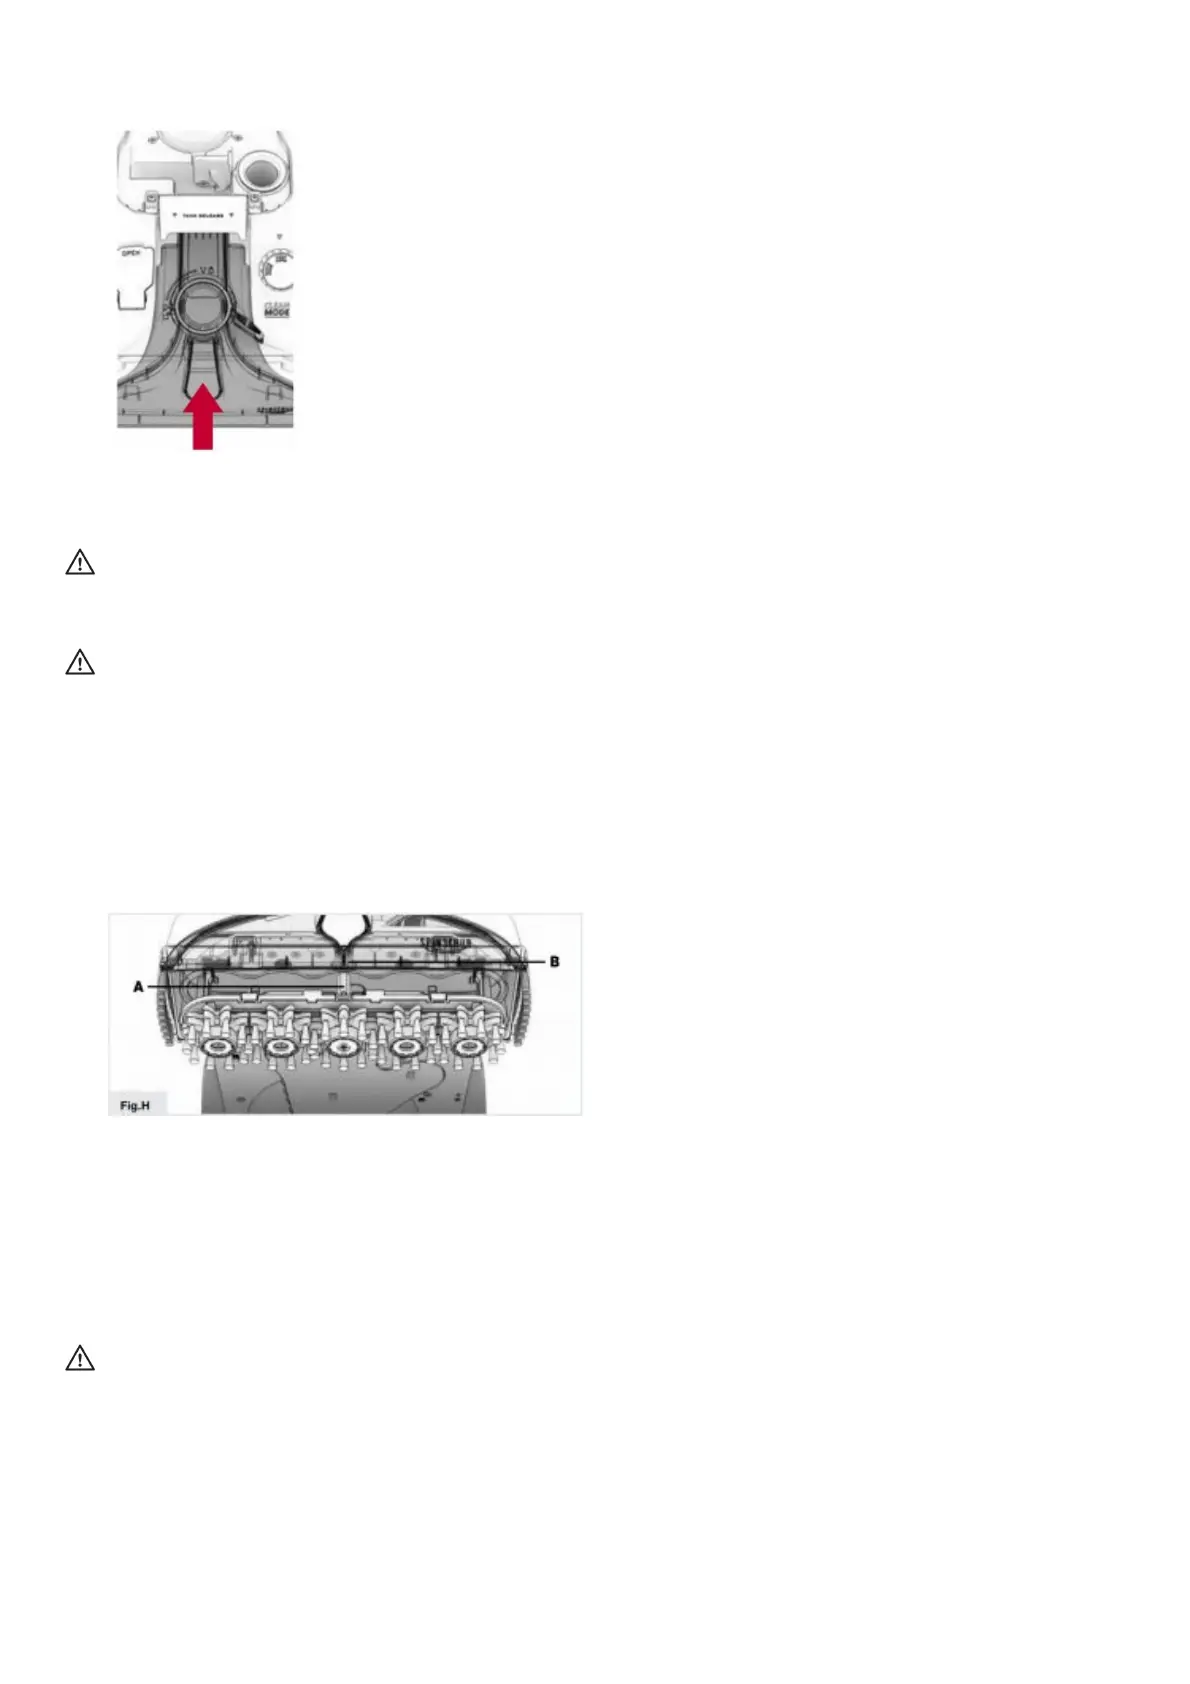
3. Grab brush assembly and pull firmly (Fig. H).
Figure: H
4. The brushes can be cleaned under running water.
How to Replace
1. Align black posts on both ends of brush assembly with the slots on the bottom of the cleaner.
2. Make sure that the hexagonal post (A) also aligns with the hexagonal hole (B). Turn brushes slightly until post
fits easily into hole.
3. Press brush assembly firmly to snap into place.
CAUTION
To reduce the risk of injury from moving parts – Unplug before connecting SpinScrub® Hand Tool. Not to be used
for grooming pets.
Storage
Before storing: Empty Clean Water Tank and let air dry. Replace on cleaner. Empty Dirty Water Tank, rinse tank
and lid thoroughly with clean water and let air dry.
Allow brushes and underside of carpet cleaner to air dry thoroughly before storing carpet cleaner on a carpeted or
wood surface.
Lubrication

 Loading...