5-Unloading, printing, and displaying images 39
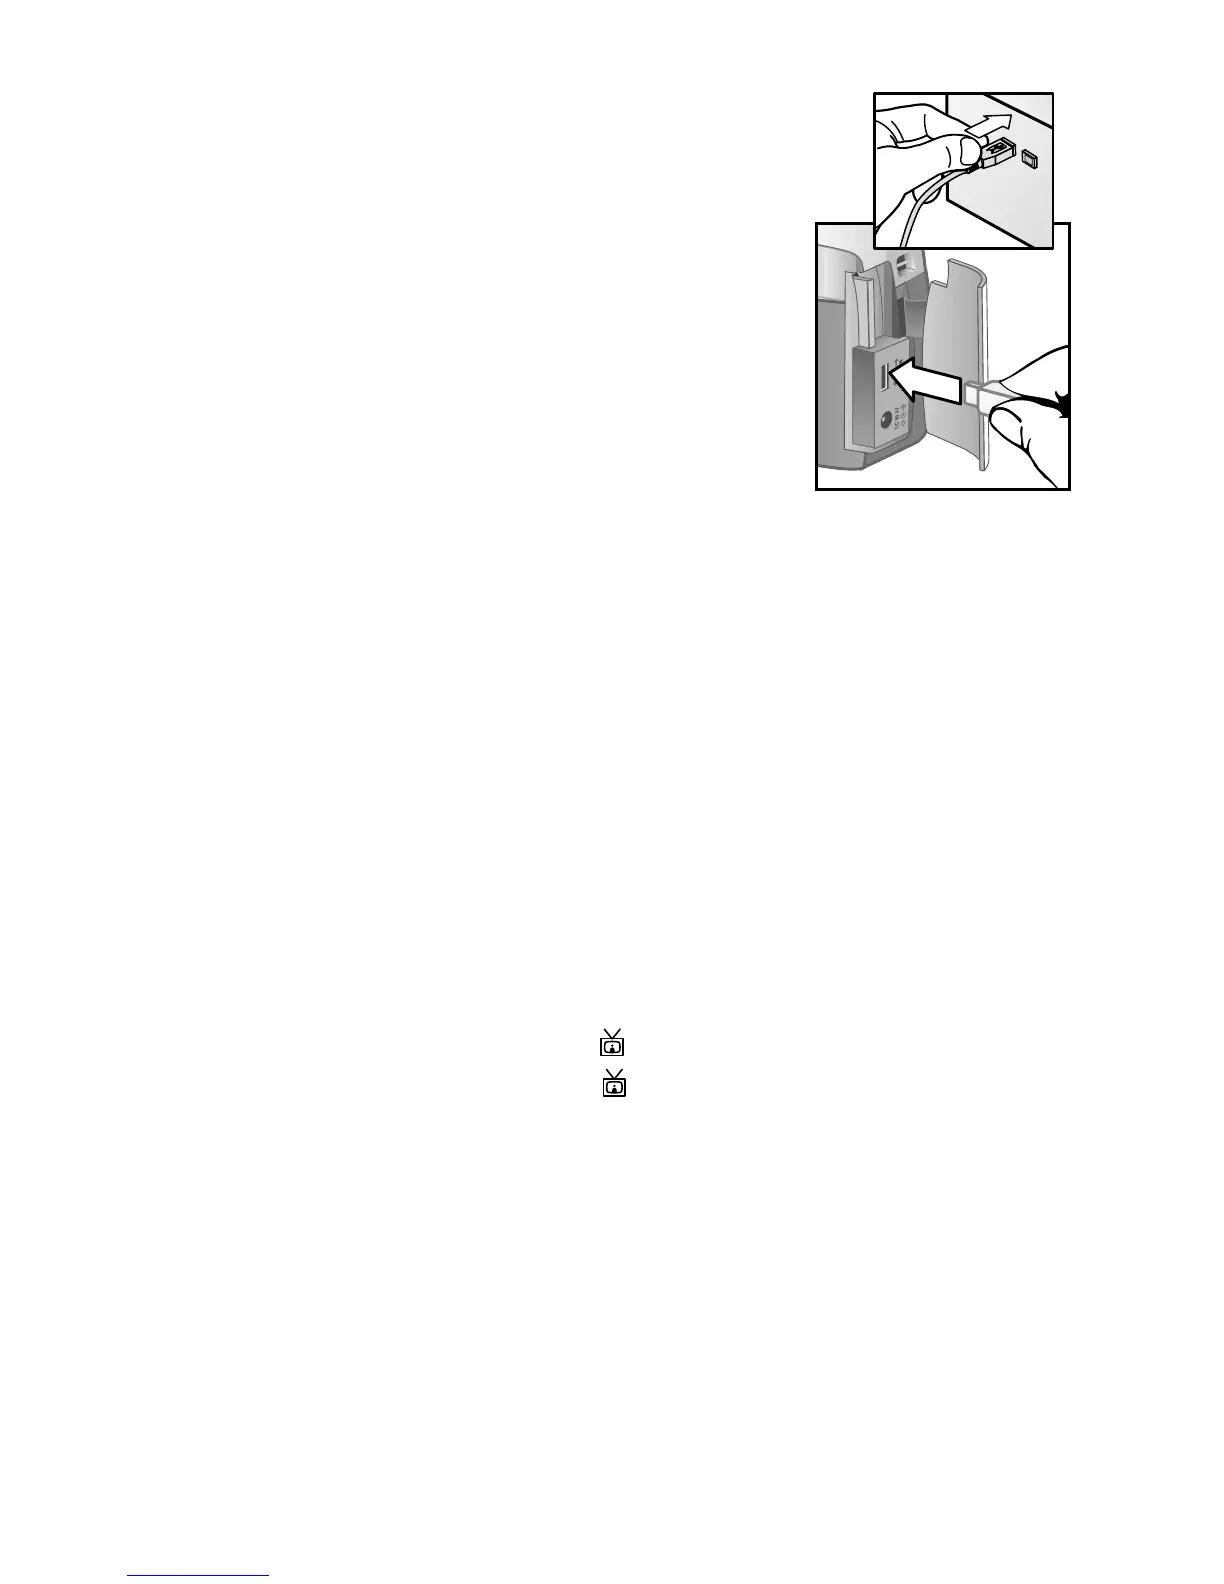
1 Your camera came with a special USB
cable for connecting the camera
directly to a printer.
2 Connect the square end of the USB
cable to the printer.
3 Open the memory card door on the
side of the camera and connect the
small end of the USB cable to the USB
connector on the camera.
4 Adjust the settings in the Print Setup
Print SetupPrint Setup
Print Setup
menu on the camera to complete the printing process.
Displaying images on a TV
Images in your camera can easily be displayed as a slideshow
on almost any TV.
NOTE You must use the optional HP Camera Dock to do this
task. See Appendix B:
Appendix B: Appendix B:
Appendix B: Camera dock
Camera dockCamera dock
Camera dock
on page 63.
Displaying a slideshow
Once the camera is connected to the TV with the optional HP
Camera Dock, you are ready to start.
1 Turn on the camera. The button on the Camera Dock
should light up. Press the button to display the Slideshow
SlideshowSlideshow
Slideshow
menu. The menu choices are described in the following
table.
 Loading...