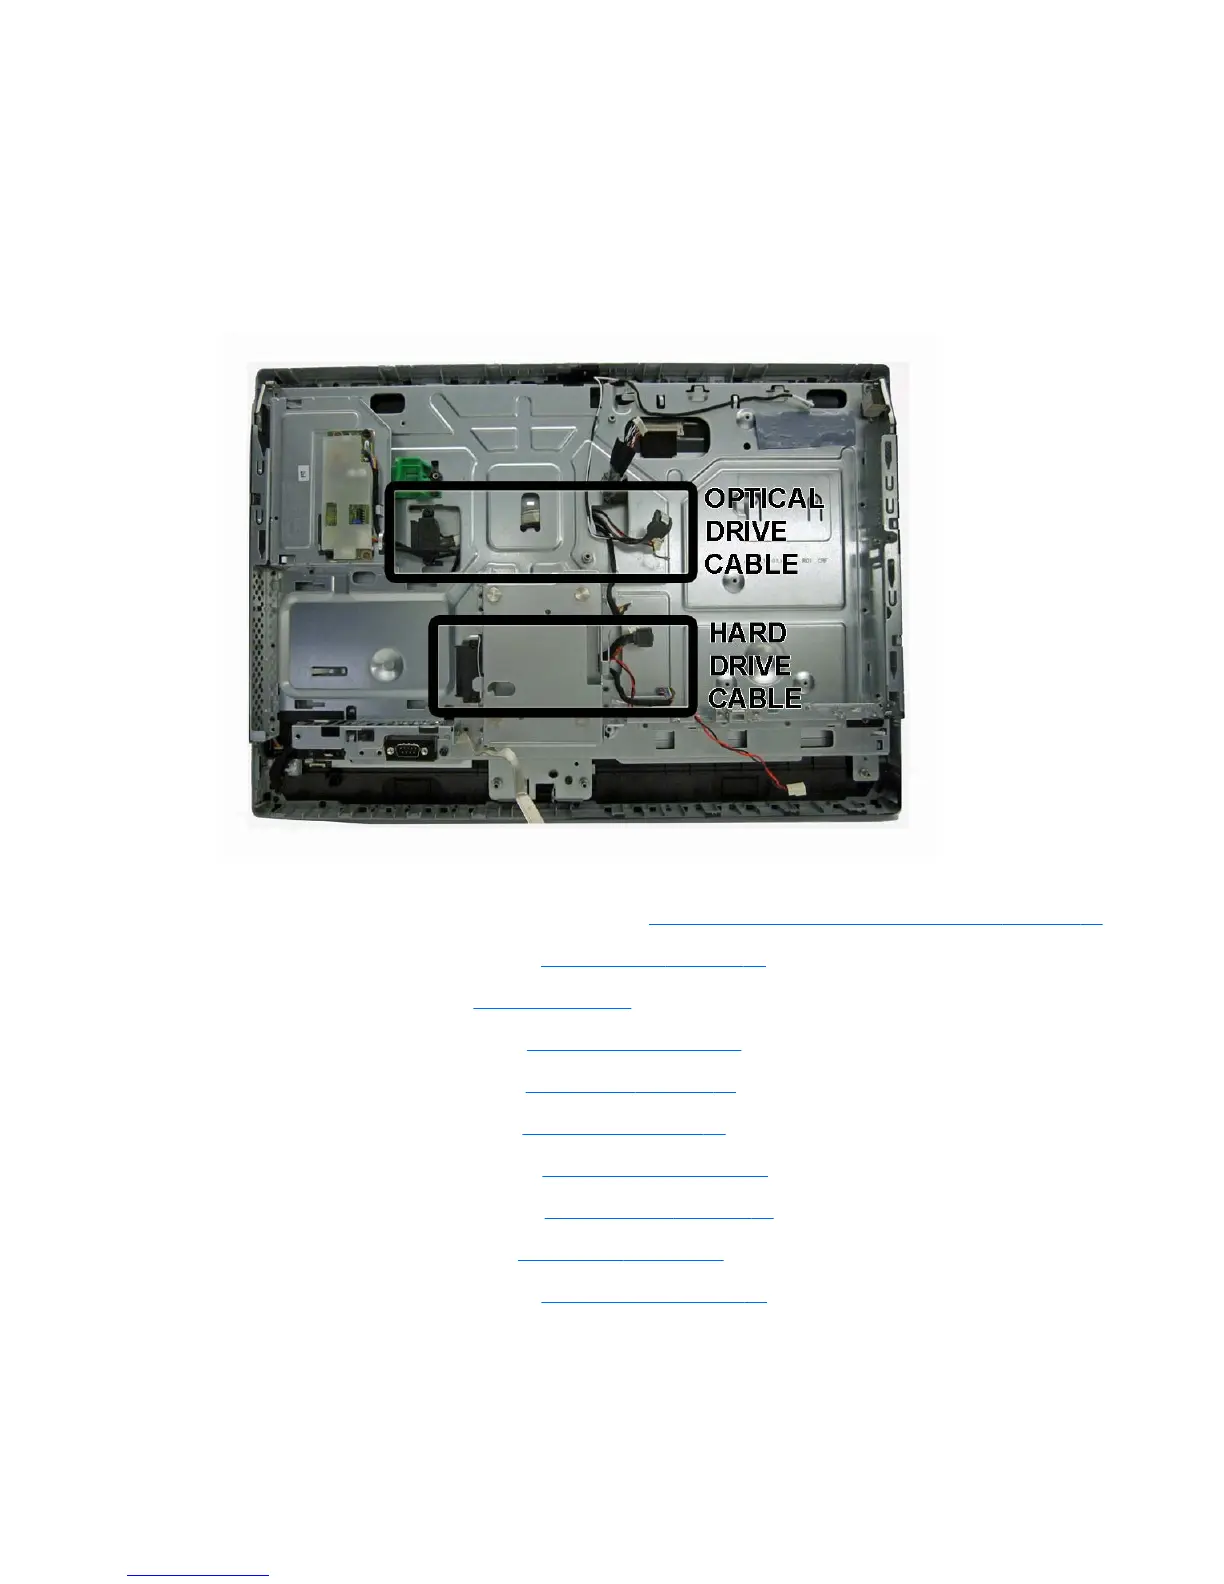
Hard drive and optical drive cables and connectors
The hard drive and optical drive connectors are located near the middle of the computer, partially
under the main display bracket. Each connector is secured with two Torx screws and has two cables
that connect to the system board.
The optical drive connector cables are longer than the hard drive connector cables.
Figure 7-88 Hard drive cable and optical drive cable location
To remove the hard drive or optical drive connector:
1. Prepare the computer for disassembly (see
Preparing to disassemble the computer on page 32).
2. Remove the access panel (see
Access panel on page 36).
3. Remove the stand (see
Stand on page 38).
4. Remove the lower panel (see
Lower panel on page 40).
5. Remove the side panels (see
Side panels on page 78).
6. Remove the metal plate (see
Metal plate on page 41).
7. Remove the power supply (see
Power supply on page 80).
8. Remove the system board (see
System board on page 83).
9. Remove the front bezel (see
Front bezel on page 94).
10. Remove the display panel (see
Display panel on page 99).
11. Remove two Torx screws that secure the hard drive connector or the optical drive connector to
the computer.
12. Remove the cables from the metal clips built into the computer.
Hard drive and optical drive cables and connectors 107
 Loading...